Koni Rebuild
Shockingly easy (for the most part)
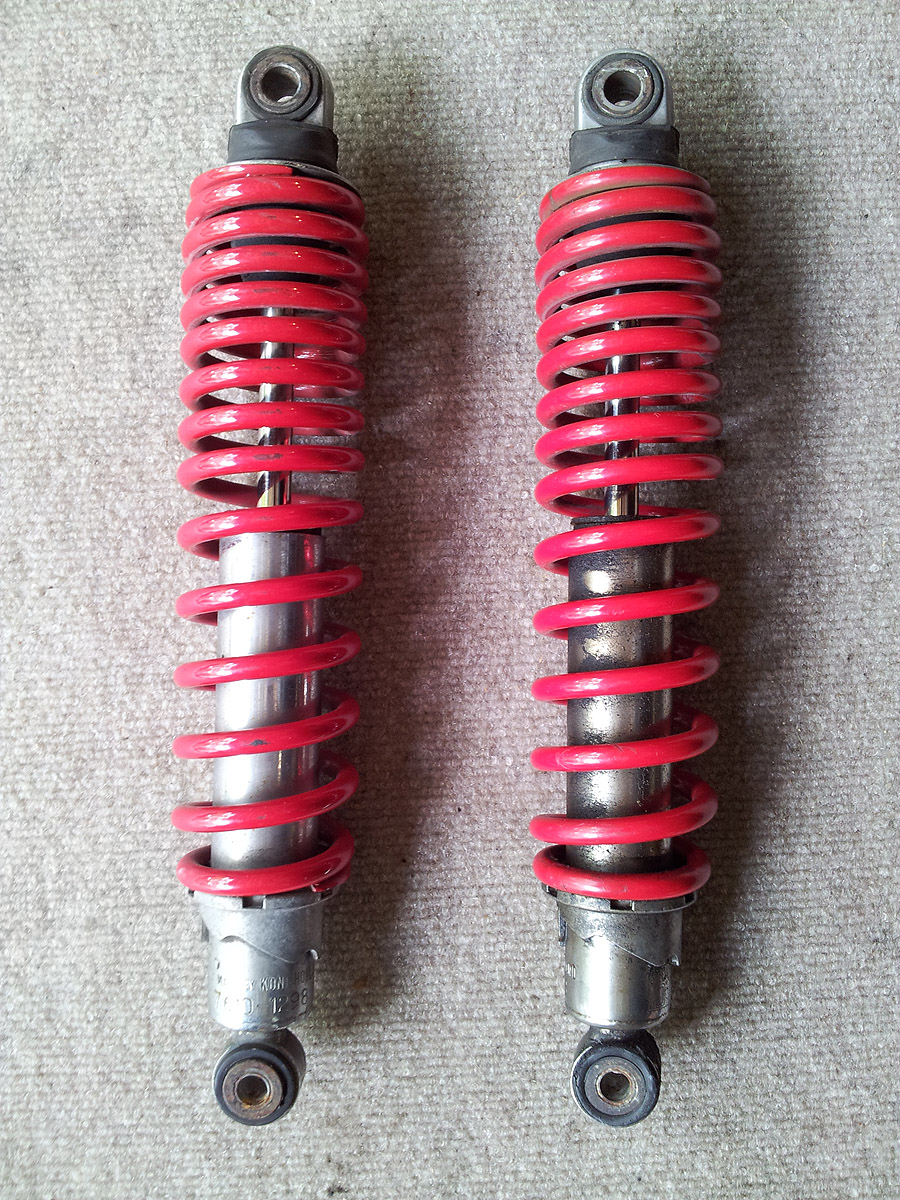
When I bought my BMW a long time ago, it came with a set
of chrome Koni shocks with red powder-coated springs. Like Lester
wheels, Konis were one of those go-to aftermarket modifications
seemingly everyone made. But after 30 years, mine were getting tired.
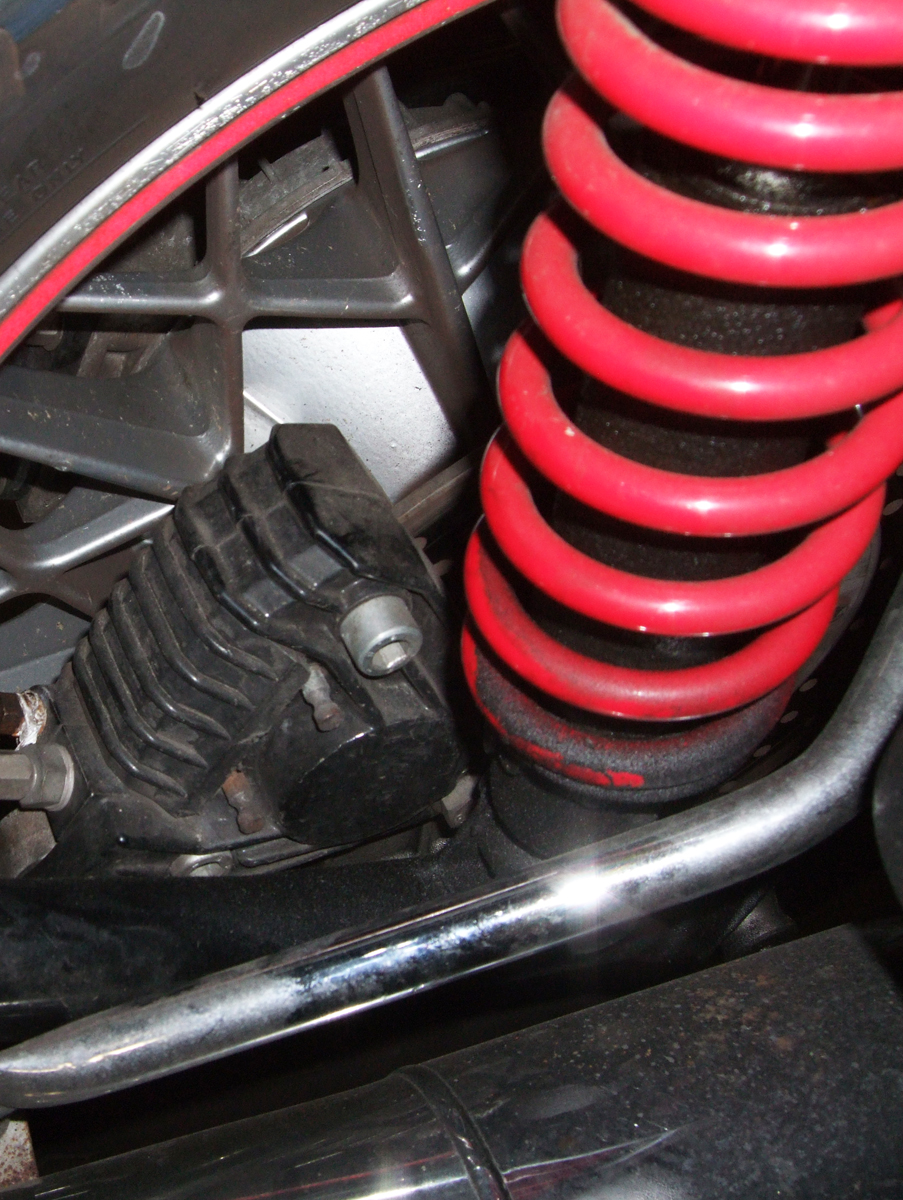
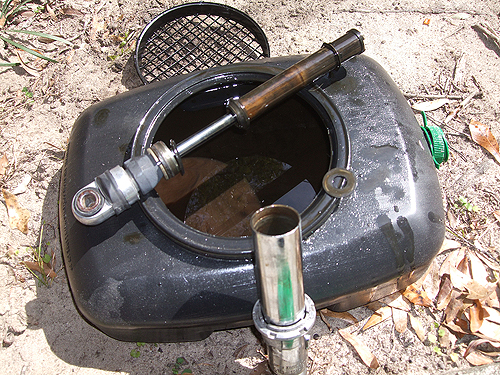
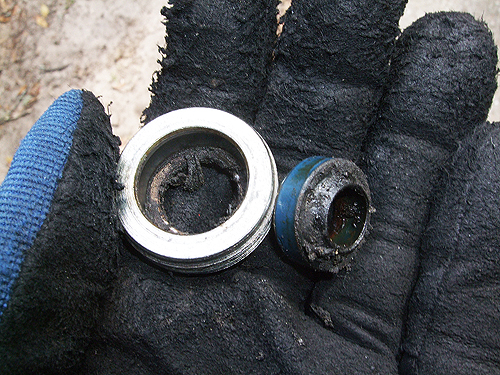
One of them let me know by puking oil all over itself, as seen in the
picture below. That shot on the left? There's a chrome damper under all
that black dirt.
I decided to get a new set of shocks after running into
a great deal at a vendor at the BMW RA Rally at Barber Motorsports Park.
The new shocks had lighter springs (these Konis have very, very heavy
springs and I figured I could sell the Konis to help defray the cost). A
friend of mine who recently bought an airhead BMW was interested. He does more two-up
riding and touring, so the heavy springs were more suited to him. I
rebuilt them for him as described here. He got a set of rebuilt Konis
for less than half the price of new, and I got to learn how to rebuild
old shocks. Fair deal.
While Koni no longer makes motorcycle shocks, a new
company, cheekily named IKON Suspension, does. In fact, they make pretty
much the same model lineup as the old Koni, and while they're based in Australia, they
have a U.S. Distributor run by a very helpful and patient man, Dave
Gardiner, who will sell you the parts you need to keep your Konis on the
road. You can check out his web site at:

Ikon Suspension USA.
He was also a great resource during the process, answering questions
quickly via email or on the phone. That's refreshing these days.
Dave will sell you a seal kit as well as any other parts
you may need, and he carries parts for a variety of shocks. My
particular shocks were Koni model 7610-1298, "Special D." Some very old
Konis no longer have parts available,
as this rider found out, so check with Dave first. The rubber bumpers on mine were pretty worn out, and I
also needed a bushing so I ordered those in addition to the seal kit. The whole bill was about $60
for the parts and everything came with instructions. He will also rent
the spring compressor and pin spanner you'll need for the job but since
I'm a tool whore I just bought some.
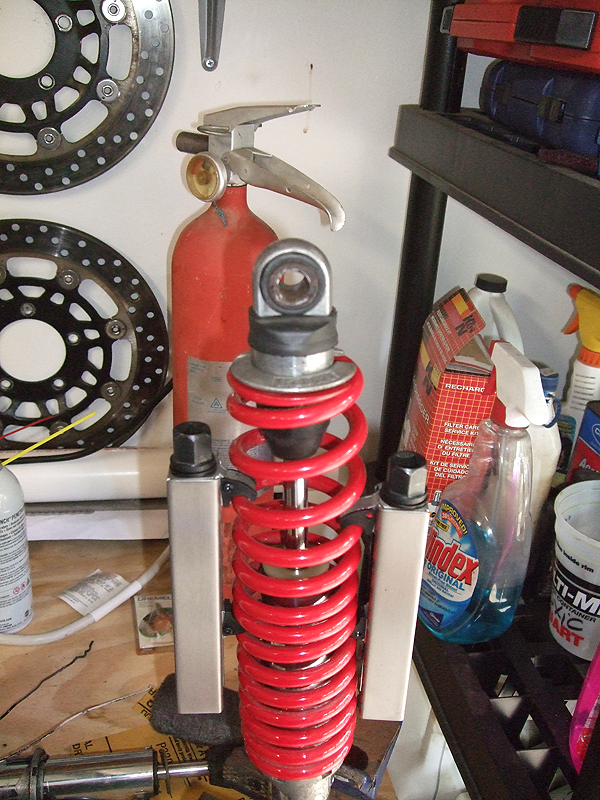
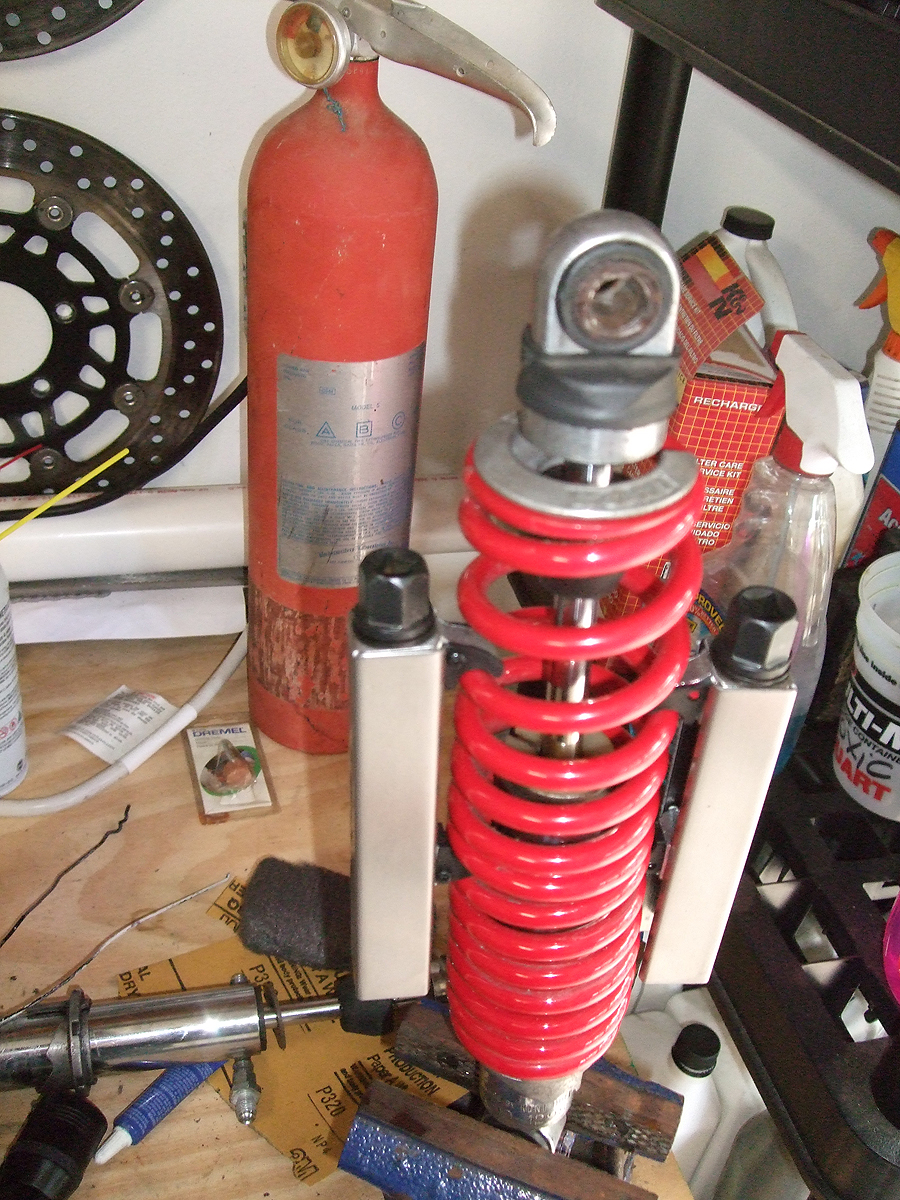
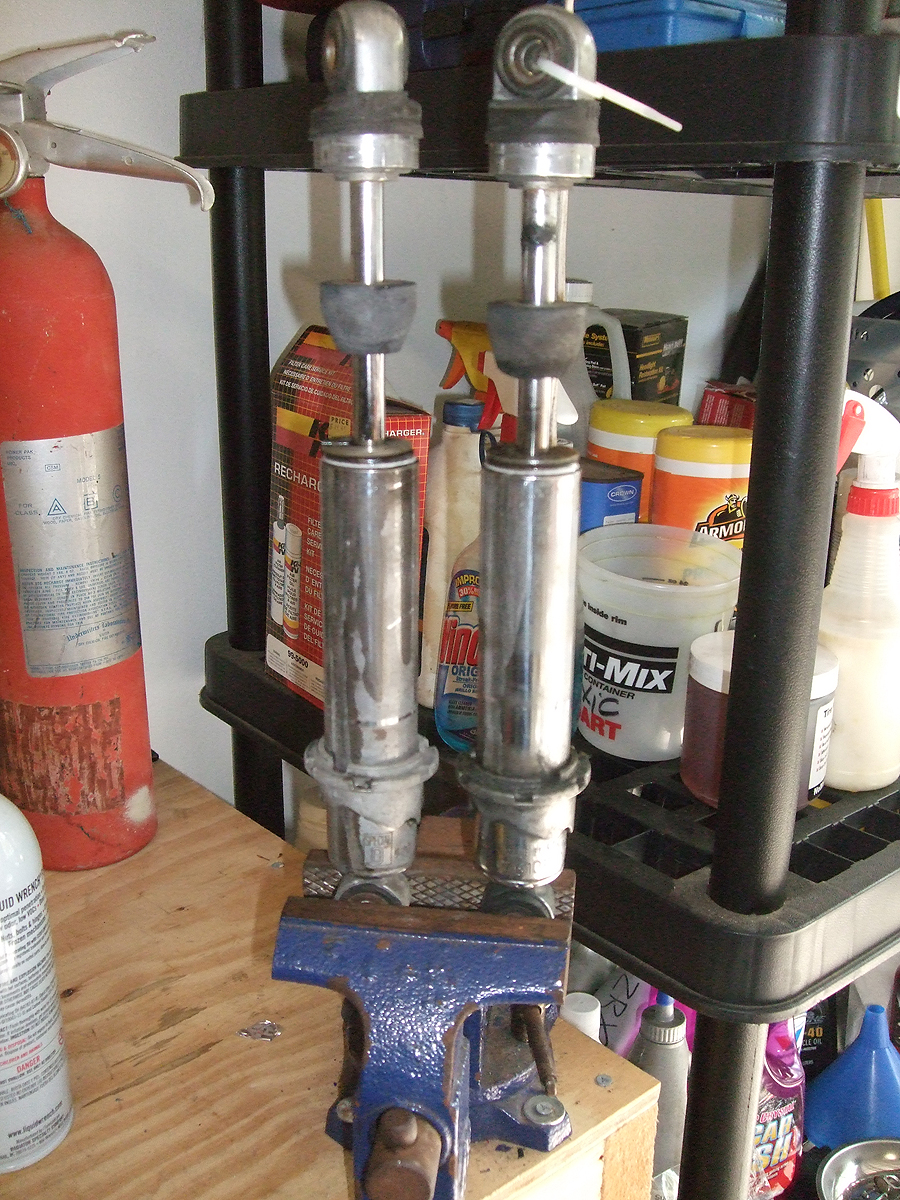
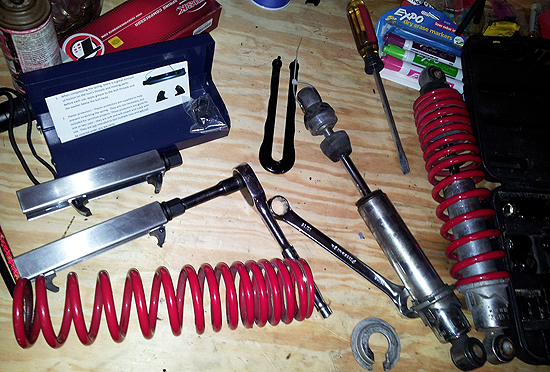
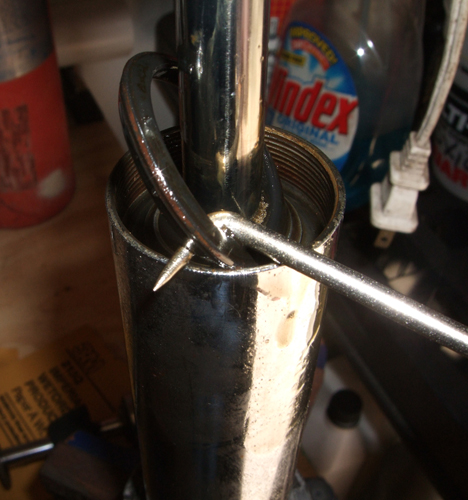
The first step is to remove the spring by compressing it
so that you can remove the retaining ring at the top. There are a number
of different types of spring compressors. I used a set from
Rocky Mountain ATV. It's basically a set of clamps. Set the shock in
a vise, mount one clamp on either side of the spring and begin
tightening them.
It's important to tighten each side just a little at a
time - one turn or two - and to do so evenly to keep the compressors
from slipping. Wear gloves and safety glasses. You will be storing a lot
of energy in that spring and in this case when the instructions warn
that "serious injury may occur," they really mean it. Go slowly. Be patient.
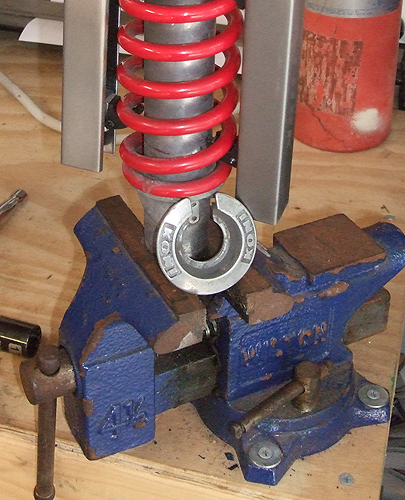
Eventually you will get the spring compressed enough so
that the retaining ring is below the top shock mount so that you can
remove it.

Here's the ring.
But you're not done yet. Loosen the compressors, again
working one or two turns at a time, alternating sides. Take your time!
Continue until the spring is loose enough to remove the compressors.
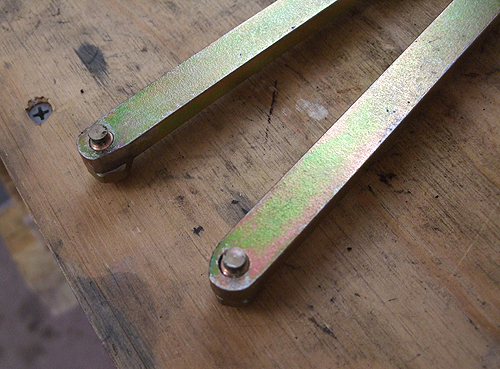
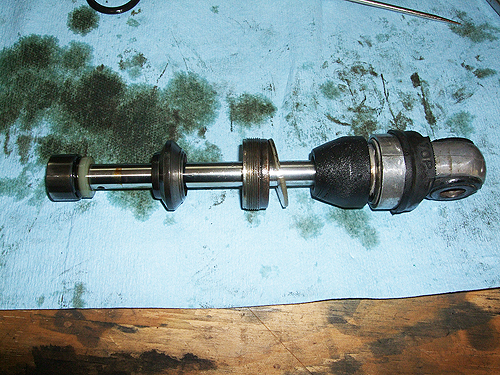
Then slide the spring off. Here are the two damping
units after removing the springs.

Now it's time to work on one shock at a time. That way
you don't get parts mixed up, and if you can't remember how something
goes, you have a reference.
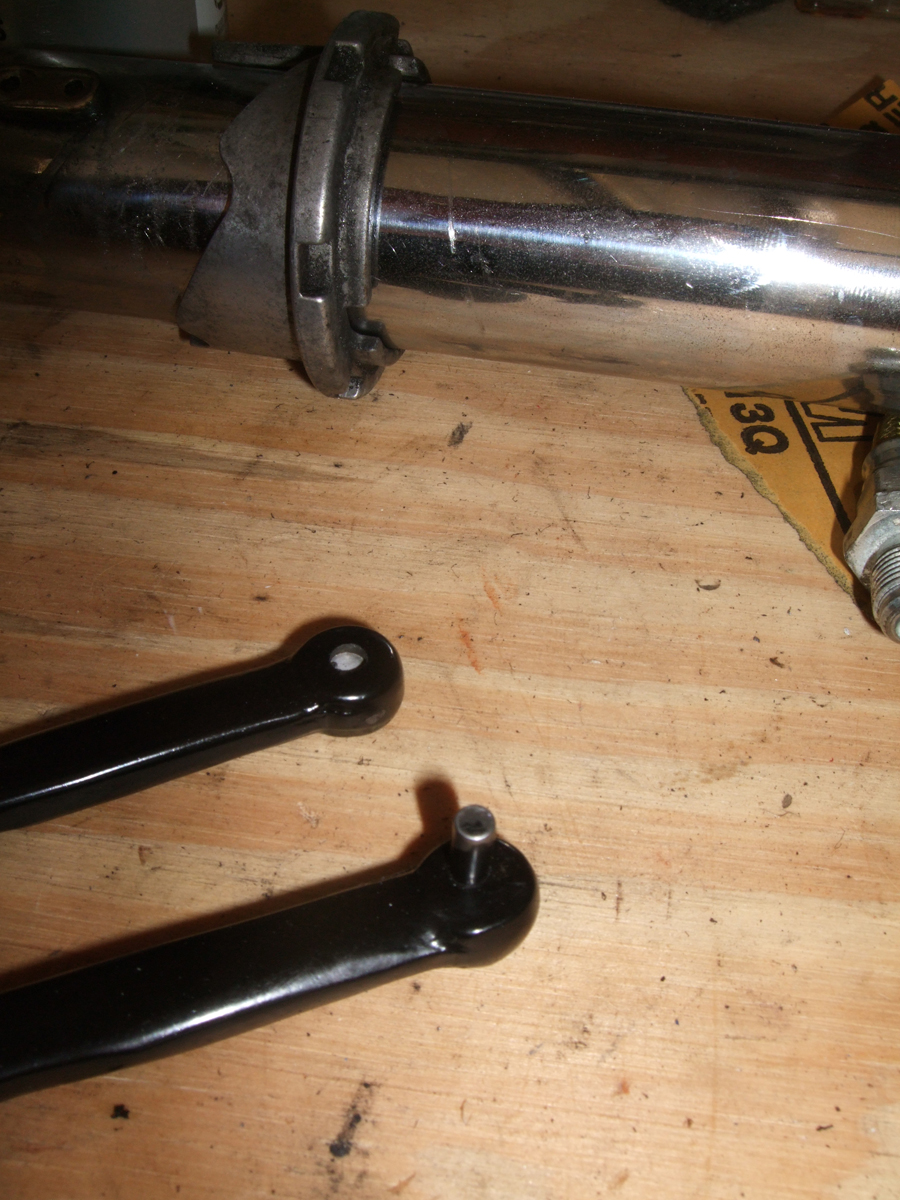
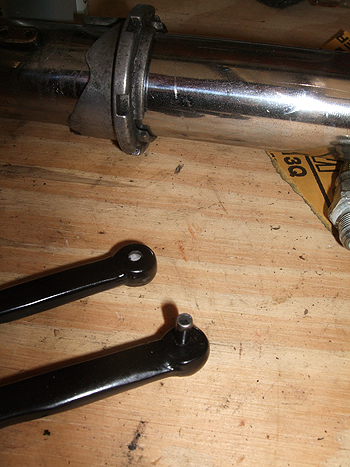
The next step is possibly the most difficult - removing
the gland nut from the cylinder. Begin by putting the bottom eye in the
vice to hold the shock firmly. Now, picture a nut that's been in the
same place for 30 years, subject to rain and dirt. Furthermore, imagine
that this nut has to be grabbed not on the sides by a normal wrench, but
by a spanner that uses two pins to engage two holes in the top. That's
what you're working on.
Here's the nut, partially removed.

Getting to that point wasn't easy. In fact, this part of
the job is legendary. The interwebs are full of stories about stubborn
gland nuts and the various methods of removing them, including violent
assault with hammer and punch, as well as using a torch. I soaked mine
in penetrating oil. For a week. Yes, a solid week.
Even so, my first attempt at removing that nut resulted
in a broken pin on the wrench.
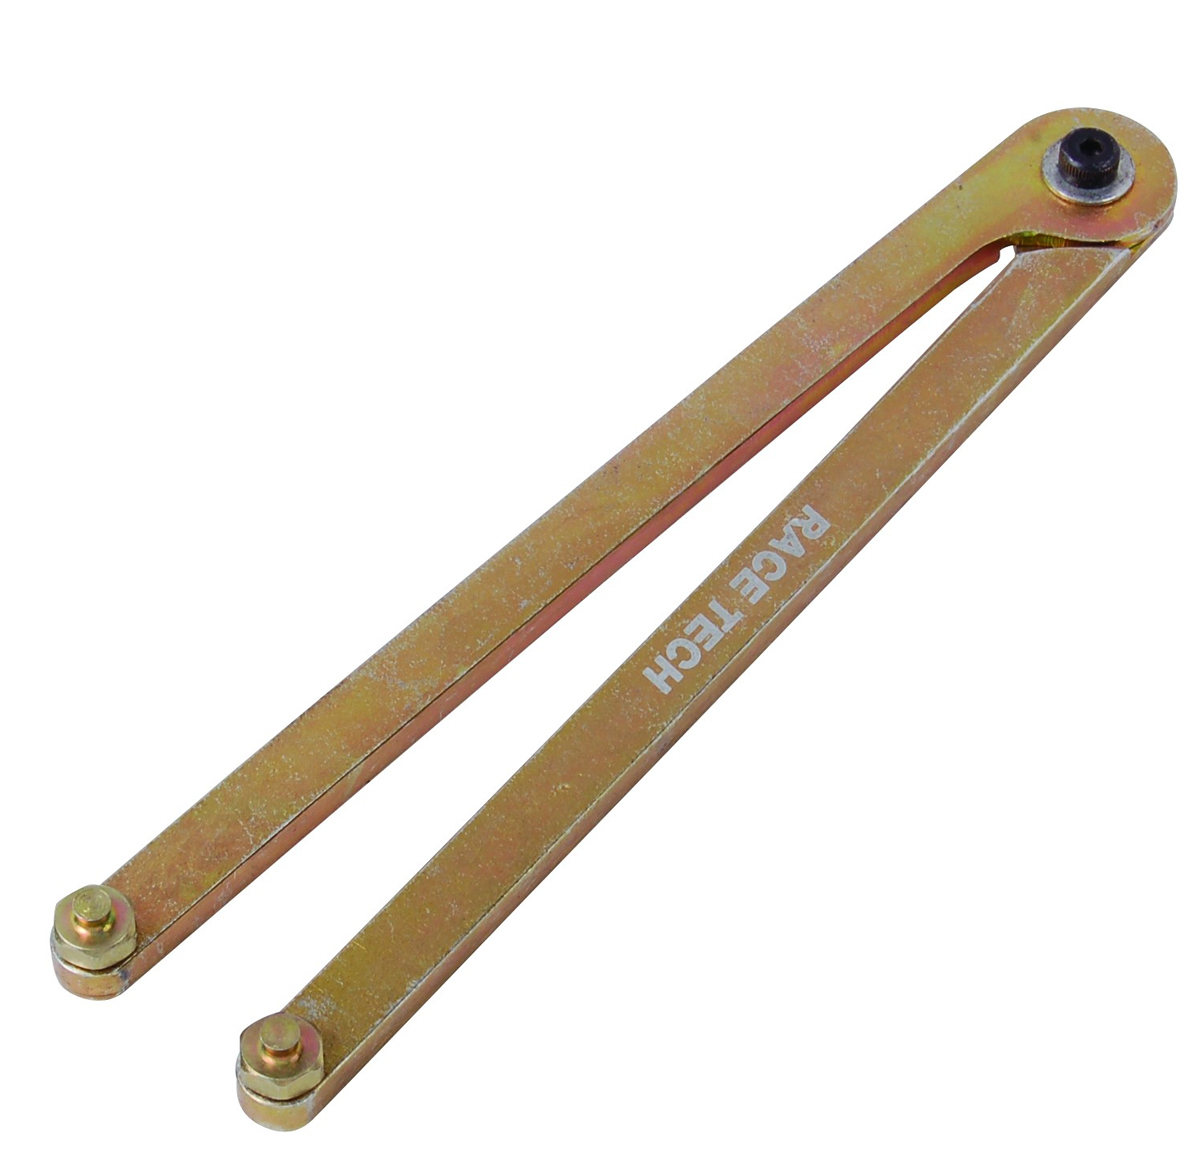
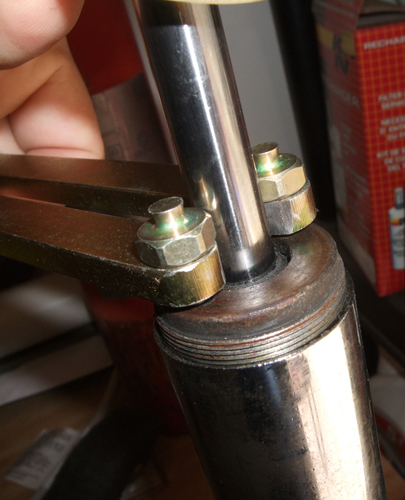
Part of the problem, I think, is that the pins on my
admittedly cheap spanner were too long and therefore prone to flexing
and ultimately breaking. I
ended up buying a better spanner from
Race Tech
suspension. They're heavier and a little longer, so you get more
leverage, and they have many pin sizes (the Konis require 5mm) and the
pins are stubbier.

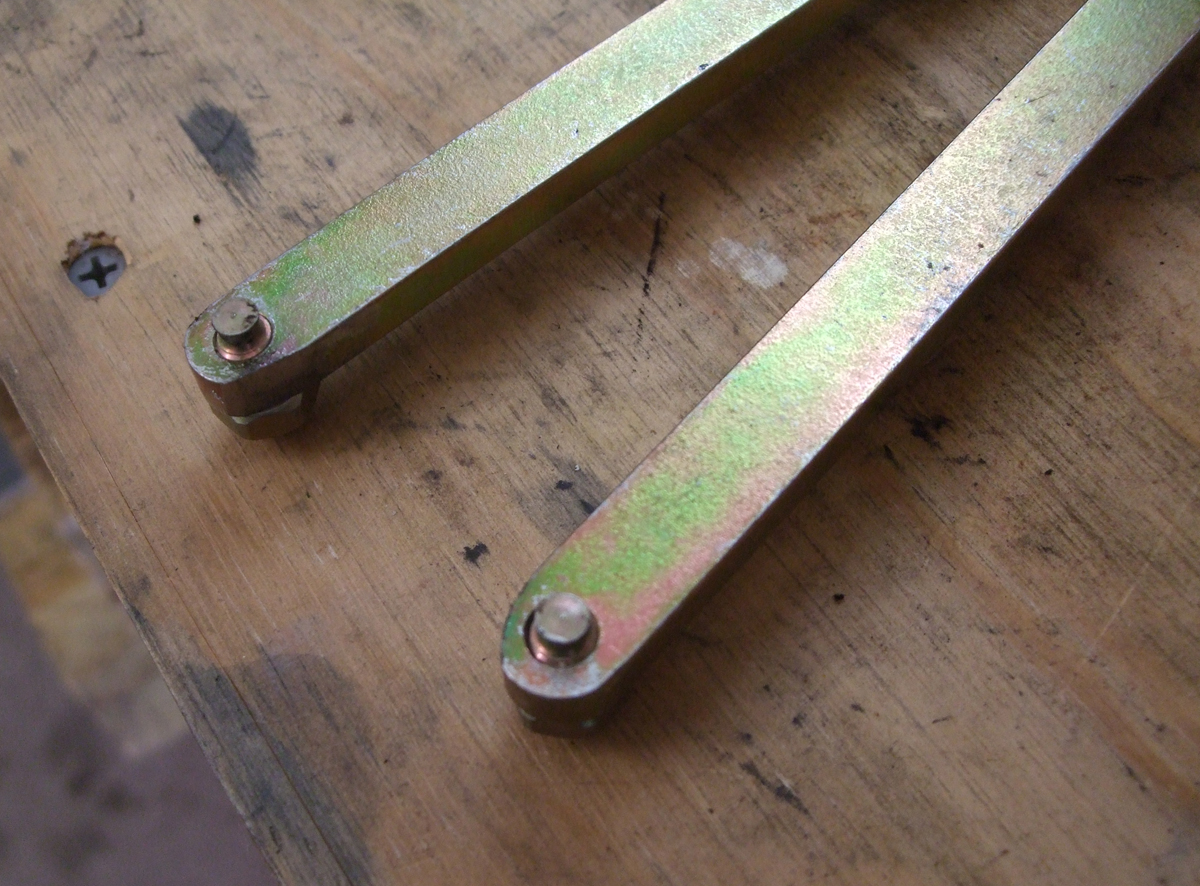
However, even these wouldn't work at first. The ends of
the spanner are too wide, and the holes in the gland nut are too close
to the damping rod. The side of the arms hit the rod before the pins
could engage. My solution was to grind down the inside portion of the
arms; it didn't take much.
And the wrench finally fit.
Here's the gland nut unscrewed completely.

Now, reach inside with a pick and remove the large o-ring.
Keeping the shock upright, take the whole thing outside and remove the
piston rod and inner cylinder, over a drain pan. This will be messy. On one of mine, the
inner cylinder came out with the rod. On the other, it stayed in the
cylinder at first. In both cases, there is also a large washer that sits
in the bottom of the outer cylinder. It may or may not fall out, but
remove it as well - that's it on the rim of the drain pan.
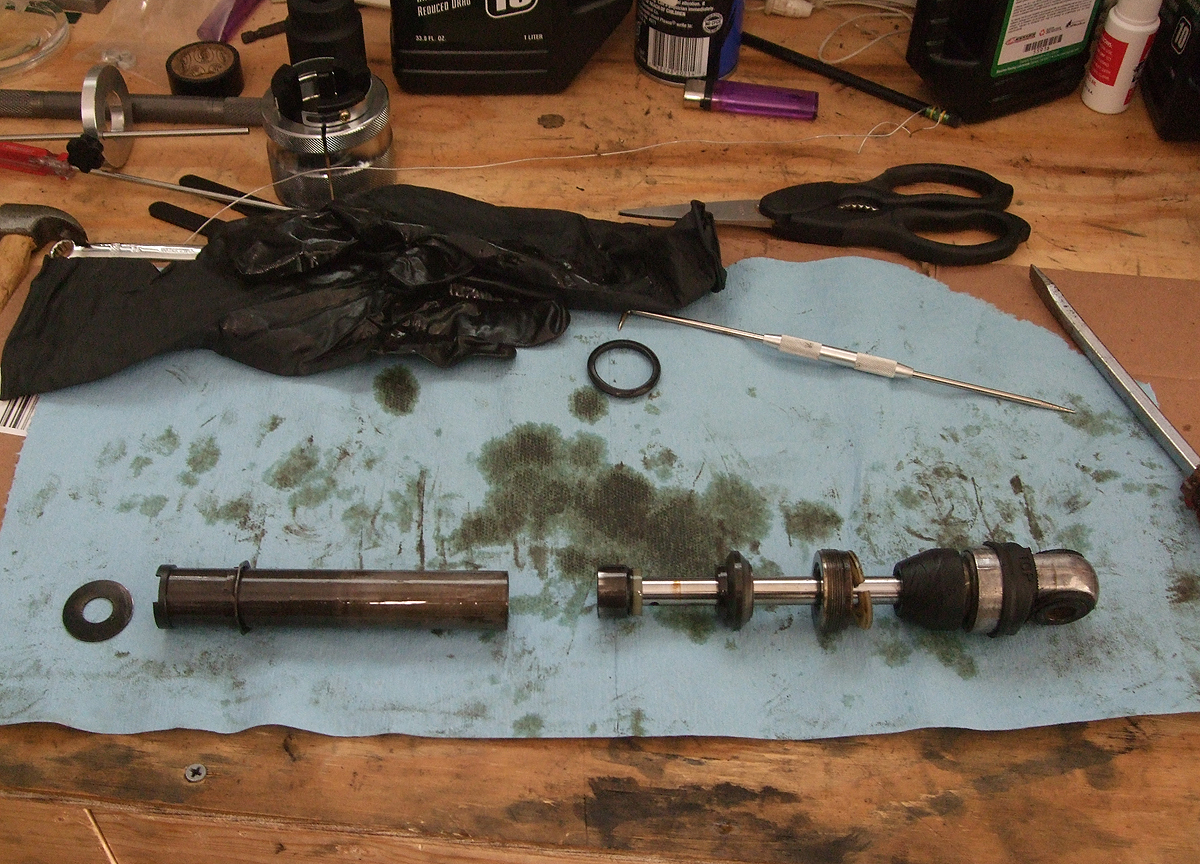
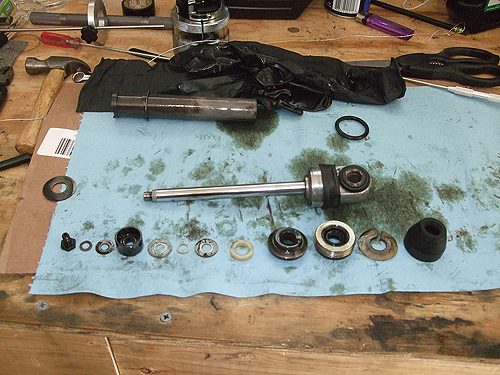
Clean everything off as much as you can. Here's the damper assembly,
including the inner cylinder, laid out on the bench.

And the damper rod itself. Notice the bits on the left side. Those will
come off next.
To remove them, mount the top eye in the vice. At the end of the rod,
there is a 12mm bolt.

Remove it with a socket wrench, being careful not to lose any of the
parts that it holds on the end of the damper rod.
Remove the washers, spacers, and assorted bits and lay them out in the
order they came off.
Clean all of the pieces thoroughly, including the inner and outer
cylinders. There will be a lot of sludge built up in there. I like using
brake part cleaner as it cuts through oil and dries quickly. I also took
some chrome polish to the cylinders. If I was really OCD, I could have
polished the retaining ring and other bits, but this isn't a restoration
and I like the patina. The important thing is to make sure there's no
more sludge or dirt to interfere with the fluid damping.
For the rest of the reassembly, from the instructions provided: "Leave the top mount & rod assembled, but check it for wobble - it should be secure. There's a small O-ring for the inner rod/outer rod in the seal kit, located in that top mount - if it's not leaking oil, this is more trouble than it's worth to go into the top mount, just leave it."
Mine did not wobble or leak, so I left it assembled.
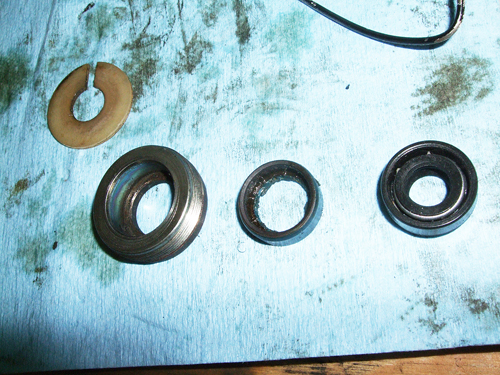
Next, remove the seal from the gland nut. One of mine came to pieces in
the process.
Here's the gland nut, the remains of the old seal, and the new one.
And here's the other gland nut and seal. This is the one that was
leaking. Messy.
Clean inside the gland nut, press the new seal in, and get ready to
reassemble in the order that things were removed.
First, put on the rubber bumper and the plastic washer.
Before sliding the gland nut on, lubricate the inside with dielectric
grease. I also wrapped the end of the rod with electrical tape to
prevent the sharp edge from cutting the rubber seal.
After the gland nut, put on the new o-ring and the "flying saucer"
bushing (oriented correctly!). Then place the remaining parts on the end
of the rod, and attach with the 12mm bolt. Dave recommends putting a
spot of loctite - just a dab - on the bolt.
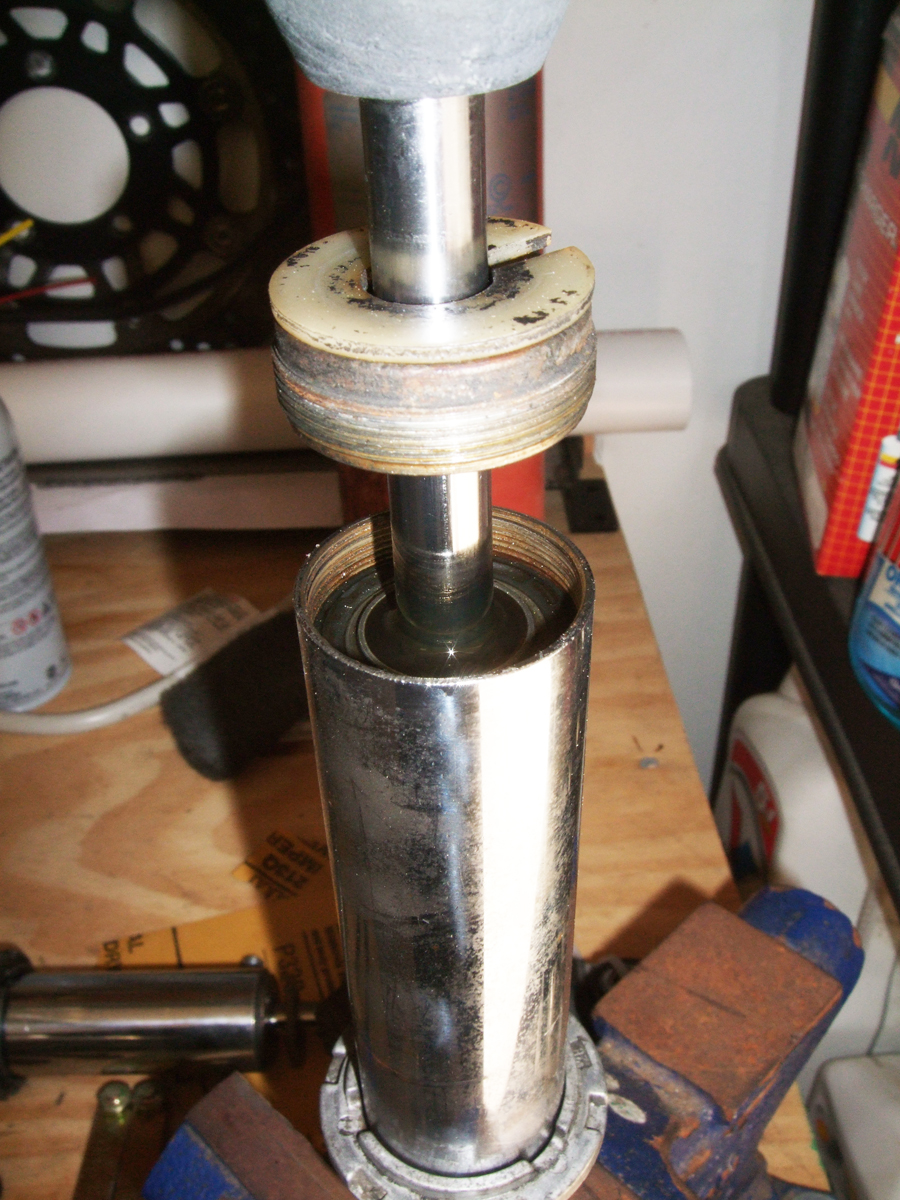
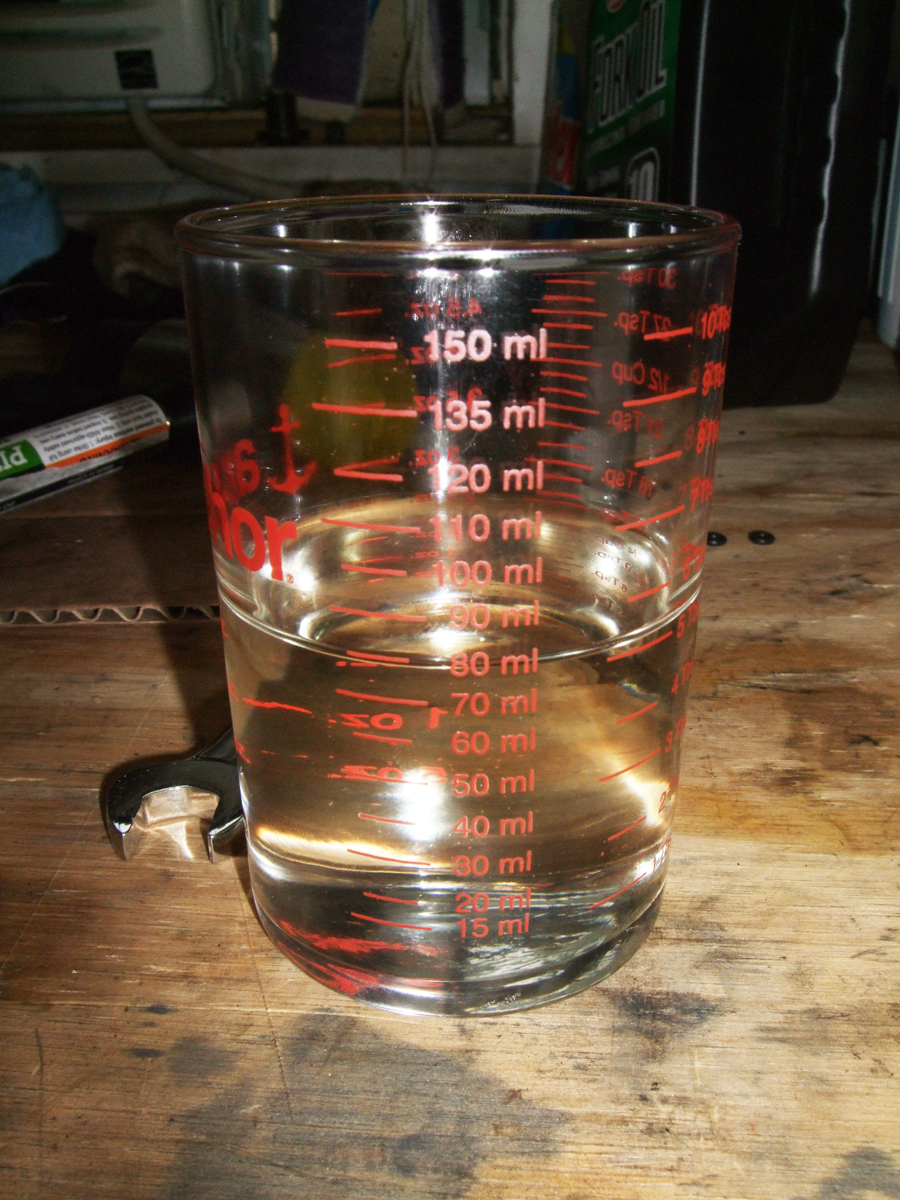
Mount the cylinder in the vice again, by the bottom eye. Put in the
washer and the inner cylinder, and fill the inner cylinder with 80cc of
oil.

Dave recommends 5w, or 7.5 for older bikes. I used 10w at the request of
the shocks' new owner, who prefers heavy damping. If necessary, we can
change it.
As for the rest, according to the instructions:
"Take up the rod/piston/top mount assy and apply a sealant to the threads of the gland nut, to prevent seepage. I use Gascacinch. Don't use a thread locker, you might want to go in there again to change oil, someday.
See that hole in the rod just above the piston? It's going to squirt oil on your shirt when you start pushing the piston into the inner cylinder. Let the "flying saucer" bushing cover it as you put the rod assy in the cylinders and you won't need to change your shirt.
Tighten the gland nut snug. It will turn in to a stopping point on the threads, that's it."
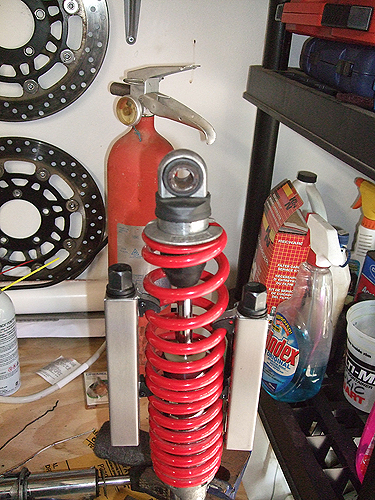
Pump the damping rod a few times to make sure it's working, then
replace the spring by compressing it (carefully!), sliding the
retaining ring on, and decompressing the spring.
Repeat for the other unit and, according to the instructions: "Set shocks on work bench, open beer."
I always follow instructions to the letter.
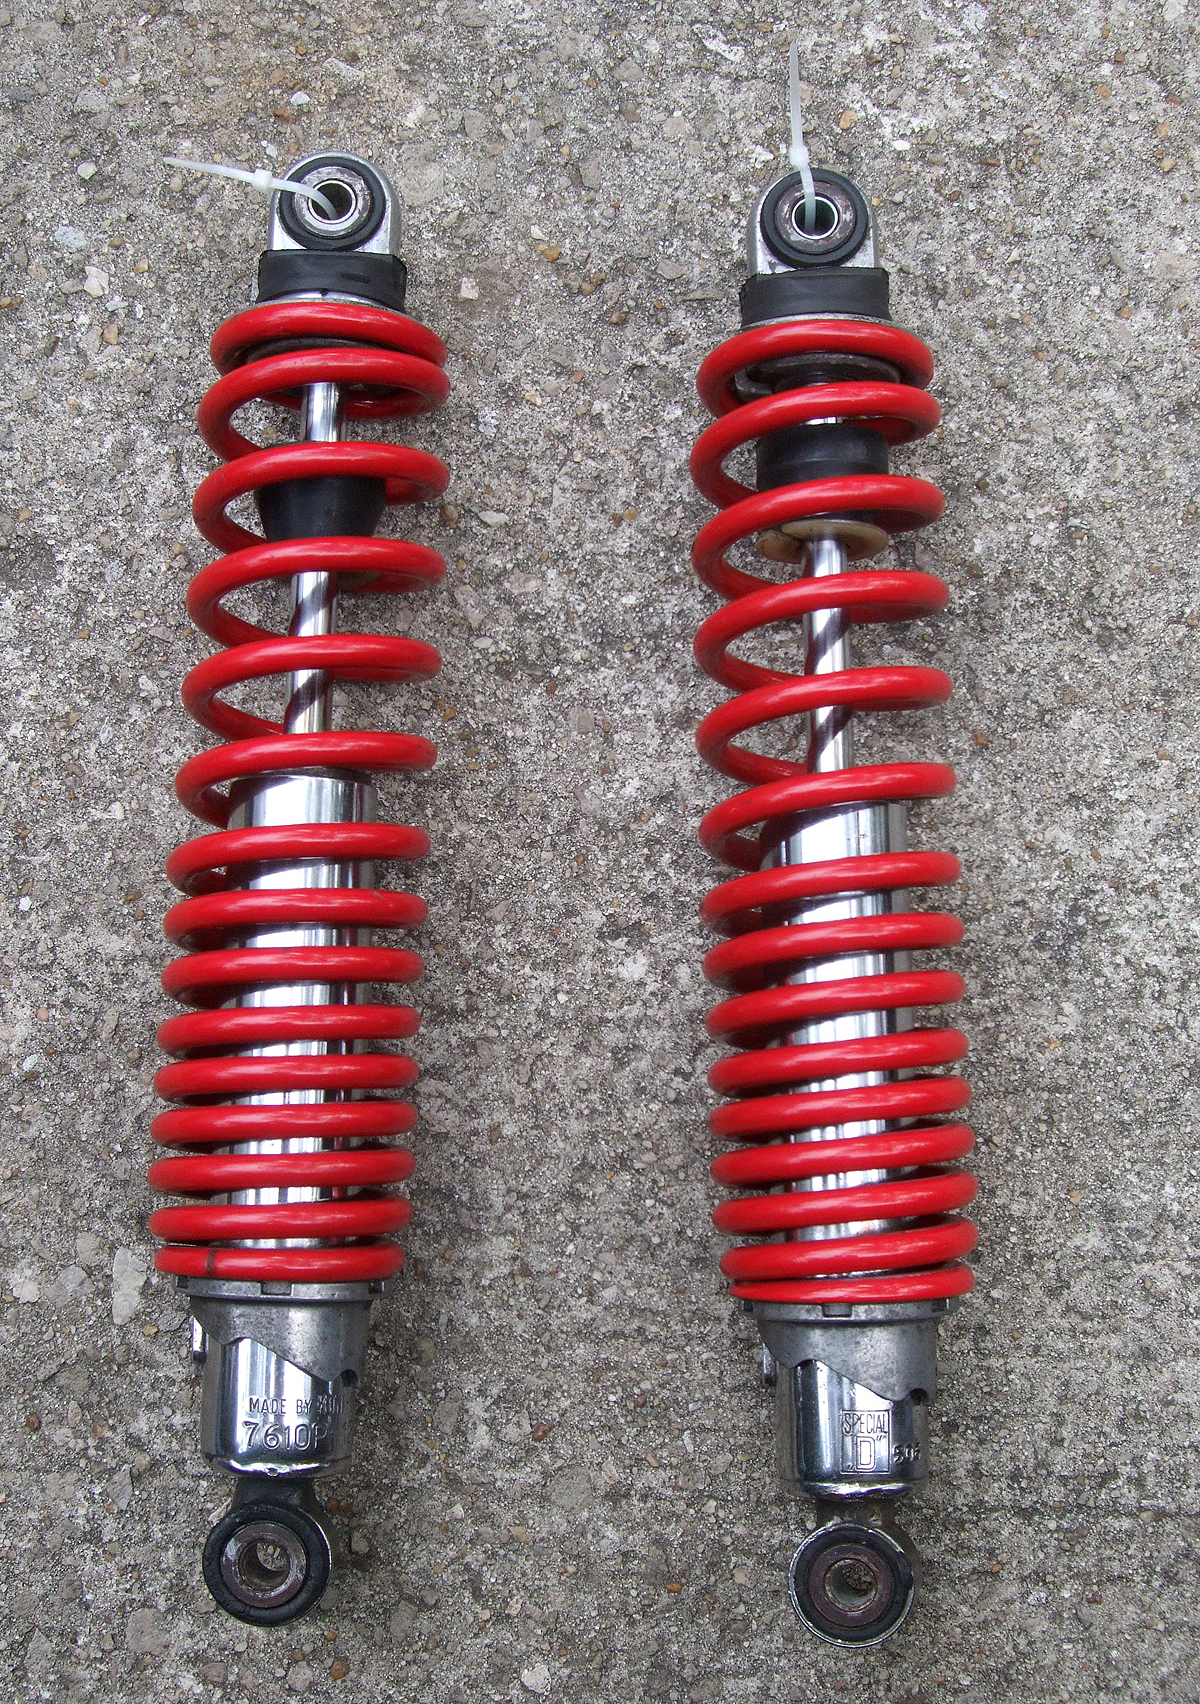
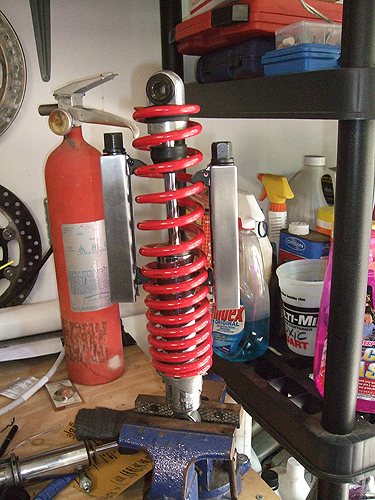
Here are the before and after shots. The zip ties are there to hold
the bushing in the top mount.
The eagle-eyed will notice that the springs have been
mounted differently on reassembly, with the tighter coils at the bottom.
Keep in mind that they had been powdercoated red by the previous owner,
and after checking photos on the Ikon web site, I put the springs on in
an orientation that matches the photos of the stock, new shocks.
Just in case, I e-mailed Dave to see if one or the other
was correct. His response:
"It doesn't really matter. It just looks better with
the tight coils down."

Return home |