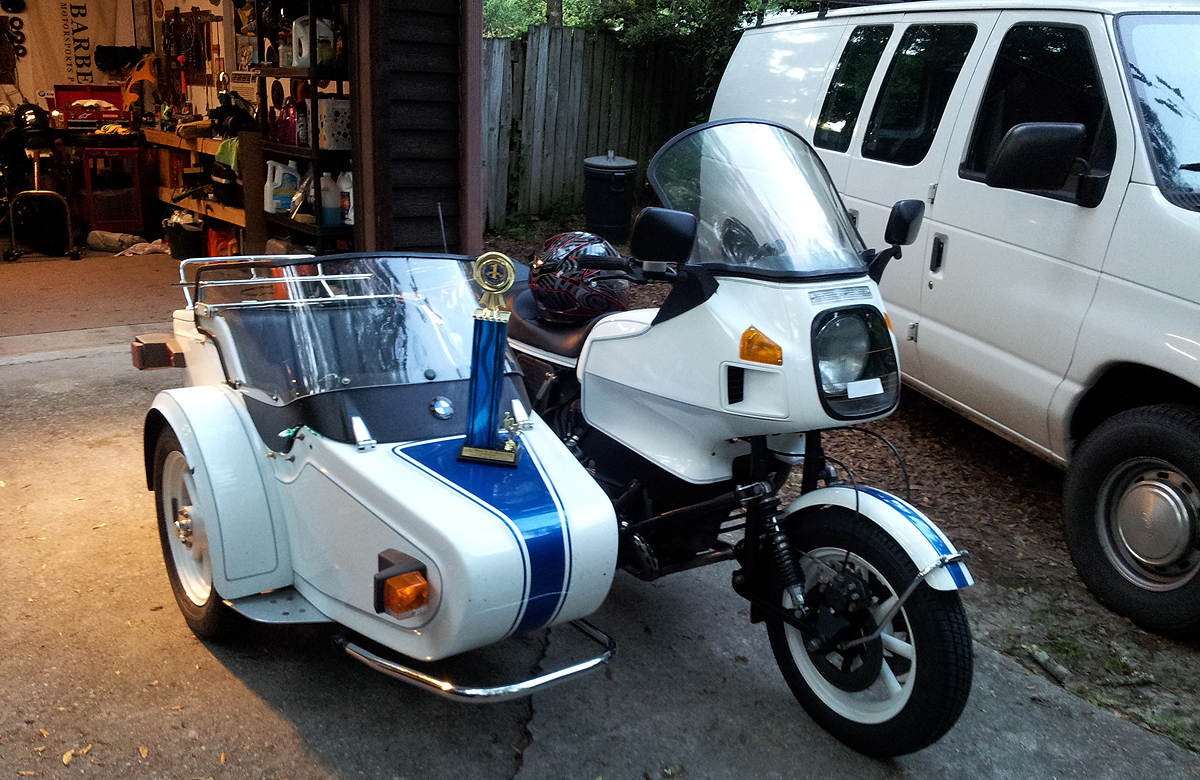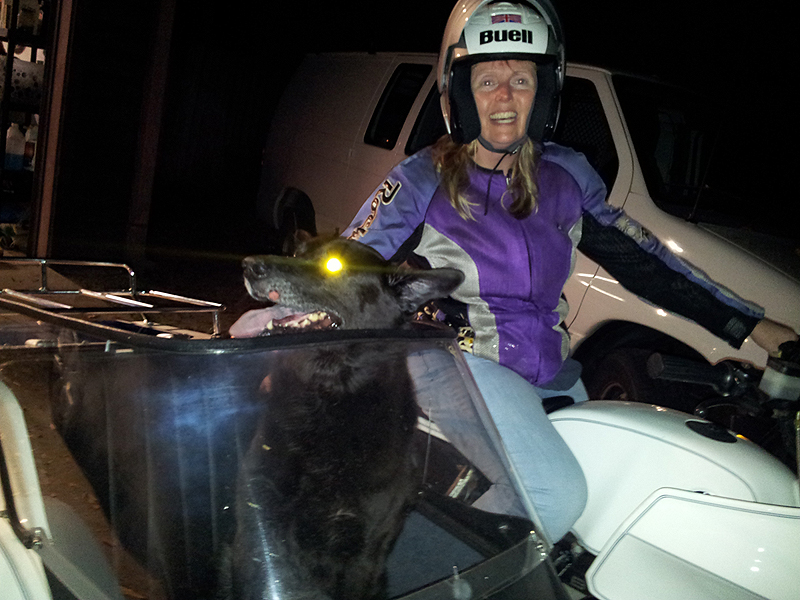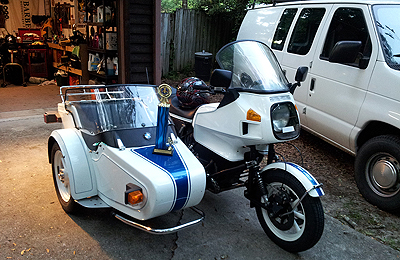
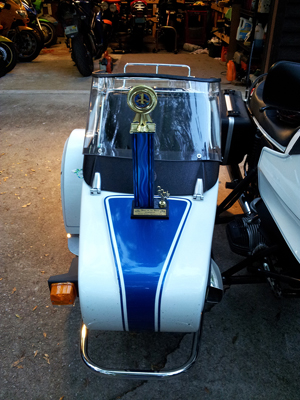
Award Winning!
Despite a completely knackered rear brake.
|
 |
Showstopper
Updating EML's bespoke brakes to something actually
useable.
Bike shows have always been problematic for me.
On one hand, it's nice to see the artistry, craftsmanship and
engineering on display, often astoundingly impressive and beyond the
reach of us mortals in terms of both skill and money. Often though, bikes are
trailered to the show, unloaded, polished within an inch of their life
and then loaded back up when the event's over, like a traveling museum
exhibit, which is antithetical to the whole purpose of two-wheeled
transport in the first place. In fact, I have seen non-running, but very
pretty, bikes take home trophies, and that is just wrong.
To complicate matters, if it's a judged show, a coven of tweedy,
bearded wizards will pore over every square centimeter looking for a
period-incorrect bolt, improperly polished part ("it should have been
painted") or other fatal flaw, while "people's choice" voting often
caters to the whim of whatever tribe happens to be the majority in
attendance, whether it's the tattoos-and-chaps horde or the
extended-swingarm-and-neon family.
So when some of our local riding group decided to head to Panama City
for a Saturday bike show during "Thunder Beach" weekend, I was a little
hesitant. But the show was being hosted by some friends with the Vintage Japanese
Motorcycle Club of North America and would be a relatively informal
affair, an easy
couple hours riding on the coast to look at some cool bikes and have a
little fun. I decided that since I was going to be there anyway, I might
as well enter the EML sidecar rig just for kicks, because you never
know. It was supposed to be a low-stress event.
Then we stopped for breakfast.
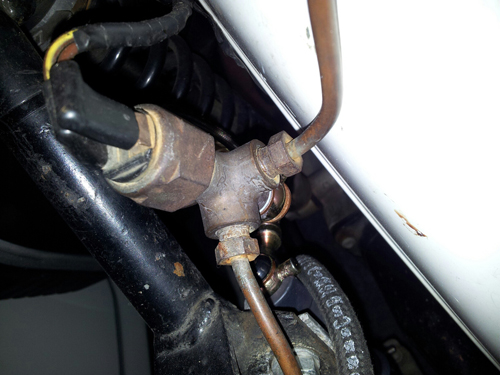
I had noticed the rear brake becoming increasingly
ineffective at stoplights as we headed out of town, and when we stopped at a little
diner in the middle of nowhere, I decided to have a closer look. What I found was horrifying - brake fluid was leaking from the caliper,
and every time the pedal was pushed, it puked some more. While everyone
else finished breakfast, I cleaned it up as best I could and decided
that since most of the ride was two-lane backroads, I'd go the rest of
the way and back using the front brakes only.
Lady Luck obviously has a highly refined sense of humor, and the bike took first place in the
"European" class, but when I took it apart the next day to assess the
damage, I discovered a complete horrorshow that would turn into a
months-long recurring nightmare.
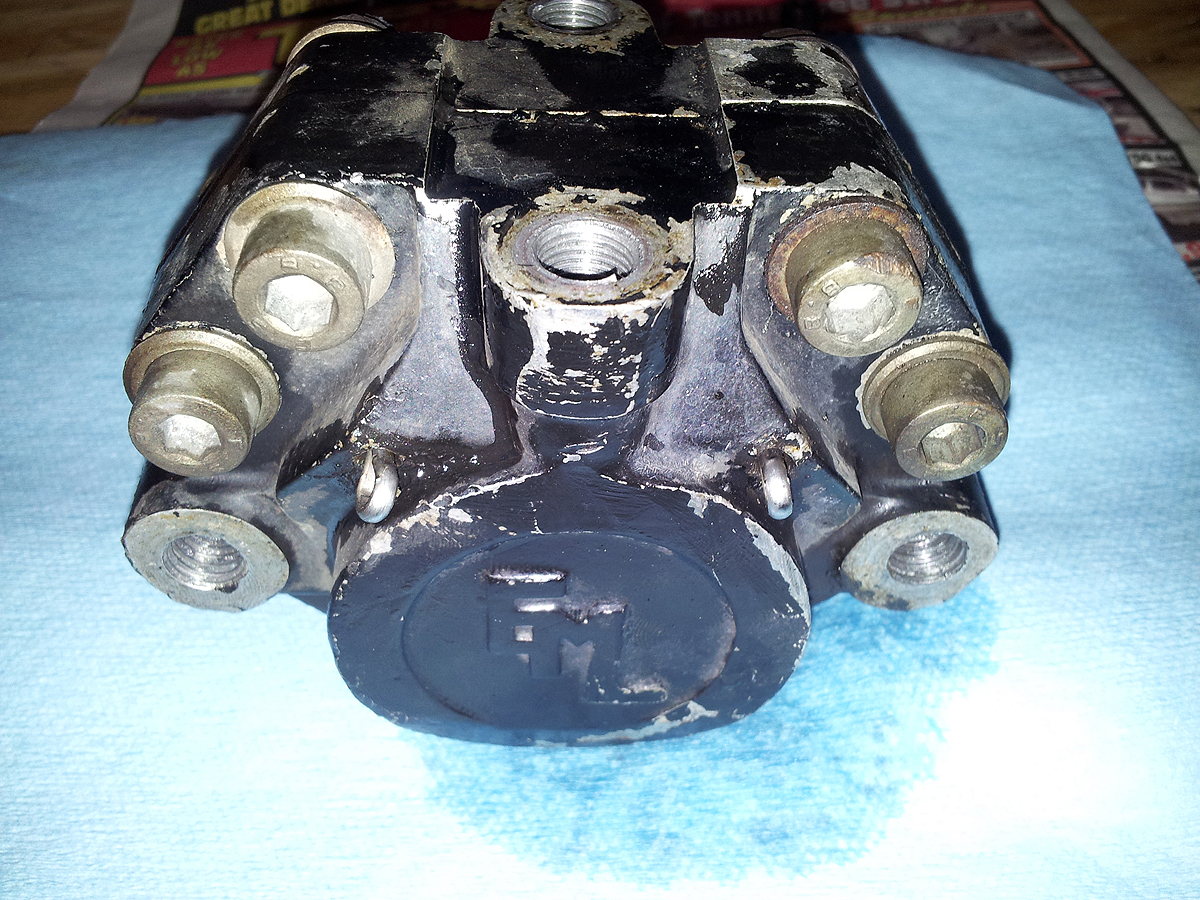
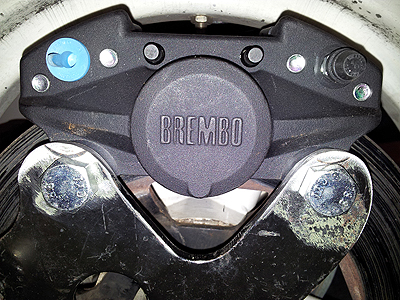
As I suspected, the caliper seals had gone bad. Really bad. Star Wars: The
Phantom Menace bad.
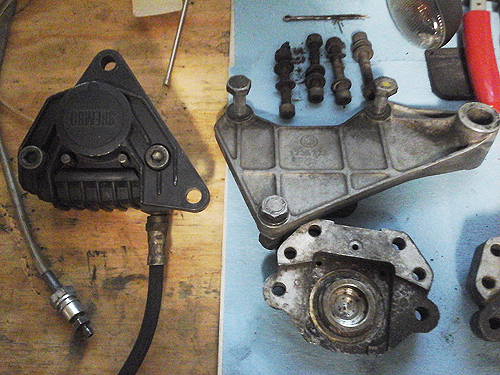
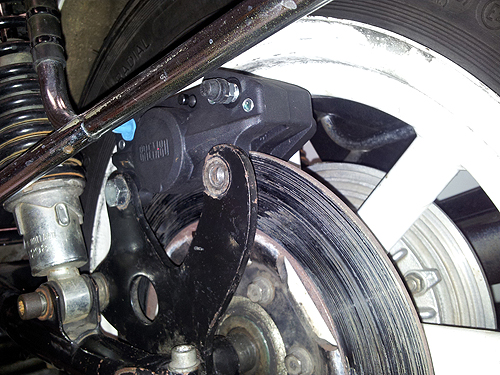
Here is the caliper, as removed from the bike.
|

Outboard side |
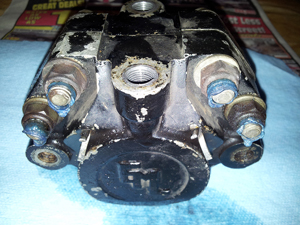
Inboard side |
Notice a couple of things:
It turns out that, early on, for reasons known only to some
now-very-elderly Dutch people, EML decided to make their own brake
calipers. On early EML rigs, the same caliper is used for both the dual front
discs and rear disc brake on the bike, while an off-the-shelf Grimeca clamps down
on the sidecar disc.
Before even disassembling the calipers, the issue was obvious. Yep,
there's your problem.
The pads are worn out, the seals are toast, and the whole thing is a
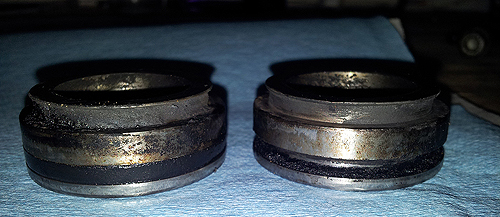
disaster. It does not get any better when taking them apart.
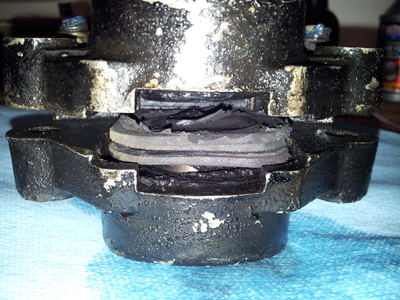
And the pistons removed from the housing.
Ordinarily, the solution is pretty straightforward: Clean everything up,
replace the seals and o-rings, possibly the pistons, and paint the
calipers if you're feeling OCD. It's chimpanzee-level stuff, lots of
elbow grease but not rocket science.
But nothing is straightforward with a 40-year-old sidecar rig built in
the Netherlands by a company that is no longer in business. Yes, there
is still a company out there called EML. No, they are not the same.
My initial hunch was that the calipers were simply another make,
rebranded as EML, and I'd be able to find seals and pistons by
cross-referencing, but after much searching it turns out that's not the
case. Many people seem to think they are Grimecas. They are definitely
not. It seems EML made their own calipers, and rebuild parts are no
longer readily available. Of course, you could measure the calipers and
try to find suitable seals. But even if you were successful, you still
need pads, and - you guessed it! - those are EML-specific too, so the only
option is to have new friction material bonded to the old metal backing
plates.
All of which means that even if you did manage to hunt down parts and rebuild
the calipers, you're still stuck with brakes for which you can't get
parts, or pads.
I even sent pictures of the calipers to Michael Morse at
Vintage Brake -
the premier go-to guy for things that make old bikes stop. He confirmed
they are not Grimecas and said he had never seen anything like the EML
calipers. In fact, his exact words were "I'm glad it's not my project."
When the best vintage brake authority in the country tells you that, you
know you're a long way down the rabbit hole. His advice was to adapt a
different caliper. Interestingly enough, EML itself did just that: Later EML
rigs use Brembo F08 and F05 calipers, which have been around since
shortly after the invention of the wheel and are still in production,
along with rebuild parts. They are the cockroach of motorcycle brakes.
They are everywhere and will outlast humanity itself.
If you have those, consider yourself fortunate (and
check out Snowbum's exceptional page on EML Brembos and other
idiosyncrasies here).
If not, the best thing to do is to toss the EMLs in the bin, or mount them
on the wall of your Museum of Bad Ideas. Or if
you're a real glutton, you could insist on doing an absolute
period-correct restoration while the rest of us enjoy riding around in
our sidecars alternately laughing at your efforts and praising you
effusively for
your dogged persistence.
I prefer riding, so the plan was changed and the search was on to figure out the most
efficient way to use a different caliper. My first inclination was to
use a stock BMW /7 rear mount and caliper, as the EML already uses the
stock BMW swingarm and axle. This has been done
successfully elsewhere, and I found the parts (with yes, an F08 Brembo!)
relatively cheap on Ebay.
However, because of the width of the EML wheel, it won't work in the
stock position.

It's possible to mount the whole thing below the swingarm, but that's
dangerously close to the ground and frankly pretty ugly, so the idea was
scrapped.
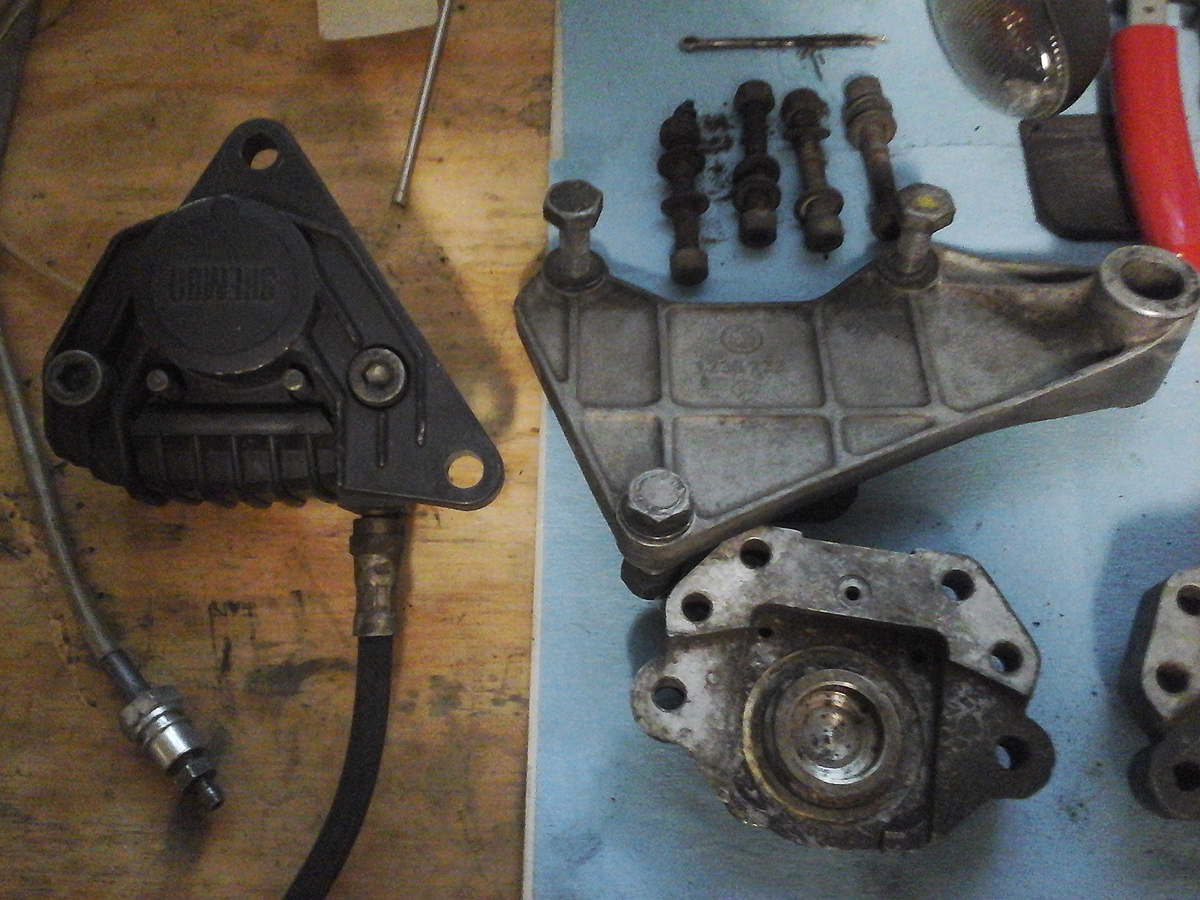
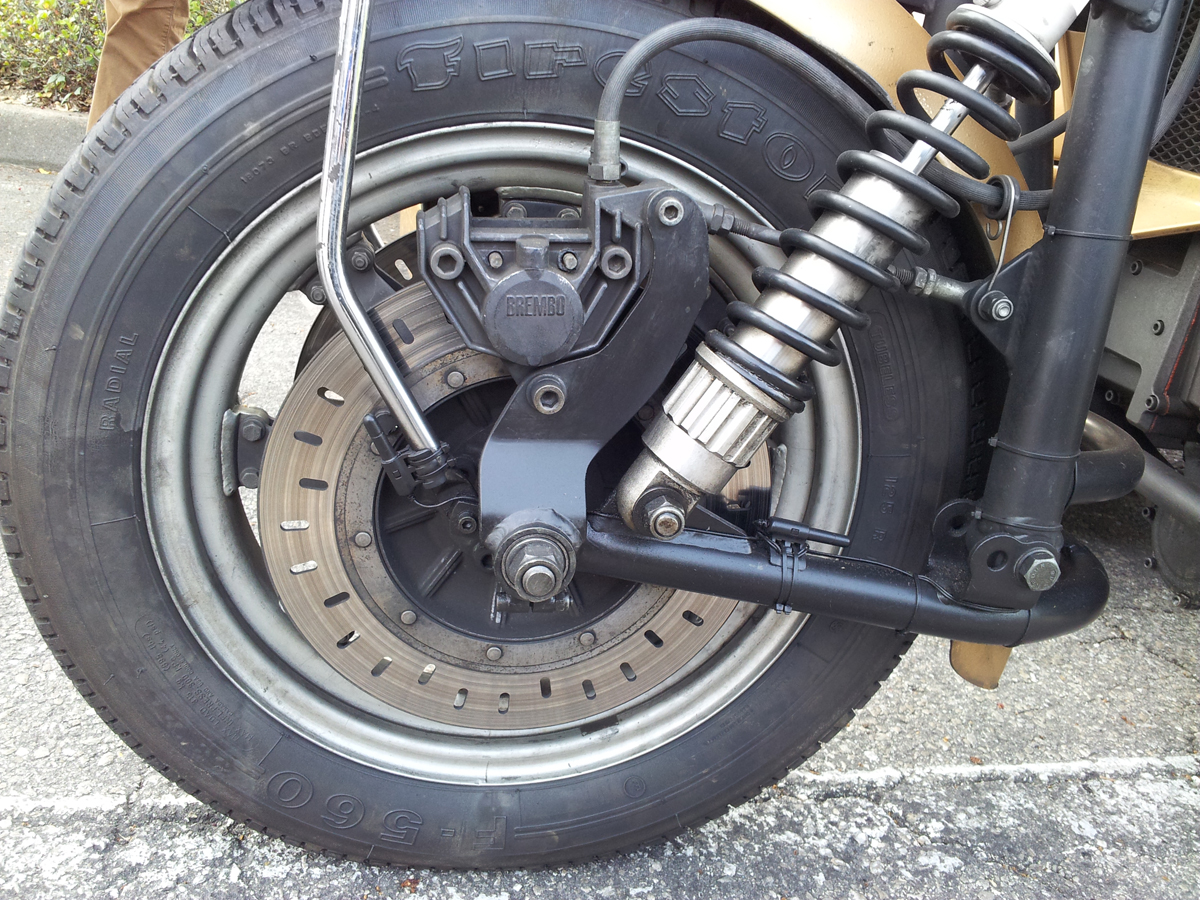
After some more discussion with Morse at Vintage Brake, I settled on using a Brembo P108 caliper. This is a Lockheed-style caliper that
uses the same pistons and pads as the F08 and mounts horizontally, like
the original EML calipers. Morse says that because of the way they mount
and their symmetrical design, they actually provide better stopping
power then the F08s.
I went ahead and ordered a P108, and had Vintage Brake install M10X1.25
Timesert thread inserts, as the mounting holes are not normally
threaded, but would need to be for this application.
There were some significant differences from the EML calipers that had to
be considered. Obviously, the lines connect at the side, whereas
the EMLs connect at the top. The bigger problem, though, is how the
mounting holes line up relative to the piston and pad.
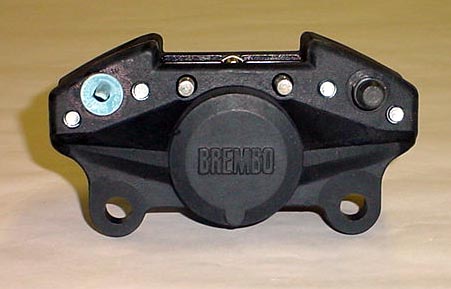
|
The EML mounts are in line with the piston center |
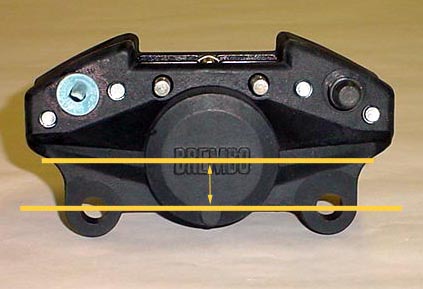
The Brembo mounts are below the piston's centerline |
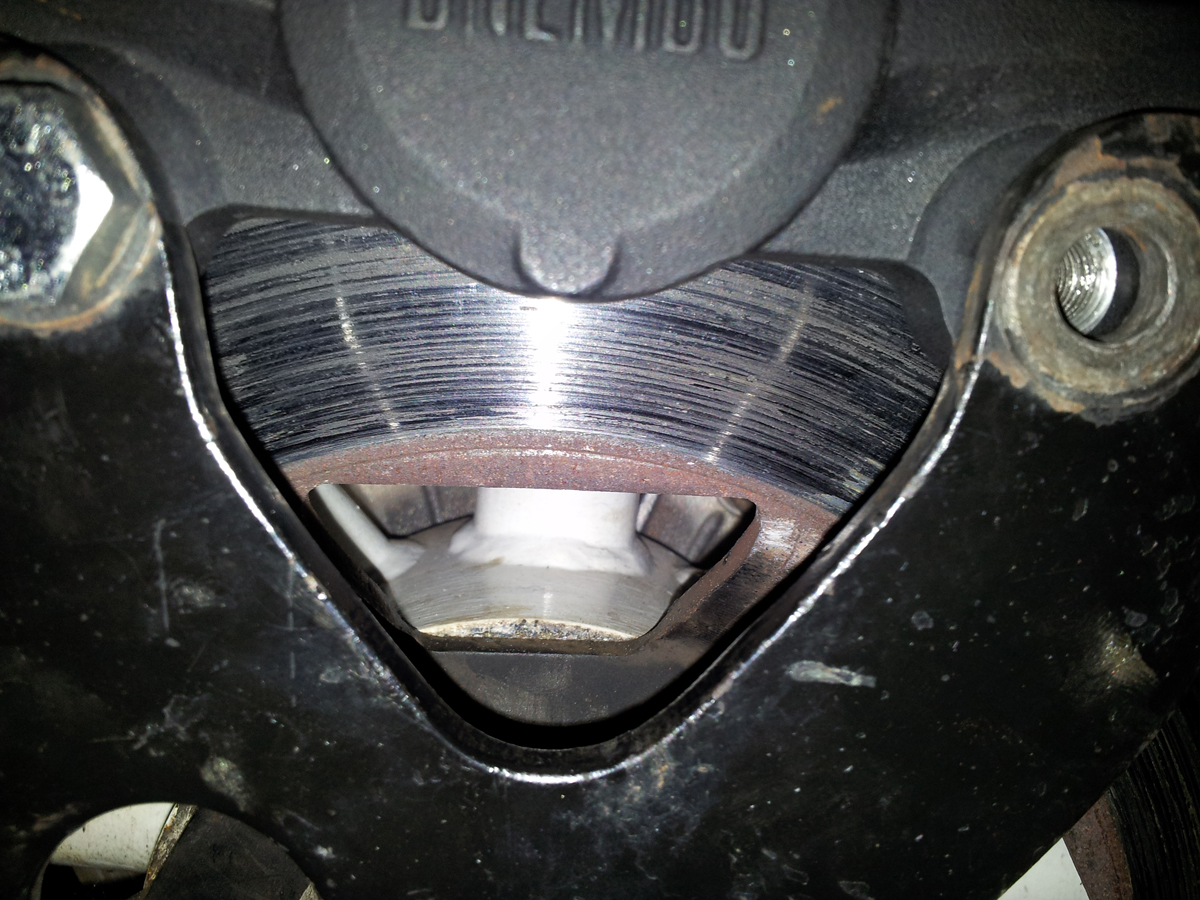
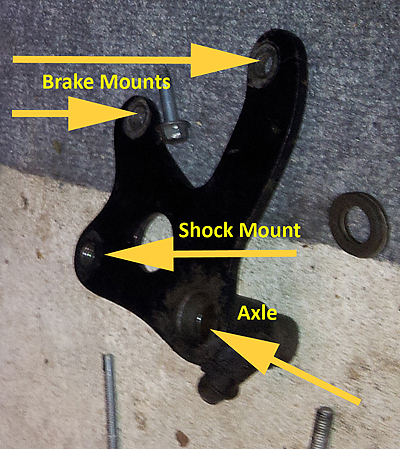
When put on the stock EML mounting bracket, you get this:

Too far up, and the mounting holes are closer together.
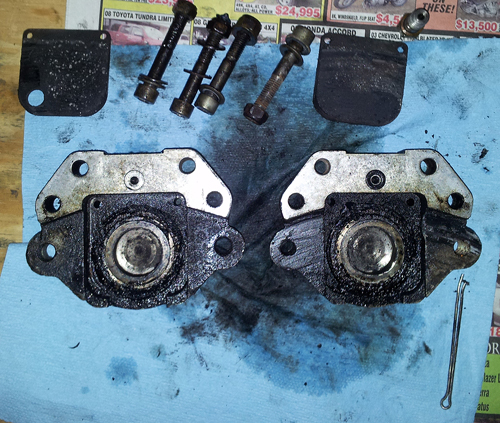
Here's the stock EML bracket removed.
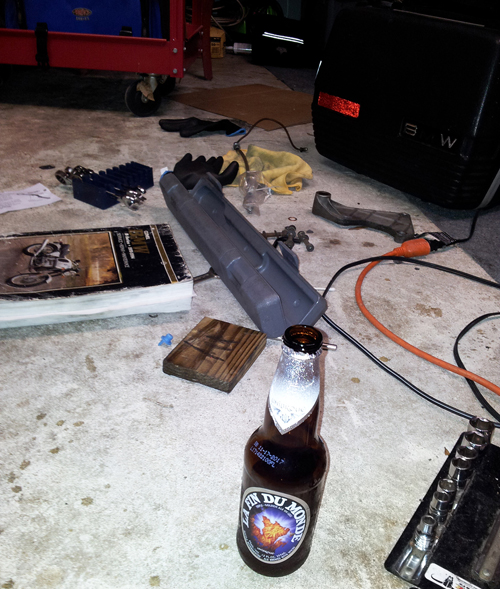
I did some measuring. Drank some beer. Then did more measuring the next
day when the beer had worn off.

My best calculations said that the holes for the Brembo needed to be
19-20mm lower on a line parallel with the centerline of the axle hole to
line up the pads with the disc. They also needed to be 89mm apart (the
EMLs were 91 - nothing is standard on them!).
I also made a photoshop mockup.

I could have marked and drilled the holes myself on the drill press, but
there is excess metal that needs to be removed from the ends of the
bracket, and it's fairly thick steel. I'm not sure a jigsaw would cut
it. So I took the bracket, photoshop picture and caliper to a local
metal fabricator who actually does a lot of bike parts (and builds drag
bikes!). To my amazement,
he knocked it out on the same day and that night I did a test fit.
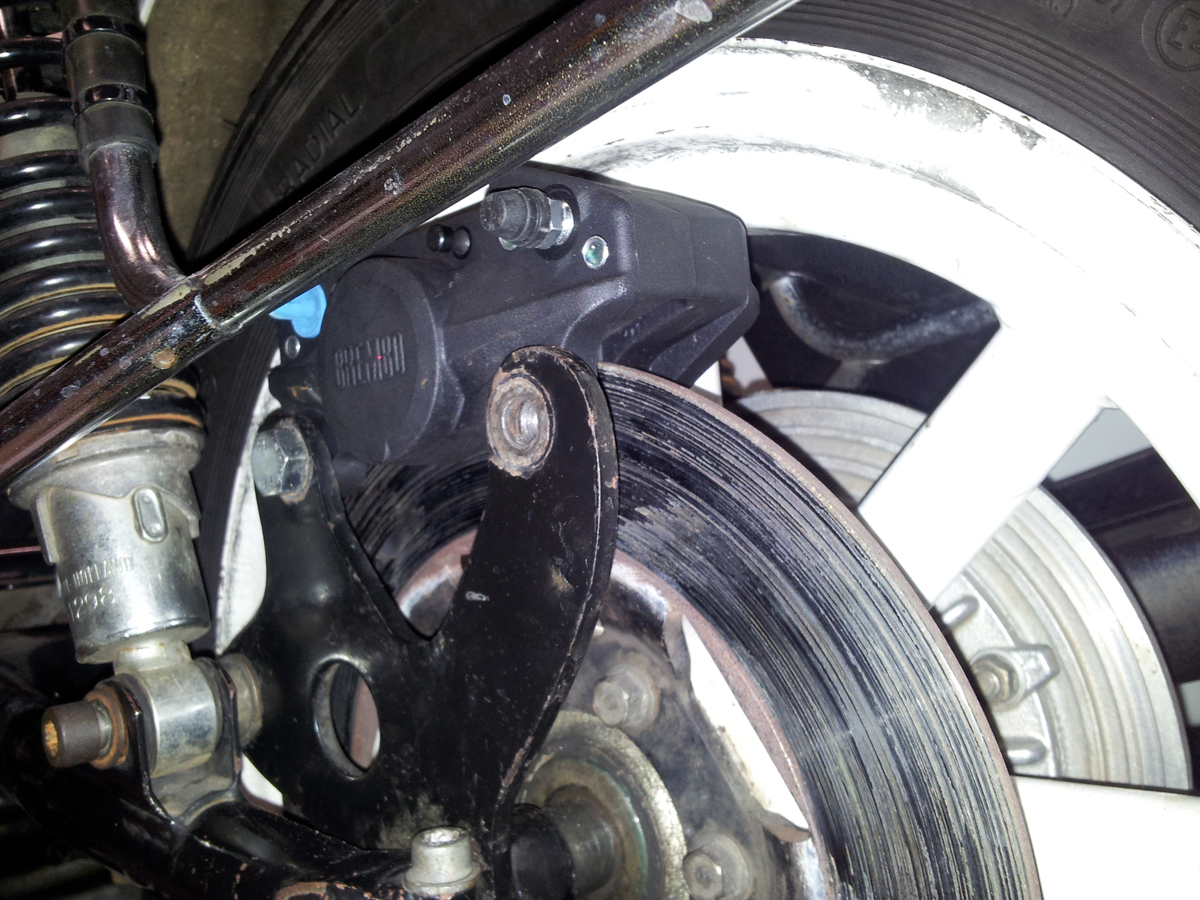
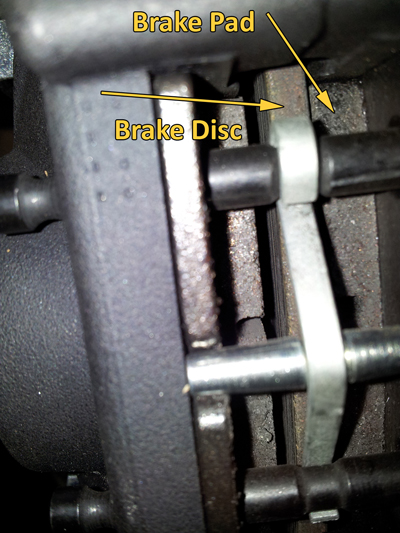
It worked!
The top of the pads hit the top of the disc perfectly.
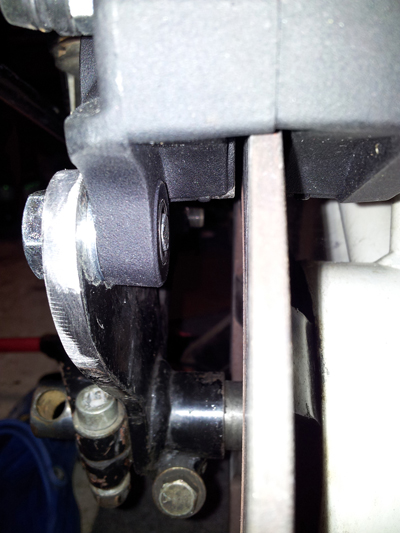
I used a washer as a spacer to get the caliper body as close to
center as possible. The camera makes it look farther to the right than
it is; I may try a thinner washer, but this is about as good as it gets.
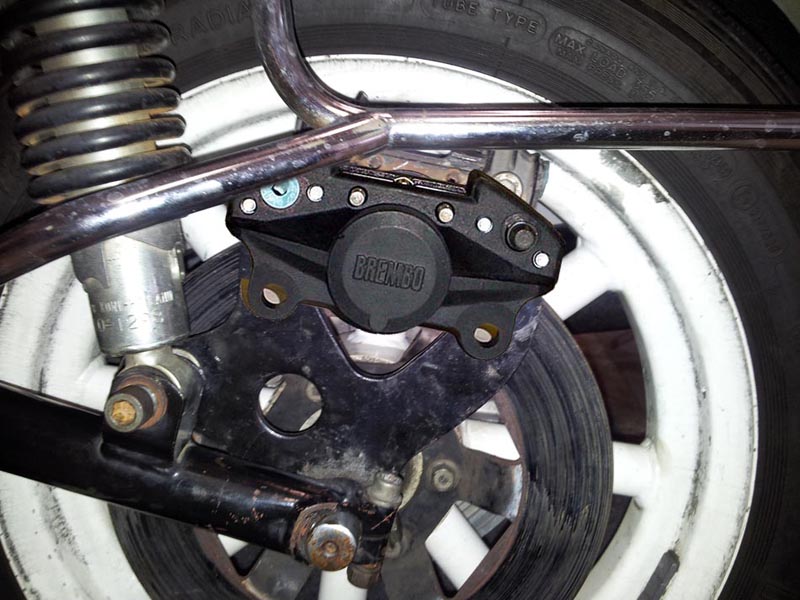
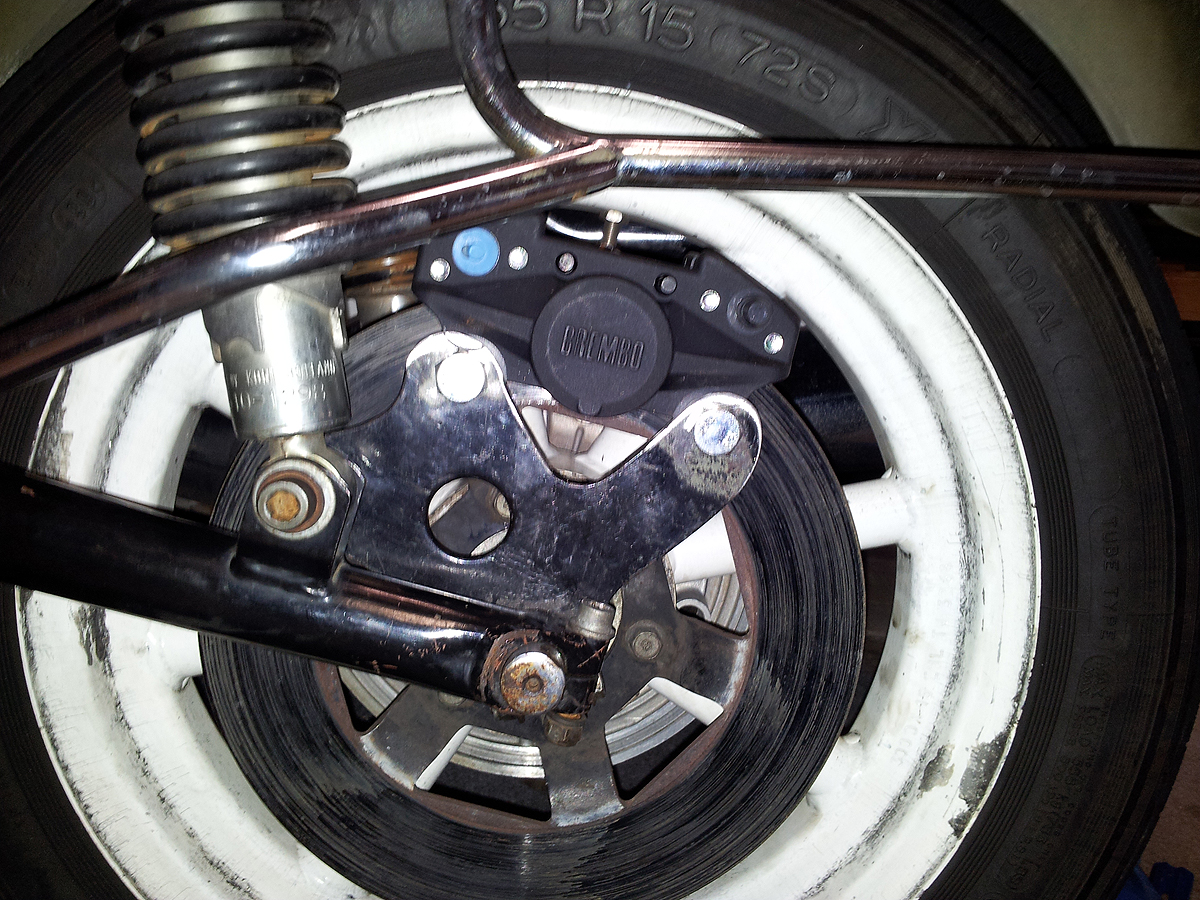
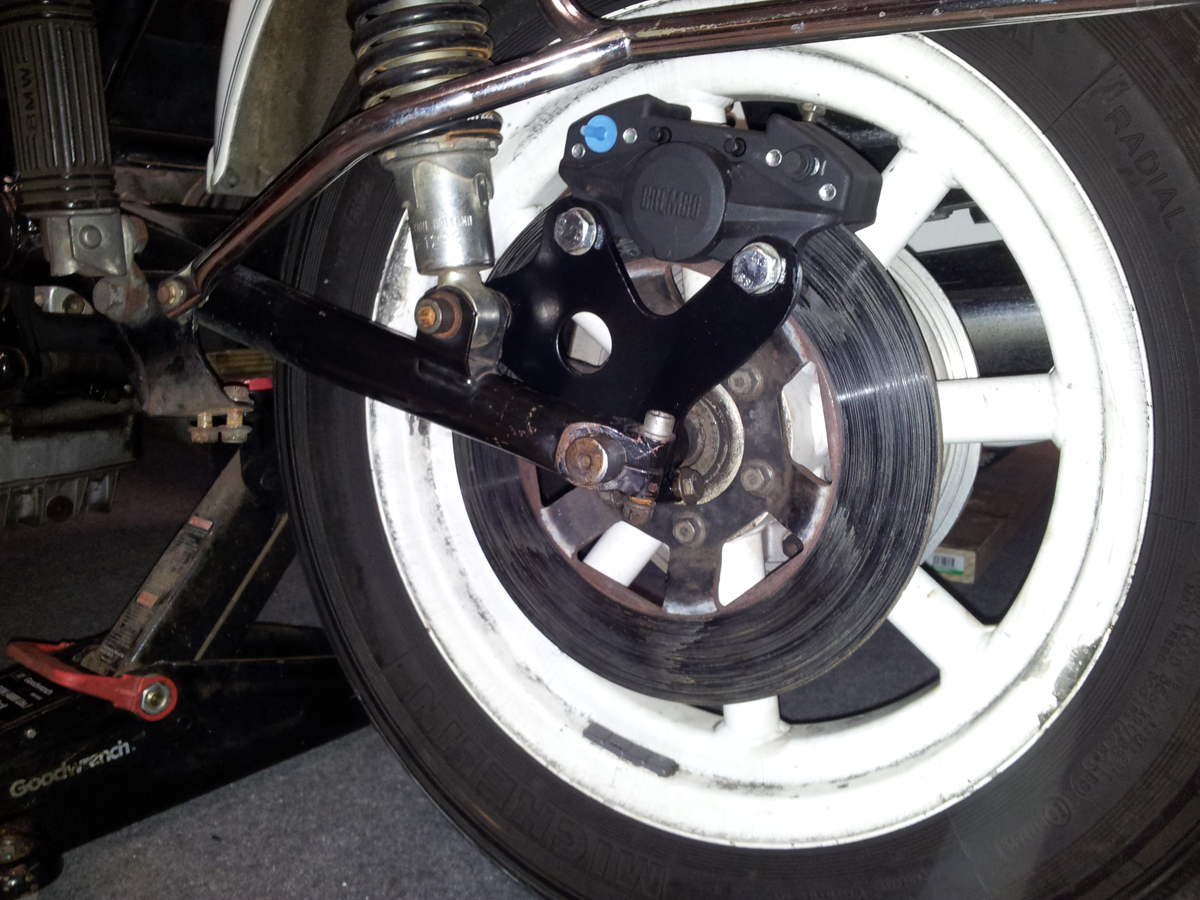
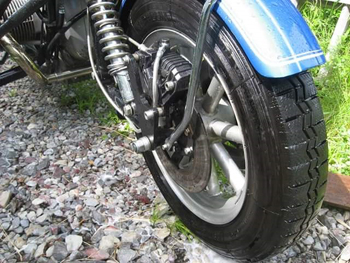
Here's the new mount, painted and bolted up.

Next up was taking care of the plumbing. On the EML, the rear wheel and
sidecar wheel operate when you push the brake pedal. It sends fluid from
the master cylinder to a four-hole manifold that incorporates a sensor for the
brake light. From there, goes to two hard copper lines.
Those have a fitting near the wheel where a flexible, braided steel line
is fitted to go to the caliper.
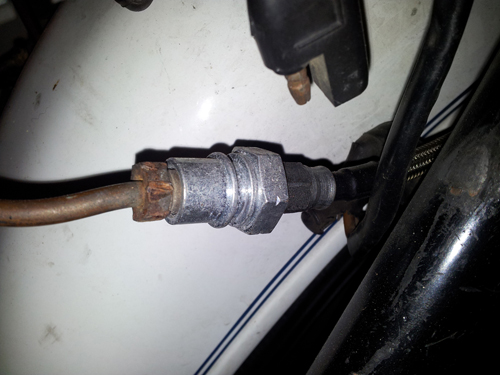
The use of automotive-style solid line is apparently a nod to European TUV
standards. TUV is short for the German "Technischer Überwachungsverein"
which, since it has umlauts, would probably be a good name for a metal
band. In English, it means Technical Inspection Association, so it
functions of like the USDOT here, though it covers many more things
besides vehicles.
Other than reducing flex, there's no real reason for it on a motorcycle, and braided
stainless serves the same purpose.
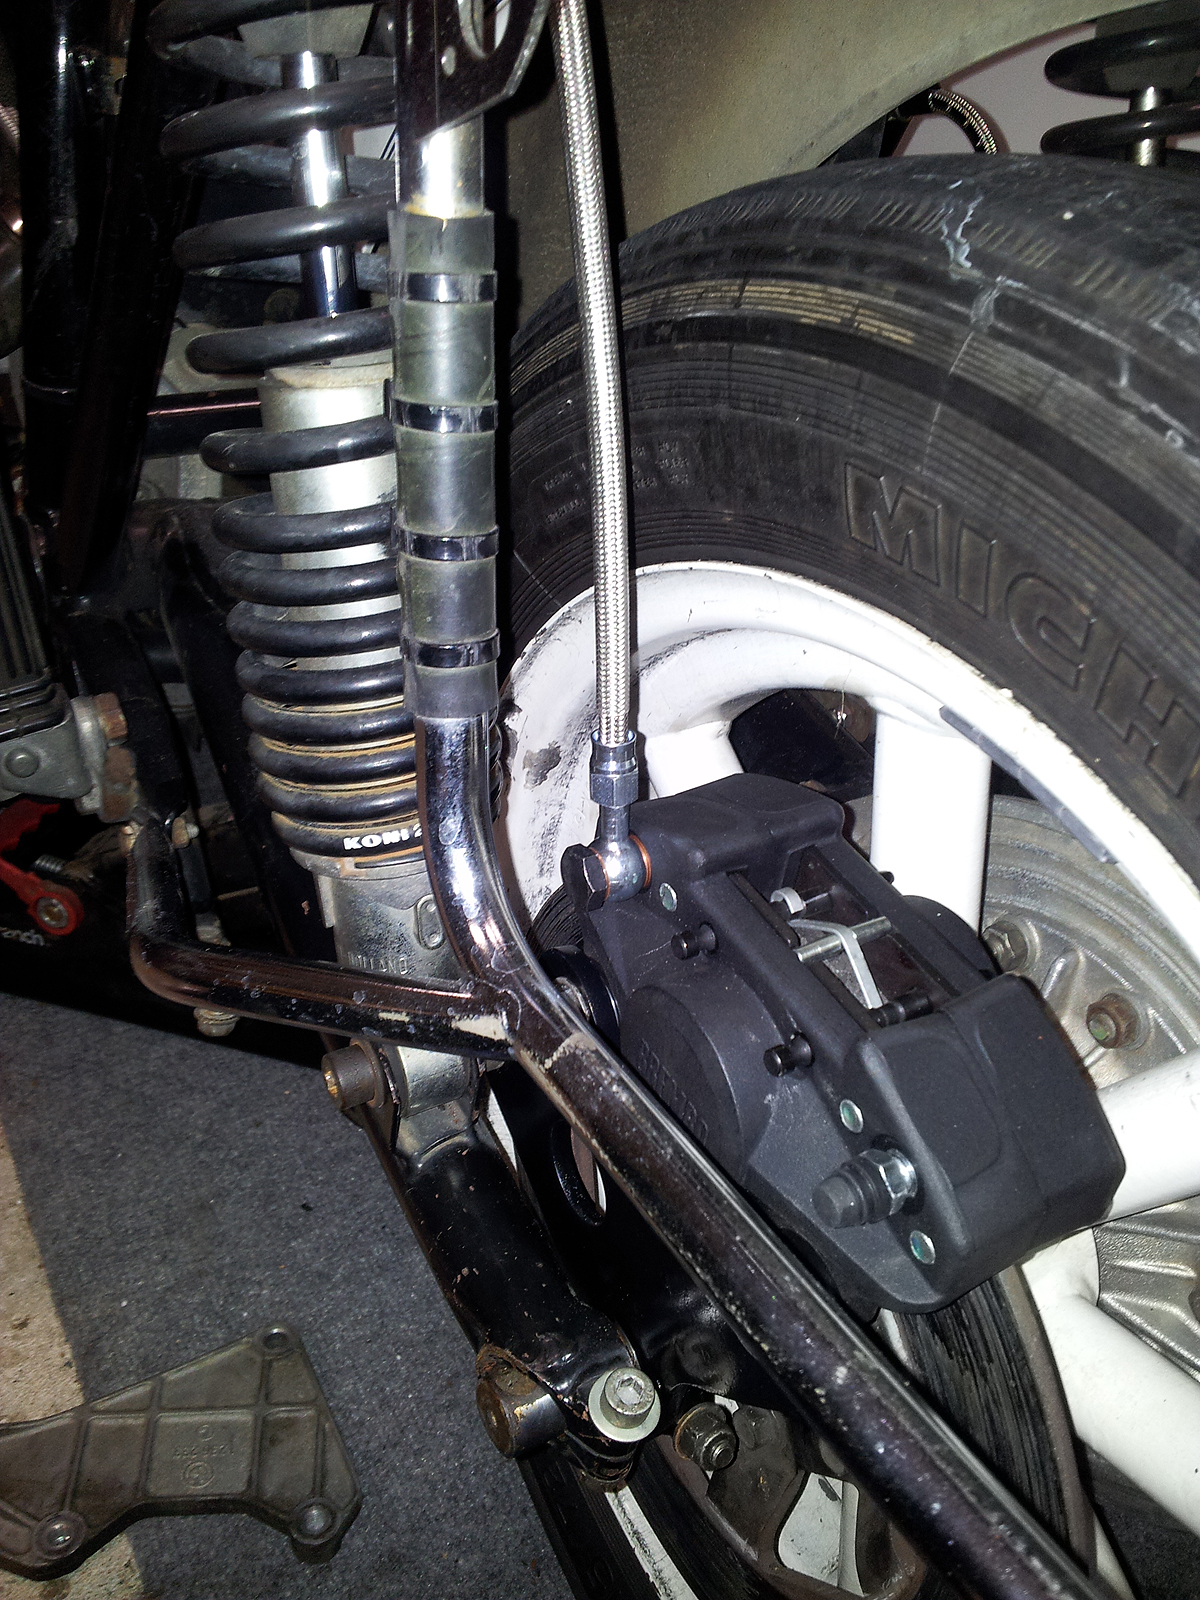
I talked to Bud Provin of
Nickwackett Garage in Vermont. He's an airhead
specialist who has sidecar experience, and he also makes brake lines. In
addition to advice during the project, he provided a length of braided
steel line with banjo fittings. One fitting is fixed; the other can be
adjusted so you do not kink the line when installing. Just fit the fixed
end and attach the adjustable end after, well, adjusting it to meet up
flush with the other endpoint.
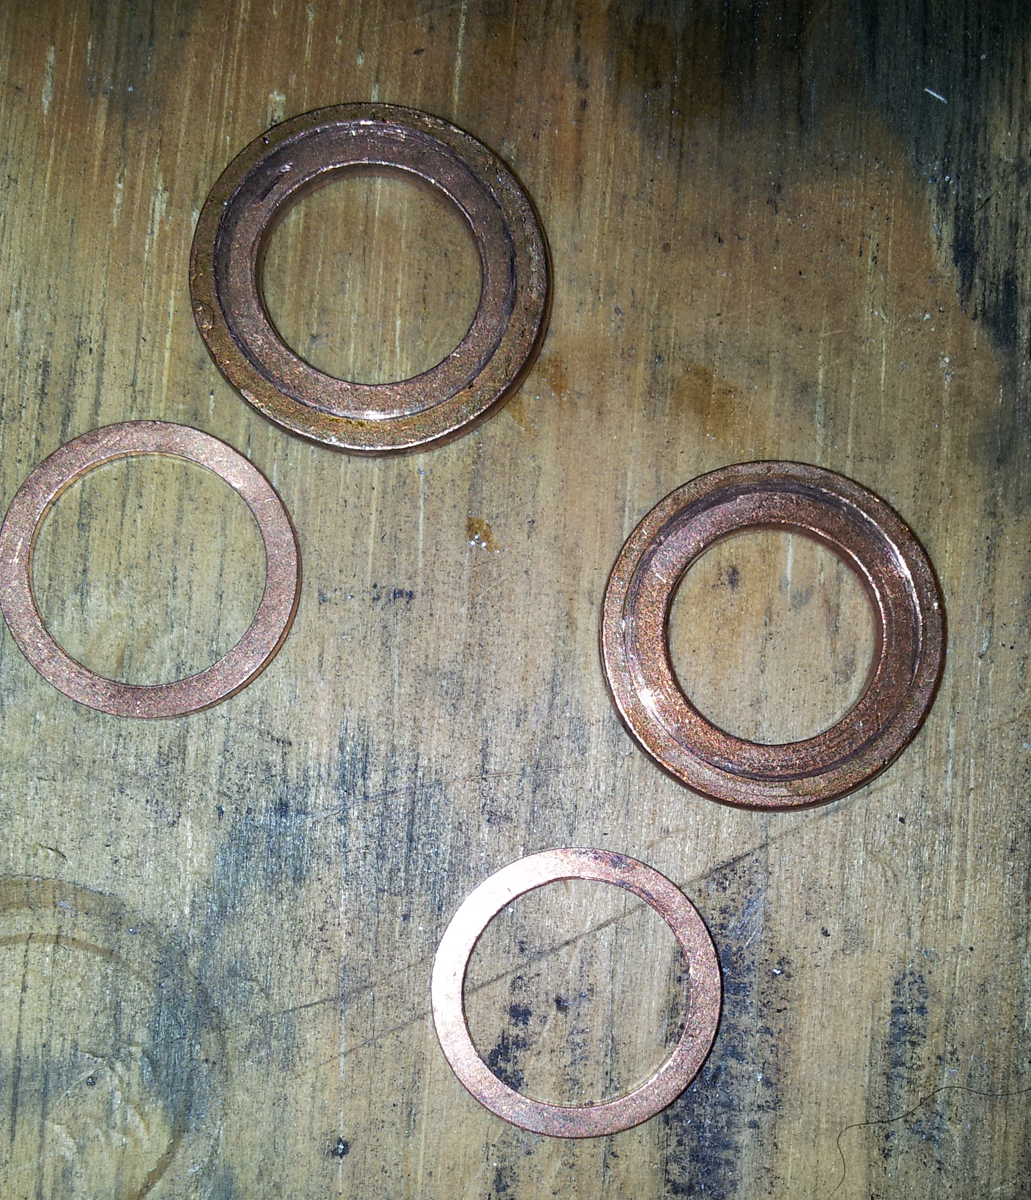
I also bought new 10mm banjo bolts and copper crush washers from Bud. A
word about those washers - it's worthwhile to get the thin kind BMW
uses. I have used generic 10mm copper crush washers from an auto parts
store, which are wider. You'd think they would seal better, having more
metal and all. They don't. They're crap. Fluid will leak. Use the thin
ones. And don't reuse them. Bud sells them at a very reasonable price
relative to what your dealer will charge.

The thin washers actually seal better!
Once plumbed, the exhaust goes back on, and all that's left is to bleed
the air out, which is a monumental chore as you have fluid going in
different directions. Be patient.

With the brakes bled and everything torqued down, it was time for a test
ride. Everything felt good, but as I am not the primary operator, I had
to ask the expert, who insisted that her fellow test pilot go along.
The results were positive from both parties.

And celebration was in order.
A couple of days later, we took it to the
Capital City Bikefest, a small
event that we help organize, and entered it in another show. This time,
with functioning brakes, it took second place, because Lady Luck also
has a sense of irony. But it still looked good. And more importantly -
it finally works!
Next up: Changing over the front calipers to something rebuildable.
The
front's a little trickier because the caliper needs to move slightly, so
it "floats" around the disc with a bearing at the axle and a stay
mounted to the fork. The P108 won't work with a simple drilling of the
existing mount because it's too close to the disc; the rear used a
spacer to move the EML caliper over to the disc. Here are some of the
ideas I'll be working from.
EML converted by Bud Provin of Nickwackett Garage, using a thick
steel plate riding on BMW wheel thrust sleeves, with spacers to
move the caliper inboard to the disc. |

Stock later EML using a Brembo caliper. The plate is welded onto
a tube that carries the bearing and bent inward so spacers
aren't necessary. |

Return home