Flash of Inspiration
2006 Sprint 1050ST Rear Turn Signal Swap
One of the first mods any new motorcycle owner does is add "custom" turn
signals. It's a relatively cheap and easy way to put one's personal stamp on
the machine, and often involves a lot of irreversible cutting of the wiring
harness plus electrician's tape. Lots of electrician's tape.
This is not that story. Rather, it is one of broader import, reinforcing the
idea that those who design motorcycles have never actually worked on one,
much less ridden.
The history of engineering is full of famous design flaws - the space shuttle o-ring
that couldn't withstand freezing temperatures, the square windows on the
original DeHavilind Comet airliner that were prone to cracks at the corners.
While not nearly as dire in their consequences, minor design flaws are a
part of everyday life, especially if you happen to ride a Triumph Sprint.
The Triumph Sprint 1050ST is a nearly perfect motorcycle, but from the
beginning it had three annoying design issues:
- The "projector beam"
headlights, while very trendy at the time it was introduced, were,
functionally speaking, utter crap,
making high-beam a necessity if you had any interest at all in seeing the
road ahead at night.
- The saddlebags, while elegant and clever, will not hold
a full-face helmet due to the elegant and clever latch and pop-up handle
mechanism, most of which was enclosed in a bulge inside each bag that
severely limited cargo space and shape.
- Finally,
the rear turn signals — or as the English call them, "indicators," because
they have different words for everything — were placed so that when the bags were attached, they
rubbed against the case and bent the flexible stalks. In addition to
creating a divot in the case over time, the rubber on the stalks gets brittle
and breaks.
Interestingly, the Sprint GT - Triumph's update to the 1050, still produced
but no longer sold in the U.S. because we can't have nice things - has normal
headlights, larger bags, and rear indicators that are well clear of any
interference, so obviously they learned something.
Meanwhile, in ST land...
|
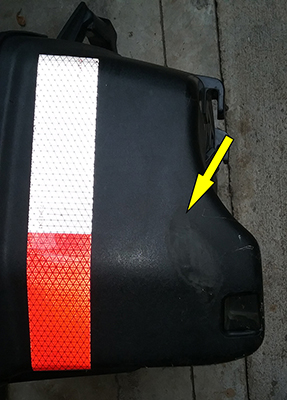
Here's a shot of the indicator with the bag
installed.
 |
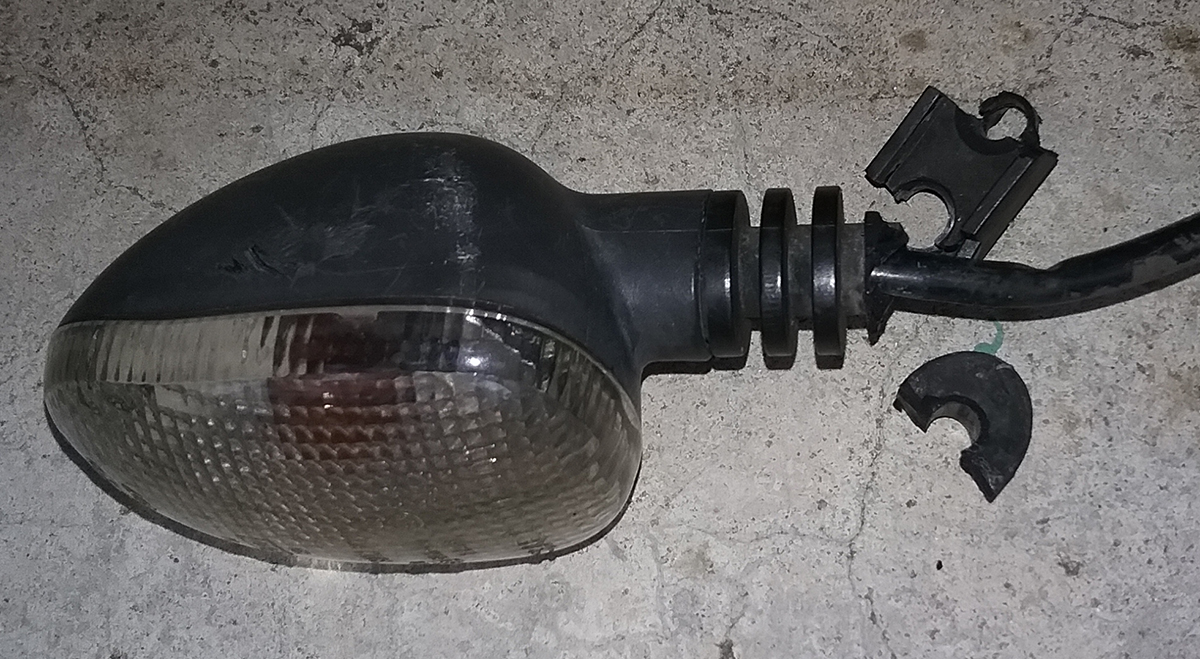
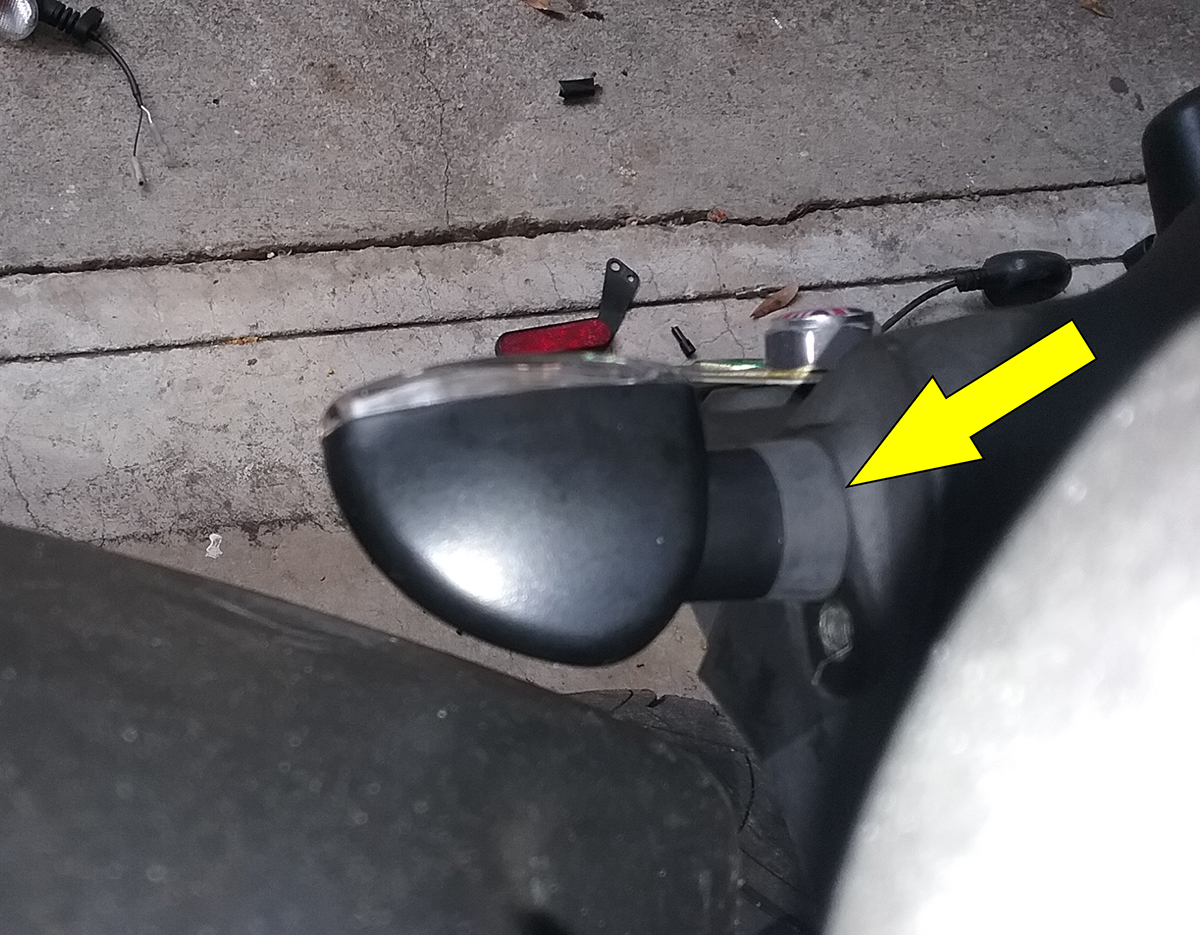
And here's what it looks like after a few years. That's an
actual crater there where the arrow is pointing.
 |
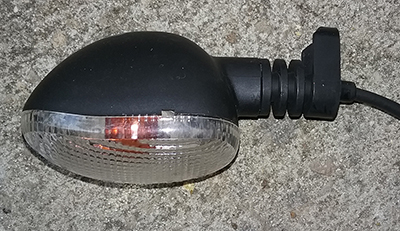
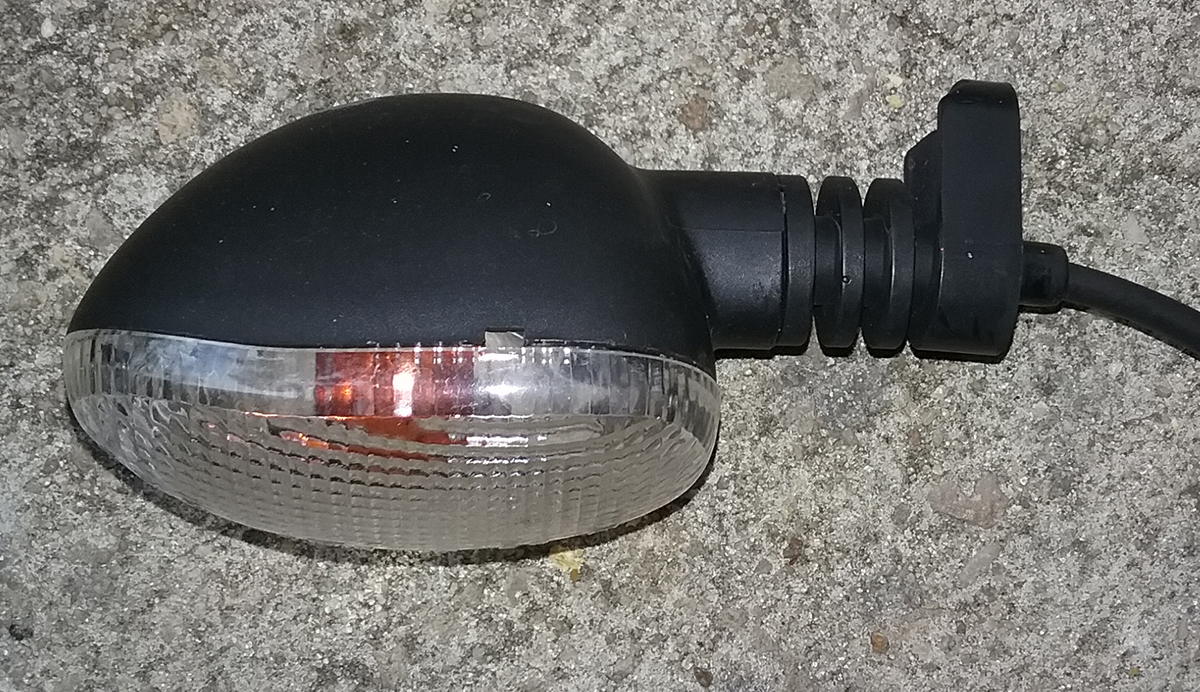
New Triumph indicator |

No-longer-new Triumph indicator |
New Triumph indicators are $46.92. They will last a few years, and then
break. You can find them used on ebay for $20-30 or so, but they will be
used, and old, and will in all likelihood snap off shortly after they are
installed. After going both routes over the years, I finally decided to try
a different solution.
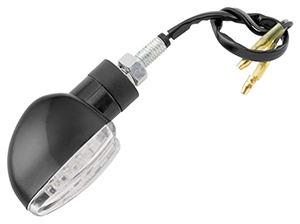
That's a BikeMaster mini turn signal, available from nearly
any local bike shop, or Amazon and eBay if visiting bike shops make you
nervous. They are $15 for a pair, give or take a buck. Yes, you can pay up
to $50 - each, mind you - for Rizoma or other designer brands, but this is a
workhorse, not a showhorse, so I'm not bothered what anyone thinks, as long
as they know when I'm signaling a turn.
The BikeMaster lights are available in
all manner of shapes, lens colours, and lighting types. I opted for a
conventional bulb over LED because annoy me and I'm too lazy
and cheap to add a special flasher or an inline resistor to slow it down. My hope
was that the smaller indicators would not interfere with the bags.
Changing out turn signals is one of the easiest jobs there
is. Doing it right - without gobs of electrician's tape and hacking up the
wiring harness - is a bit fiddly, but worth it in the long run.
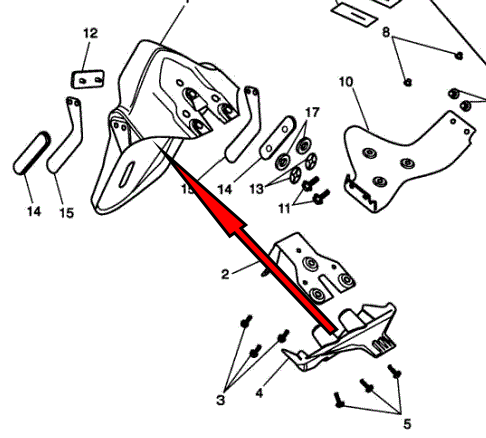
The first step is removing the old indicator, held on by a
single bolt, which is hidden behind a cover — because OF COURSE it is — on the rear
fender (or what the British call a "mudguard," because again, they have
different words). The cover, part number 4 on the schematic below, is held on by three
allen screws (part 5), two of which are hidden away in deeply recessed caves
where you can't actually see them, much less get an allen key into easily.
Keep trying. Even a blind squirrel finds a nut once in a while and
eventually you'll get the screws out and the cover off.
In fairness, the cover is there to protect the wiring to the tail light,
indicators and license plate light from all the crud thrown up by the tyre
over the life of the bike. Go ahead, take it off. Surprise! It's filled with
crud anyway. And wires. Clean out the crud, then unbolt and unplug the first indicator - do
them one at a time, so you can differentiate the left and right sides more
easily.
 The
first thing you notice is that the Bikemaster indicator fits the stock hole,
so no drilling is required. The second thing you notice is that the stock connection will
not work with the aftermarket signals. Because OF COURSE they don't. In this case,
the stock plug from the harness is a male, and the plug coming from the
indicator is also male. So everything is going to get neutered and we'll
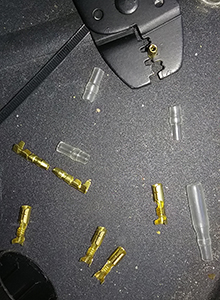
start again. Fortunately, I have a moderately decent kit full of connectors
and covers from
Cycle
Terminal, who not only sell individual bits, but collections of bits as well. I
went with bullet-style terminals, as that was close to stock. The
first thing you notice is that the Bikemaster indicator fits the stock hole,
so no drilling is required. The second thing you notice is that the stock connection will
not work with the aftermarket signals. Because OF COURSE they don't. In this case,
the stock plug from the harness is a male, and the plug coming from the
indicator is also male. So everything is going to get neutered and we'll
start again. Fortunately, I have a moderately decent kit full of connectors
and covers from
Cycle
Terminal, who not only sell individual bits, but collections of bits as well. I
went with bullet-style terminals, as that was close to stock.
The first step is to strip off about 3mm, or 1/8 of an
inch of insulation. Seriously - you don't need much. Each connector has
two sets of tangs to crip - one holds the bare wire, while the other
holds the insulation. You only need a bit of bare wire as long as the
tangs are wide.
Once you've stripped the wire, slide the insulating
cover on and further up the wire. It will not go on once you've crimped
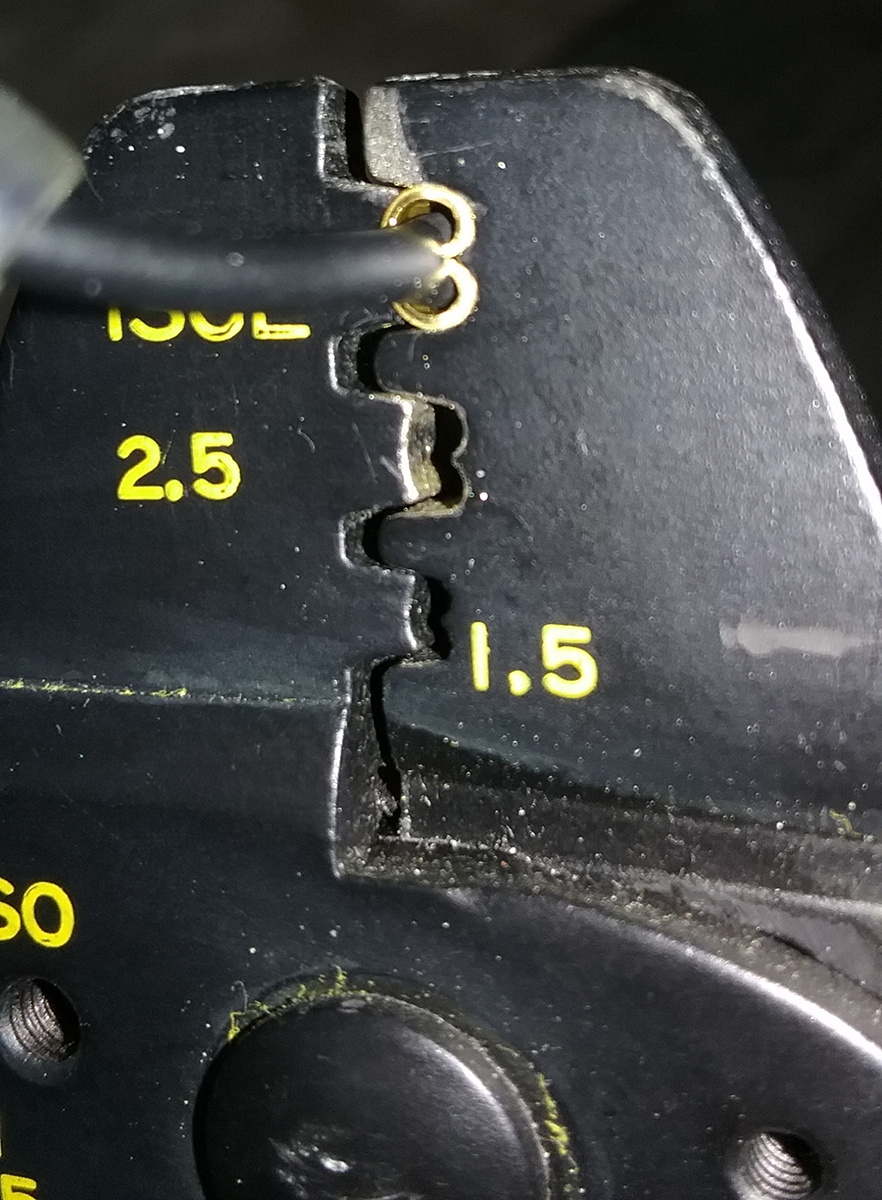
the connector. Once that's in place, I set the connector in the crimper.
Note that in this case, I used my
Goodspeed Motoring
crimping tool, because the wires are tiny, the spaces are tight and it
give me finer control over the crimp. Lay the wire into the connector
and crimp the bare
wire first. Give it a tug to make sure it's secure. It may take a few
tries until you get used to how to do it.
After the bare wire is crimped and you're happy with the
connection, crimp the insulation.
Use a larger crimp, since you do not actually want to pierce the
insulating material. This is primarily for strain relief.
Once you've secured the connector, slide the cover over
it. The cover for the male end will leave the plug sticking out. The
female connector will be fully covered.
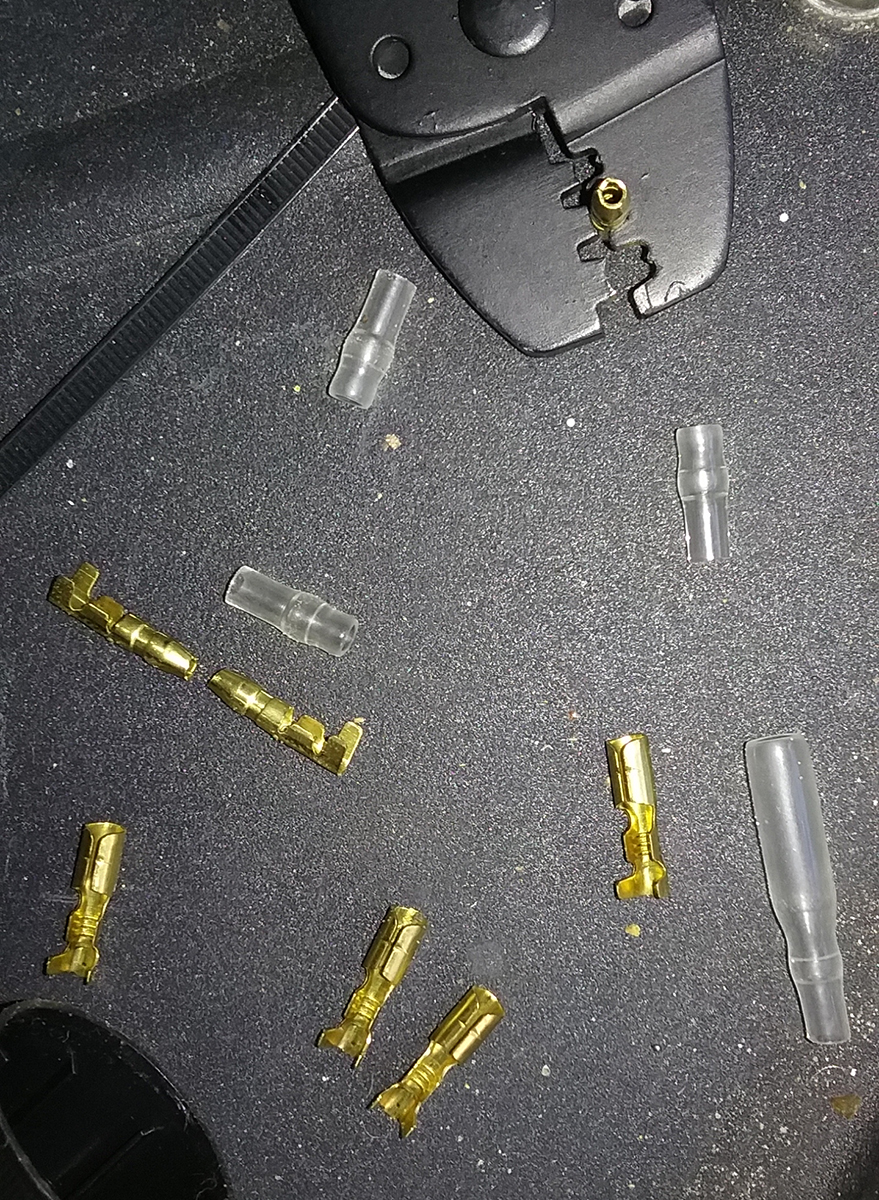
Here are a few shots of the process.
|
One wire stripped, one done |

Crimping the insulation |
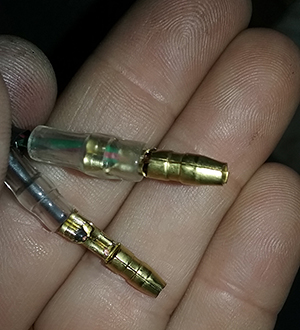
Nearly there |
Note that I have not soldered anything. Sometimes,
soldering is best, but while it is certainly possible to solder the
crimped connection, it's not really cost-effective here. The current is
very low and there is no strain on the connection. The factory
connectors were not soldered either, and they never failed, so I'm
comfortable with just crimping in this application.
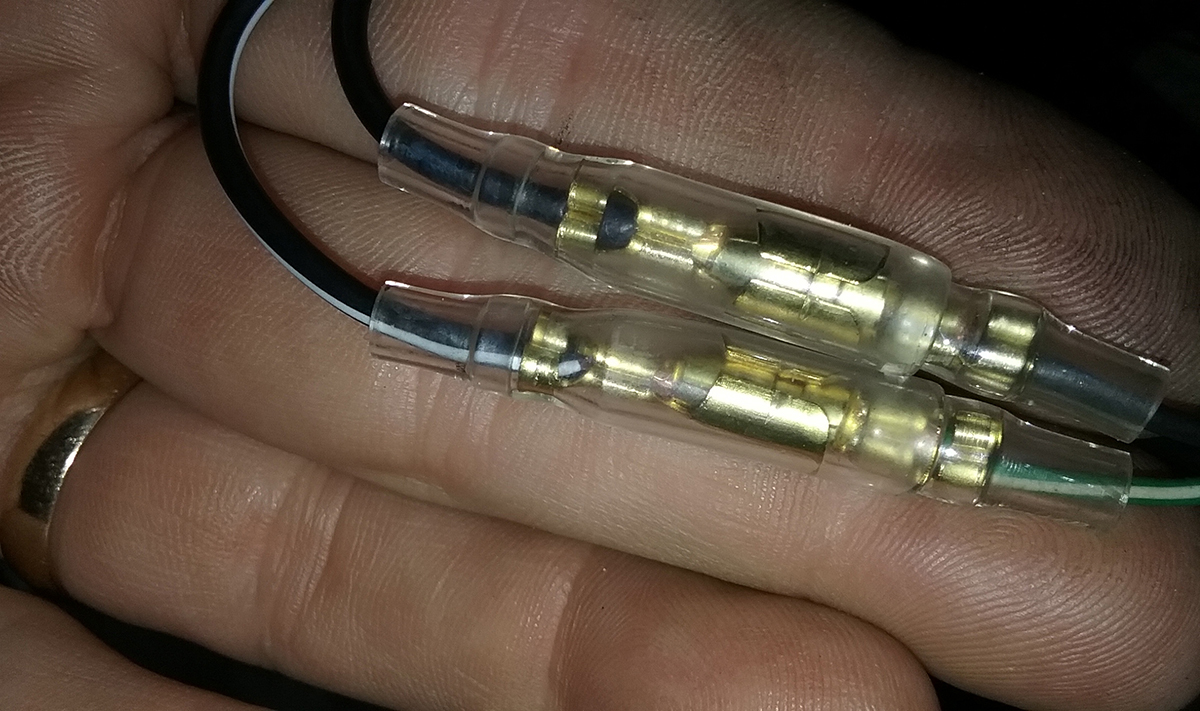
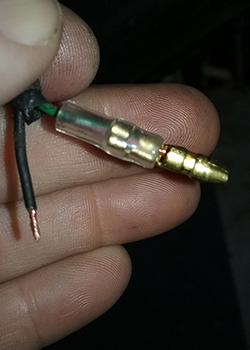
Here's what it looks like when everything's
finished.

Note that you'll see all manner of different coloured wire used in
various harnesses. The important thing is that solid black or brown are
most commonly used for ground wires or, as the British call them,
"earth," because, you know.
Usually the positive wire will have some sort of stripe on it. In this
case, as shown above, positive from the indicator is black with a white
stripe, while positive from the harness is green with a white stripe.
Thread the wires through the hole in the mudguard and tighten the
indicator. On these, there is a rubber ring at the end of the stalk to
allow a bit of flex. Tightening the nut too much squashes this,
rendering it useless. Too little means the indicator will fall off. I
went for moderately snug, with a bit of blue Loctite on the nut for good
measure.
Once everything is plugged in, turn the key and make sure the inducators
work correctly, then turn everything off, tuck the wires in behind the
cover and bolt it back onto the mudguard.
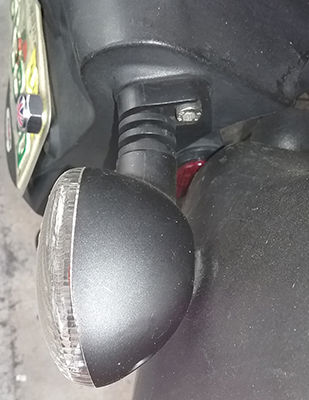
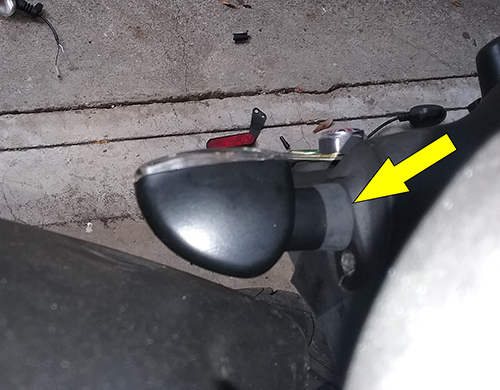
With the new signals on and the bags installed, we now have daylight
between the two. The yellow arrow below points to the rubber
grommet. This allows enough flex to install the bags, because they do
not go on straight and instead must be tilted first, then slid onto a
mount. Because the designers have never actually used panniers.
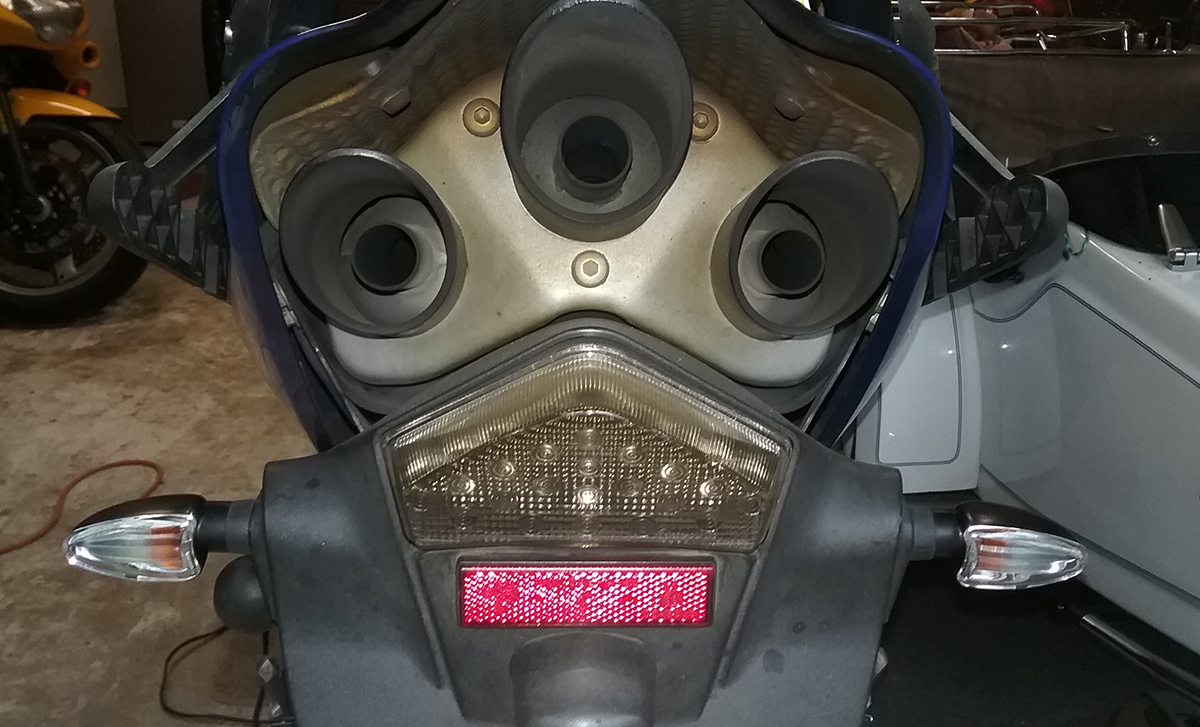
And the finished job, none of which would have been necessary if they
had just moved the original indicators a few millimeters to the rear.


Return home |