Triumph
TT600 Stator replacement
I covered some of the electrical gremlins endemic to modern Triumphs
HERE in "The Ghost of Lucas,
discussing some of the methods for diagnosing problems and some of the
pitfalls. The usual culprit is the stator. We own four modern Triumphs
and until recently, three had required new stators. Not wanting to be
left out, my TT600 finally joined the club and I thought I'd take the
opportunity to go a little more into what's involved in replacing a
stator once you've determined that is the problem (hint: that is ALWAYS the problem).
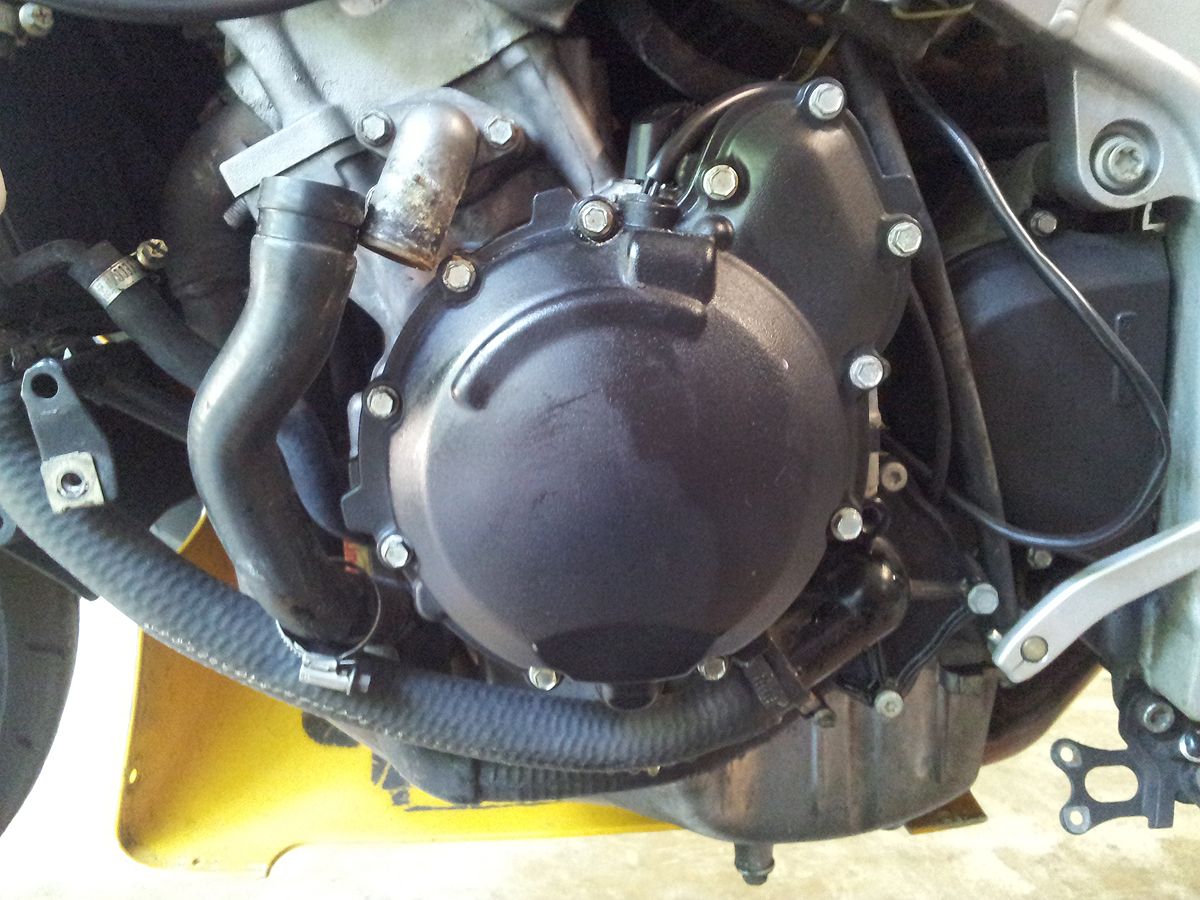
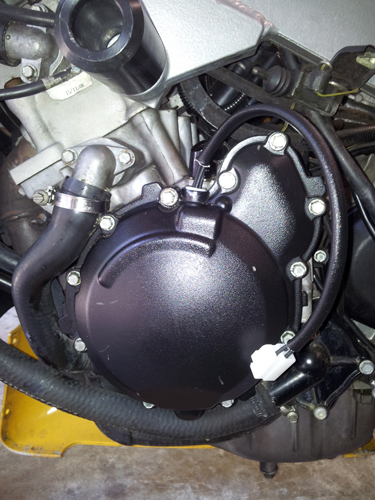
First, remove the seat, disconnect the battery and remove any bodywork
that's in the way. This will give you a good view of the stator cover on
the left side of the engine. It is held on in typical British fashion by
a bunch of bolts (8mm, in this case).
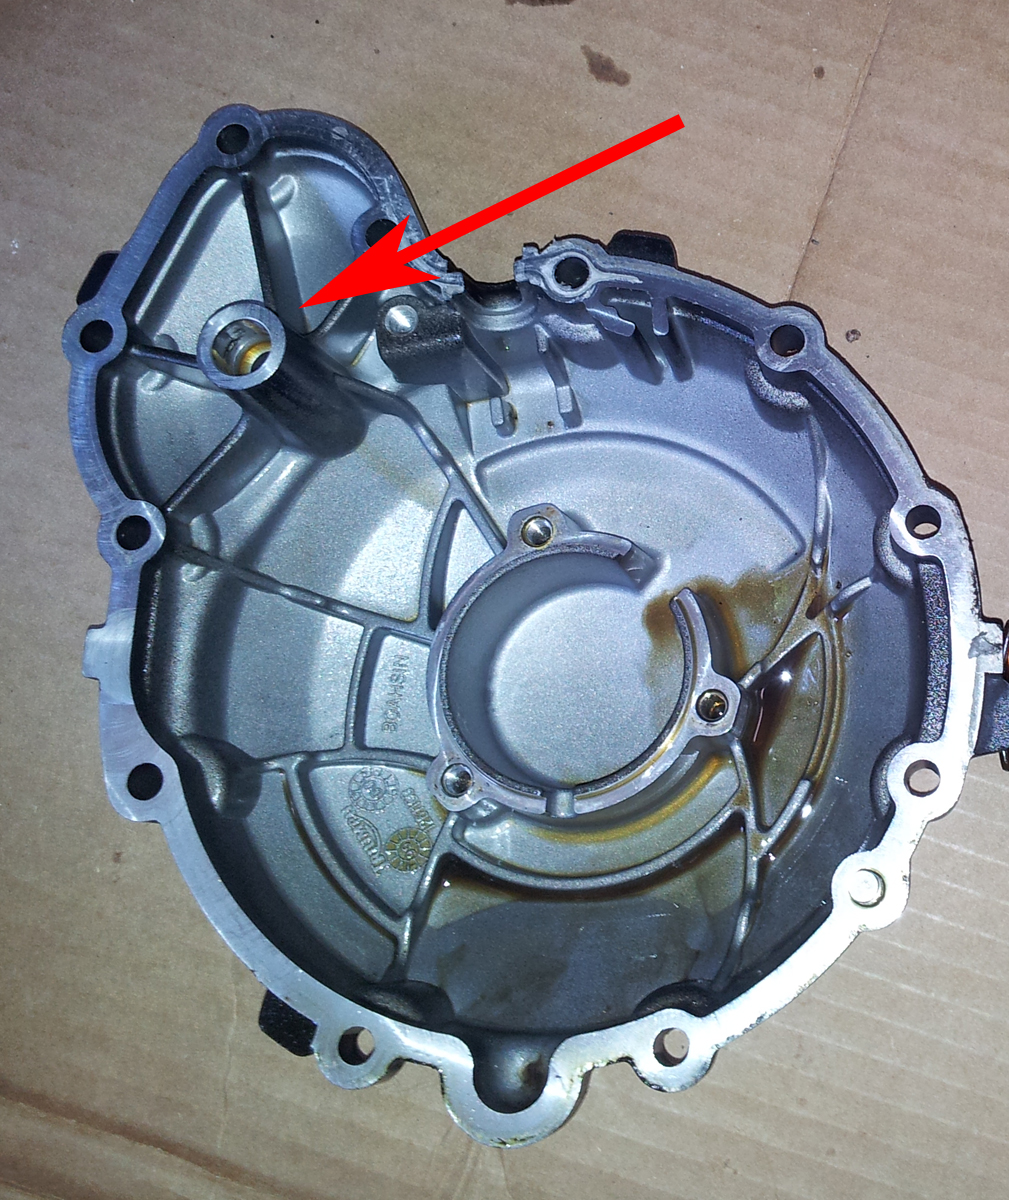
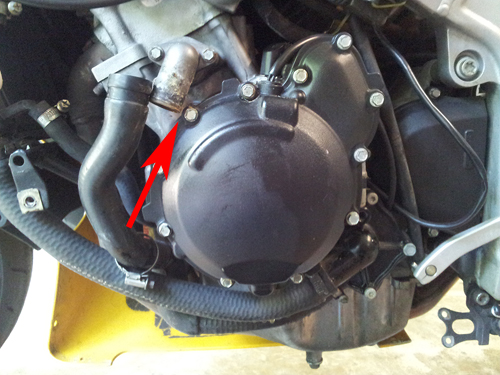
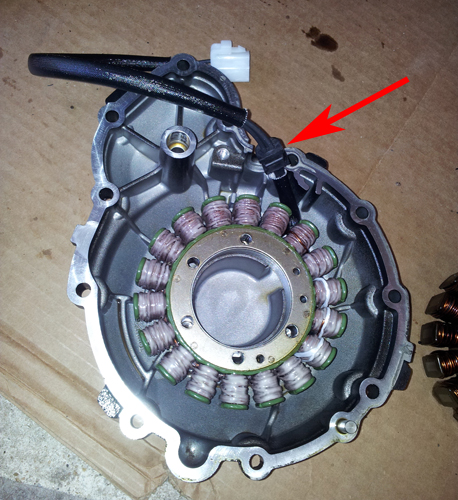
The arrow on the left points to your first problem - one of the bolts is
behind a water hose, which must be removed. To do this, you must drain
the coolant (into an appropriate container) by opening the drain valve
on the water pump, indicated by the arrow on the right. In the next
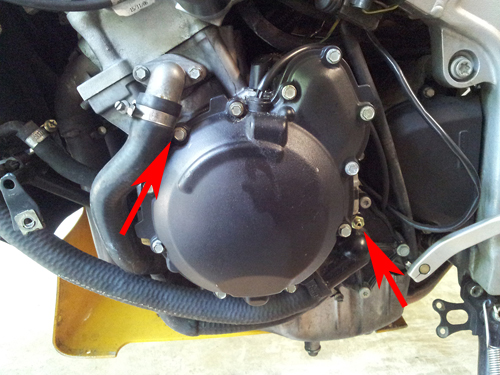
photo, you can see the hose removed, allowing enough room to get a
socket on the bolt, and reinforcing the idea that the people who design
these machines have never had to do any actual maintenance on them,
because having to drain the coolant just to get to the stator is plain
stupid engineering.
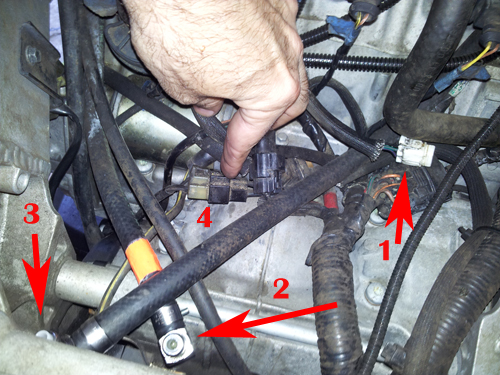
But you're not ready to remove the cover just yet. You also have to
remove the gas tank in order to gain access to the plug that connects
the stator to the voltage regulator. The tank is held on by one bolt in
front and two at the rear. You also have to disconnect two fuel lines
and the electrical connector for the fuel pump. In the photo below:
1. Fuel pump connector
2. Fuel line (marked with tape, connects to the inlet marked "red")
3. Fuel line
4. Connector between the stator and regulator/rectifier
Once you've unplugged the connector, remove the bolts and take off the stator and cover, as well as the
metal gasket. Note that it will take a bit of effort, since the stator
will want to stay on due to the magnetism of the rotor. Also, watch out
for the gear assembly connecting the starter motor to the crank shaft -
it may fall out (more on this in a bit).
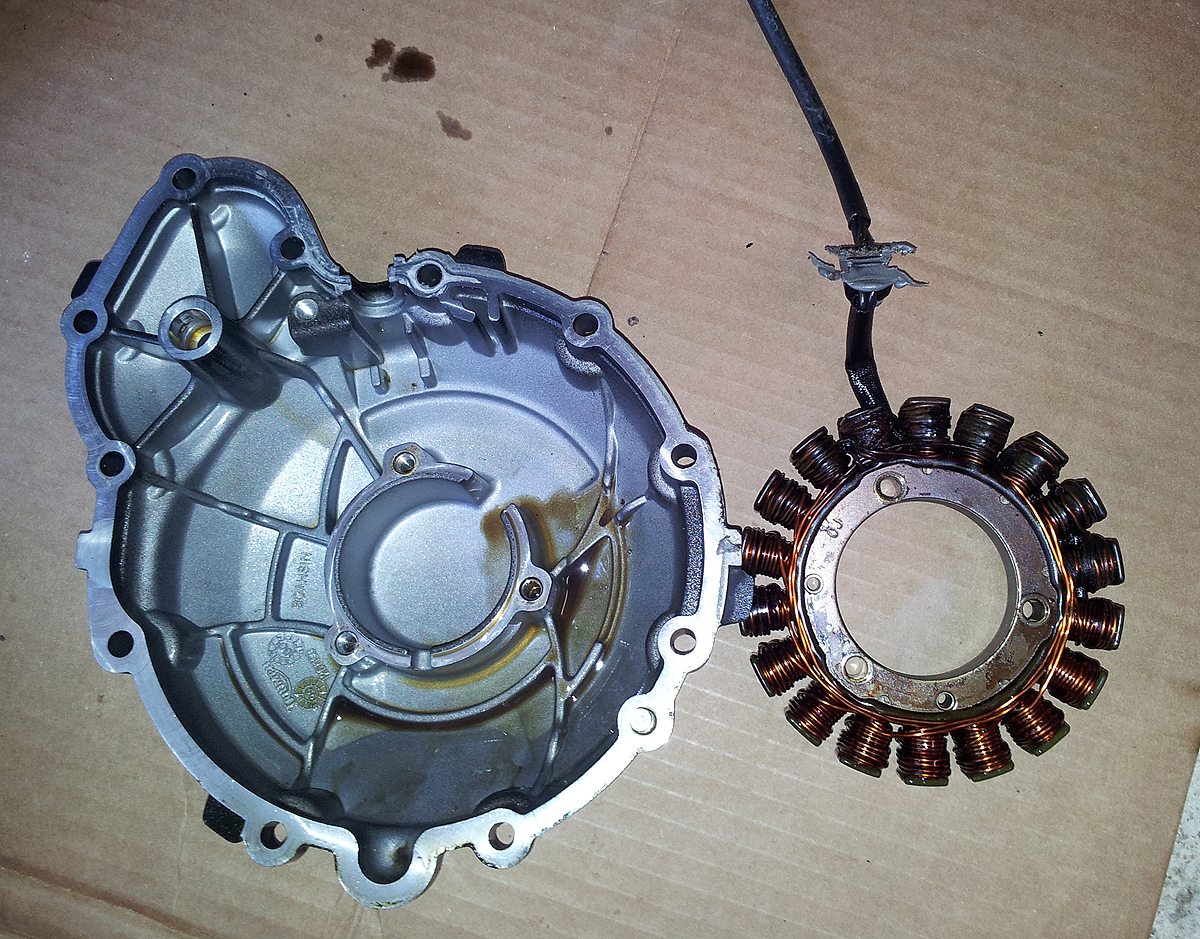
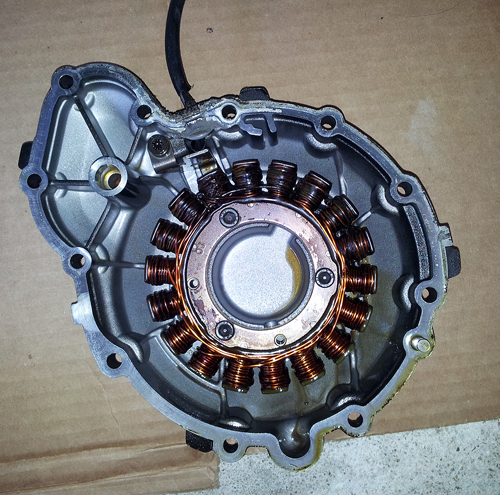
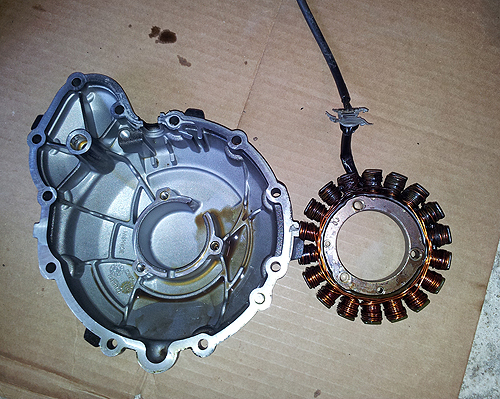
Here's the stator cover removed, with the stator attached by three bolts
on the inside ring. Note the black, crispy burned bits at the top.
There's your problem.
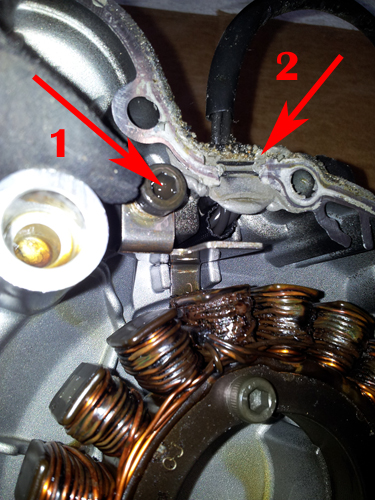
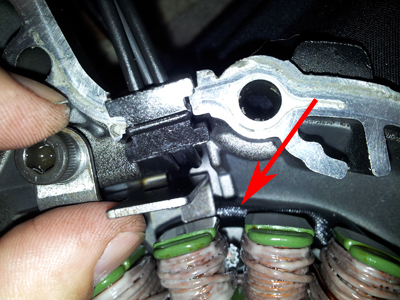
Before removing the stator, unbolt the retaining clip that holds the
stator wiring (1 in the photo below), pull out the rubber plug and
clear out the silicone sealant (2 in the photo).
Now the stator can be taken out of the cover. Note the rubber plug with
the silicone sealant on the wire coming off of the stator.
Clean the inside of the cover, as well as the engine casing, then place
the new stator in the cover. This part is from
Rick's Motorsport
Electrics. It's about $140 and I haven't had one fail. The Triumph OEM
part is $459, and I've had four fail. Make your own purchasing decision.
Note the rubber plug on
the wiring. You may have to adjust this up or down so that you have
enough room to feed the wire behind the stator and beneath the retaining
clip. Adjust this first, before fitting the clip.
Here's a closeup of the retainer and plug. The wire runs behind the
stator for about an inch, then is held in place away from the rotor by
the retaining clip.
Replace the three bolts holding the stator to the cover.
Now, make sure the starter gear is in place. It turns on a shaft that is
held in place by inserting it into a hole in the engine case, and
another hole in the stator cover. Here's the hole in the stator cover
for the gearshaft.

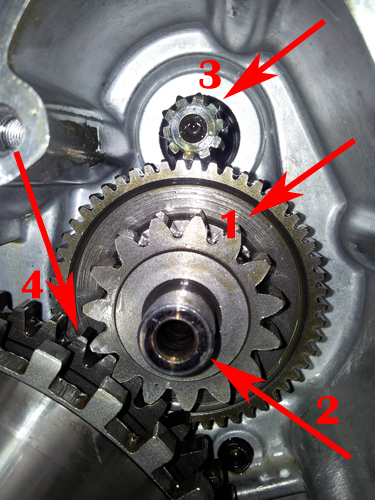
Fit the gear and shaft in place on the engine case. The gear (1 in the
photo below) rolls on the shaft (2) which connects the starter drive (3)
to the starter clutch gear (4). Everything must line up perfectly in
order to fit the shaft. The starter gear will only rotate one way. You
can turn the starter drive gear in either direction to get the teeth
lined up properly.
Once the gear is in place, apply silicone sealant to the plug around the
stator wire and install the cover, using a NEW metal gasket (it's a
crush type and should only be used once). It usually goes right on if
you've gotten the starter gear assembly in place properly. If you
haven't, keep trying. It will work. Here's the cover back in place.
Plug the stator wire back into the rectifier, reattach the water hose
and close the drain plug, reinstall the tank, refill the coolant and
reattach the battery cable. Start your engine and make sure it is
charging. Have a beer.

Return home