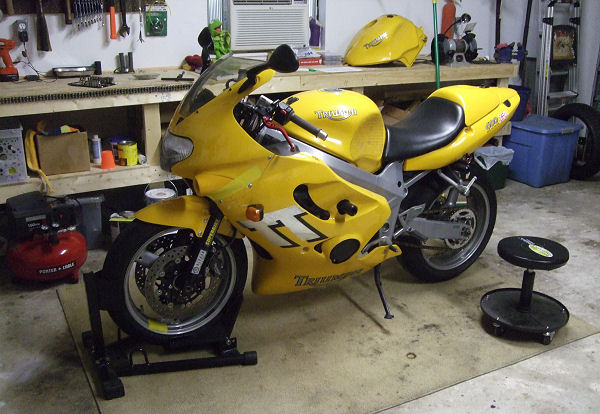
2001 Triumph TT600
Valve Adjustment and Major ServiceAll the usual caveats apply - don't try this at home, RTFM before doing
anything, all service should be performed by a Trained Triumph Service
Technician, take lots of pictures and notes so you know how everything goes back
together, etc.
That said, it's a fiddly though not impossible job. The main thing is to take
your time and be thorough. Double-check and triple-check everything.
First, a little backstory: I bought my TT600 years ago as my
first track bike, and it's served me well.
I paid $2K, and for four years, I never did anything more to the engine than
change the oil and it ran like a top. Then I
started riding my racing SV more. Then I crashed the SV and broke my thumb.
Meanwhile, the TT sat, neglected but not complaining. Finally, with
a fresh battery but the old gas, I tried to fire her up. It took a while, but
she finally started and ran great once warm. Every time I tried to start it
after, though, she didn't wanna. And when she finally did start, she had a hinky
idle and some throttle weirdness until thoroughly warm. So I decided that it was
time for a thorough service: air filter, plugs, fluids and the dreaded Valve
Adjustment. I've done locknut adjusters on my airhead BMW and
Gill's 250
Ninja. I've done sliding rocker arms and shims on a big Kawasaki ZRX 1200 (click
here to see that job). But this required taking out the cams. It scared me.
But it had to be done, so...
I got it on the stand and on the carpet. Fortunately, my garage is
air-conditioned, which makes a huge difference in my comfort level, and
therefore my patience level, which is very important for this sorta thing. The
right side of the tank is dented - was that way when I bought it. Found a decent
used tank on e-bay for $90, so that got replaced too.
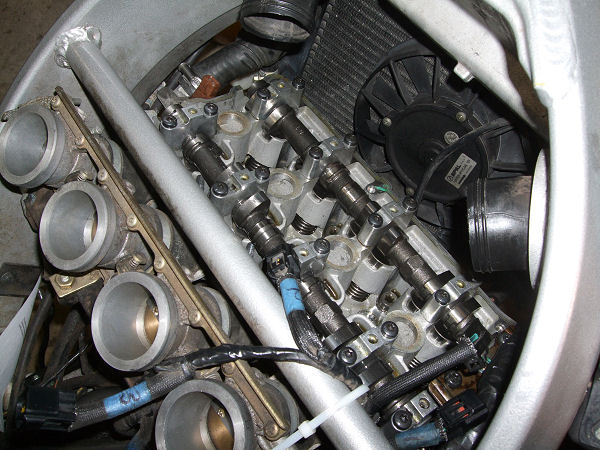
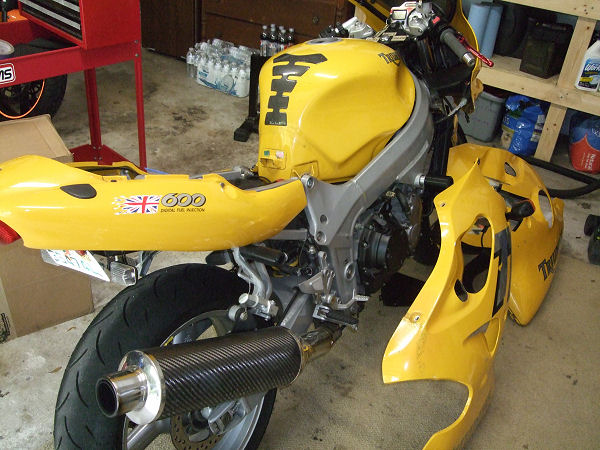
Fairings, tank, airbox and seat off.
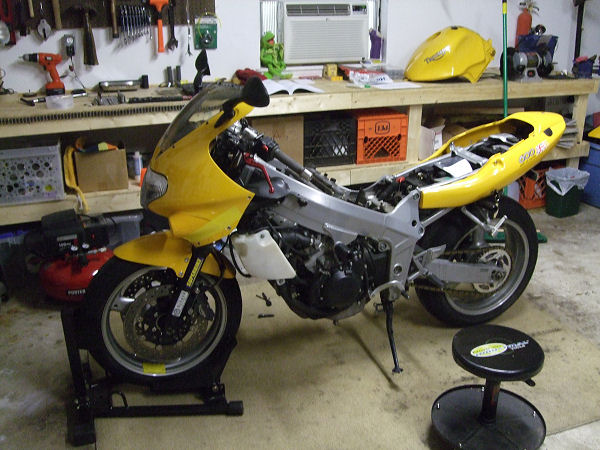
Revealing throttle bodies and a lot of tubing and connectors.
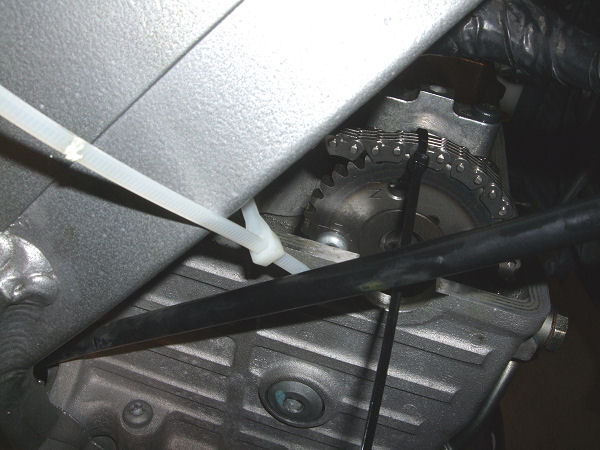
The radiator had to be moved, but not re-moved, to get the valve cover out.
Obviously, we have a li'l leak at the gasket. I suspended the radiator with some
zip-tie to keep stress off the hoses. It's a tight fit, but the cover will come
off through the right side.
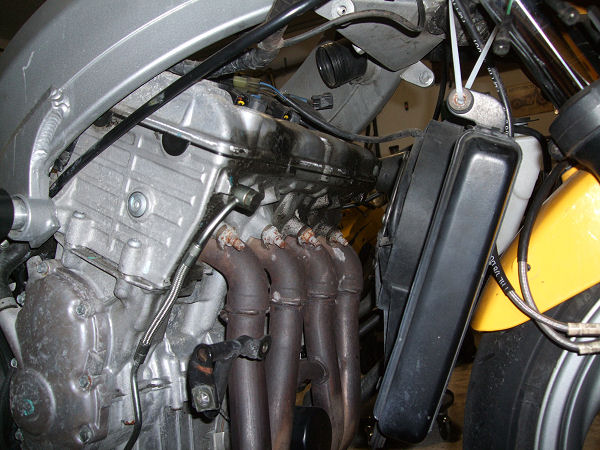
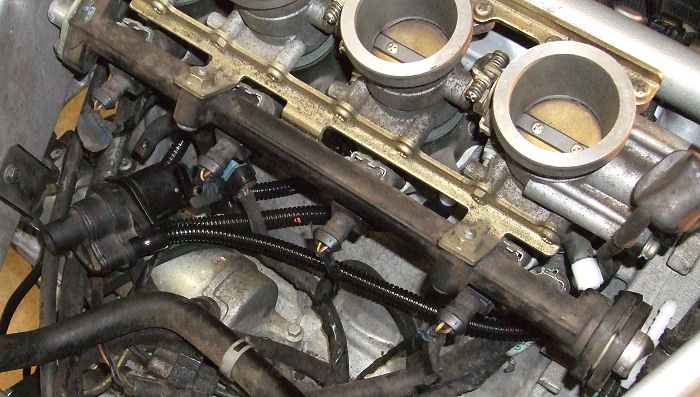
Before I even got to the valves, I found a new mess.
That's one of the tubes from the Idle Air Control stepper motor to the throttle
bodies. There are four of 'em. And every damn one was cracked at both ends,
which would explain the starting/idling problem. A new set was ordered, then
backordered. Just in case, I got some vacuum hose from an auto parts store and
improvised, replacing the old rubber.
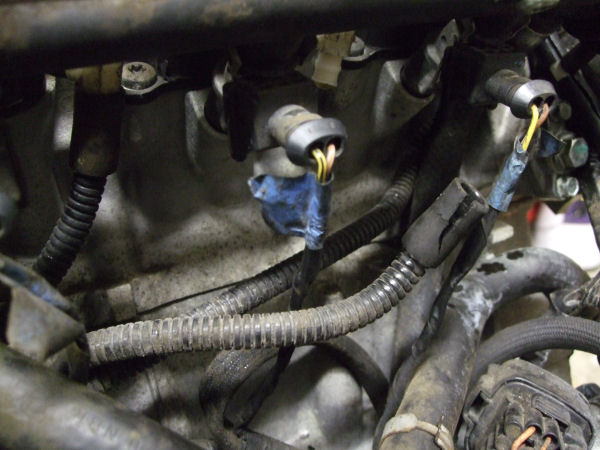
There's also a similar tube running from the FI back to the ECU. It was
completely knackered. I'm surprised the thing ran at all.
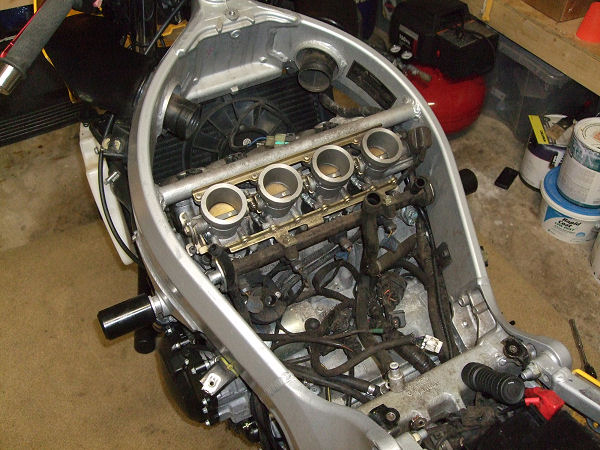
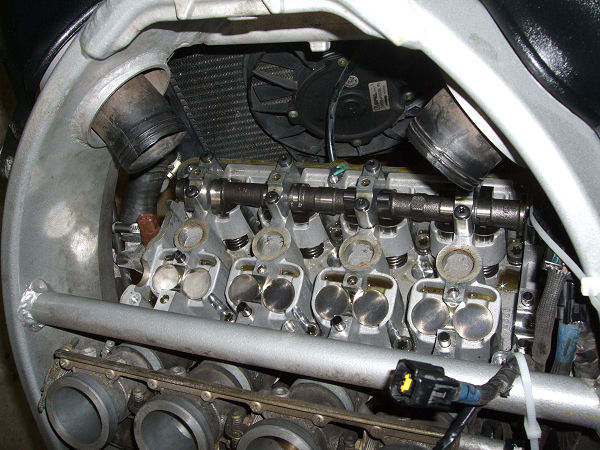
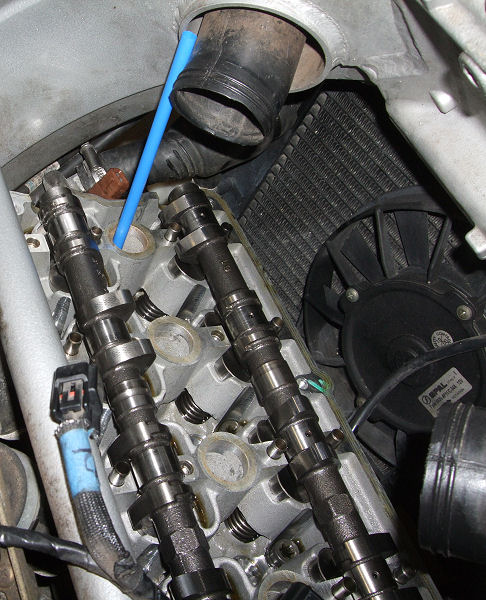
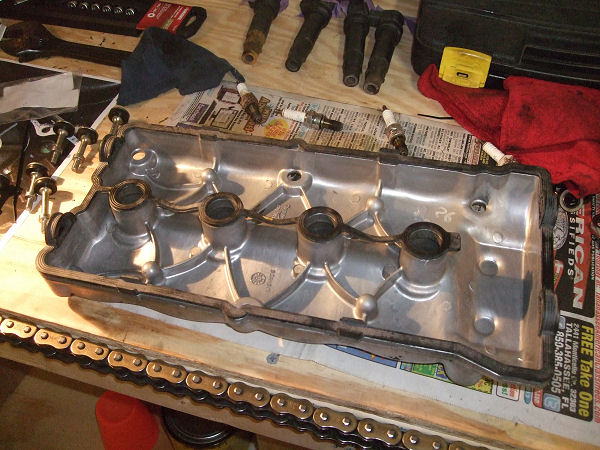
The coils and plugs came out and the valve cover off.
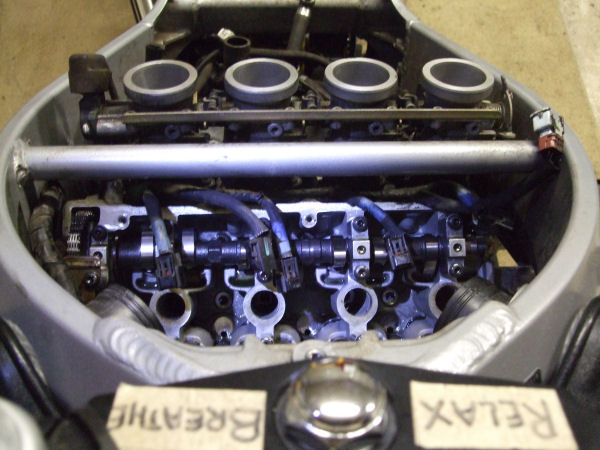
Revealing the guts. This is a cam and bucket. To check clearance, you put it in
second or third gear and rotate the engine with the back tyre until the pointy
end of the cam is pointing away from its respective bucket, then measure with
the feeler gauge. That part's easy.
I was hoping everything would be within acceptable tolerances, but I had four of
16 out of spec (tight). Two on the intake side, two on the exhaust. That meant
the cams had to come out, which sucked. But the rest of the valves were on the
tight side of tolerance anyway, so I figured I'd re-shim everything.
Now, taking the cams out and putting them in ain't that hard. It's a buncha
bolts, and you gotta do 'em in sequence, and a li'l at a time, like a half or
full turn. Easy does it, or things further inside start bumping into each other.
Before that, though, you have to turn the engine so that cylinders 1 and 4 are
at top dead center. Easy enough, since there are handy arrows and markings on
the cam sprockets and the crankshaft. Remove the crankcase breather cover and
turn the crank so that the arrow lines up with the the split between the case
and cylinder, and the markings on the cam sprockets line up with the top of the
head. See the manual for details, but here's how it looks.
First, the cam sprocket marks - lined up nicely.
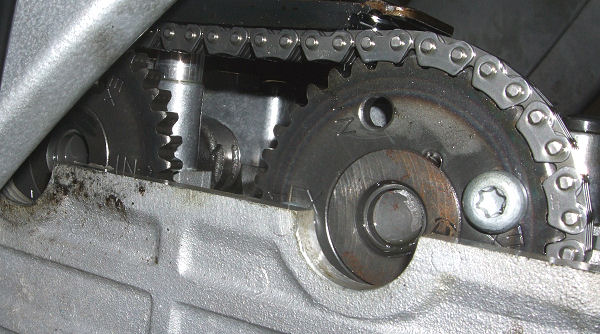
The crank, however, did not align like the manual says it should. This would be
a source of consternation, but more on that later. The important thing is, I
took pictures of all of this before disassembling anything.
Next, you take out the cam chain tensioner (simple - see the manual) and top
rub/retaining plate, and then you start unscrewing the cam caps. This is fiddly,
since while 1 and 4 are at TDC, the valves on the other cylinders are in various
stages of actuation, so there's pressure on the cam and valves. Patience is
required. Progress is slow and methodical. Once everything's undone, the chain
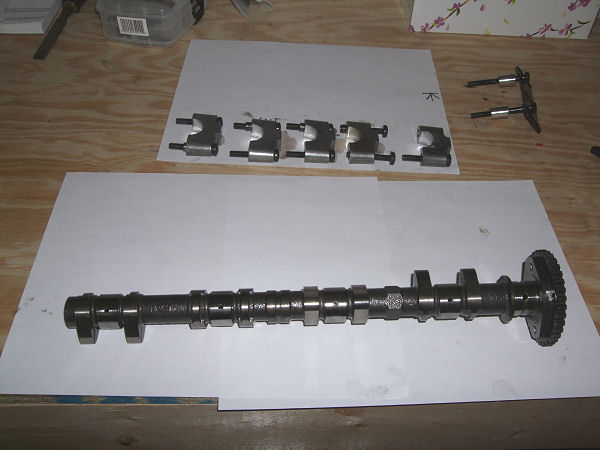
gets pulled off and the cam comes out. You remove one cam at a time, according
to the Holy Book of Triumph. I removed the intake cam first, then exhaust. The
cams, caps and bolts got laid out in the order they were removed. Here's the
first one
When the cam out, you're facing this. With the bits out, the buckets and shims
are easy to get to.
The buckets come out and the shims replaced one at a time. This is the top of
the valve stem, shim removed.
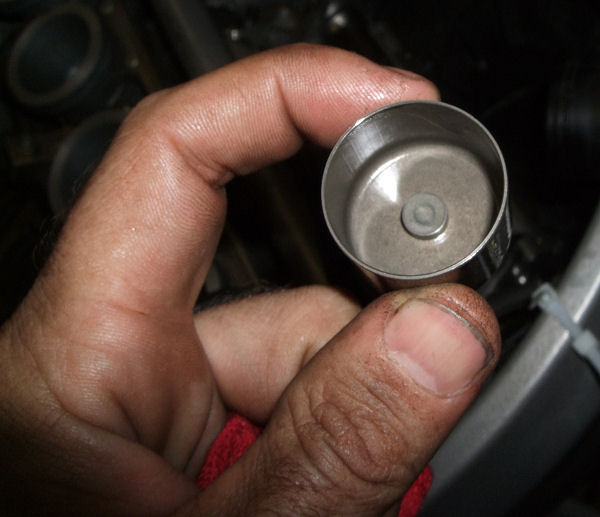
Beneath each of those buckets is a little tiny shim, 7.48 mm in diameter. They
tend to stay with their bucket when removed, thanks to the oil, but be careful -
you don't want to drop one.
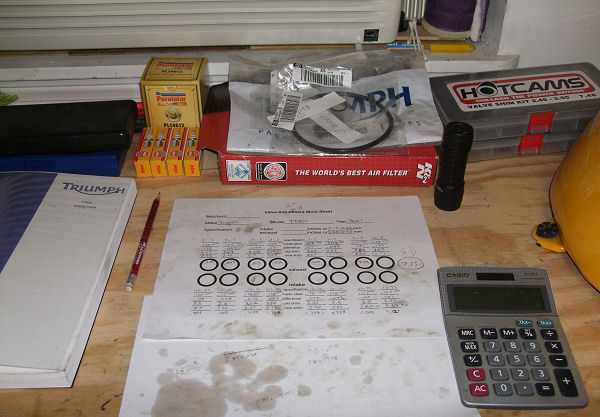
Earlier, all measurements were recorded on a worksheet, along with proper spec
and difference. Did I mention this whole process is very fiddly? As each shim
was removed, it was measured with a micrometer and noted (although the thickness
is printed on them, the printing can wear, as can the shim). Maths were then
performed to determine the correct thickness needed for the replacement shim.
Click here for a worksheet!
Basically take the difference between measured clearance and ideal clearance (I
use the larger, looser end of spec as ideal, as the tendency is to tighten over
time). Then, take size of old shim, subtract the difference from spec (since you
want a larger gap, you're going to use a smaller shim) to get the ideal size of
the new shim.
Simply put:
Old shim size - difference from ideal spec (ideal gap minus measured gap) = new
shim size
or let's say you have an ideal gap of .15mm. Your measured clearance was .11mm.
The difference is .4mm. Your old shim was a 2.6mm.
So 2.6mm - .4mm = 2.2mm for the new shim to achieve the desired gap.
On the worksheet, ideal replacement shim thickness was noted, as was the
anticipated clearance when complete. Since all the math was done beforehand, it
was just a matter of picking out the shim and putting it in, then putting on the
bucket.
And so forth 16 times!
Now, factory shims come in smaller increments, but cost about $8 each, although
some shops will swap shims with you for free. I haven't even been in a shop in
years, so I got an aftermarket shim kit. It has shims in increments of .05mm,
which probably isn't going to give you an exactly matching set of clearances,
but you can get them within 1 or 2 thousandths. Yes, it's a compromise. No,
you're not building a MotoGP motor. Get over it. Or spend $8 a shim.
Now came time for reassembly. Although I had pictures of everything, I was a bit
perplexed as to whether the 1 and 4 pistons were actually at TDC where they were
supposed to be. The Holy Book of Triumph showed pictures of the crank indicator
level and even with the seam between the case and cylinder. But mine clearly was
not. I needed to make sure I was at TDC before putting the cams back in.

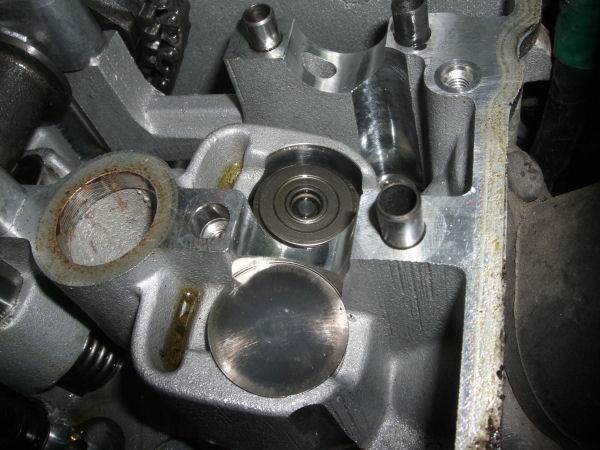
In the picture above, you will notice a hole above the crank where you can see the actual rod,
complete with "Triumph" logo embossed. That's one way to check for TDC (1 and 4
rise and fall together), but after consultation with a friend of mine who knows
more about this stuff and who was exceptionally patient and helpful with my many
questions, I went with the low-tech method of stickin' a straw down the No. 1
hole moving the engine back and forth to find the highest point.
I used one from a Circle K Polar Pop - at 75 cents for a
New-York-City-taxable-sized jug o' soda, they're the best deal going. And they
come with reeeely long straws. And unlike screwdrivers, straws won't scratch the
piston.
Problem now was, TDC appeared to be somewhere between even with the crankcase
split, or just past it, as originally noted. Then things got weird.
I slathered everything with a 50/50 mix of moly lube and engine oil, according
to the manual, put the cams in place and put the timing chain on, but when the
crankshaft mark was aligned with the split at the case - as per the manual -
with the chain pulled tight the marks on the cam were off regardless of what
tooth the chain was on.
However, when the marks on the cams were right, the crank was... just past the
crankcase split, where it was before I disassembled the thing. Since that's how
it came, that's how I decided to reassemble it.
I found it easiest to put the exhaust cam in first, then the intake. However,
the chain would slip and do stupid things while I tried to put the intake cam
in, so I attached it to the exhaust cam with a zip tie to keep things from
shifting off the proper tooth. Worked a treat. The white zip tie is running over
the frame and under the cam chain, loosely, to keep it from falling down into
the case while the cams are out or being moved around.
With both cams in place and the chain loosely draped over the sprockets, it was
time to torque down the cams, progressively tightening each of the 10 bolts on
the caps in the order prescribed by the Holy Book of Triumph. What the scripture
doesn't tell you, though, is that the cams will turn slightly as you tighten
them, on accounta the cam lobes contacting the valve buckets.
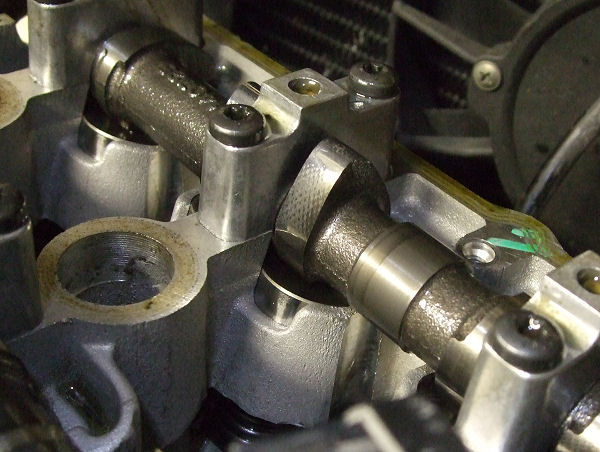
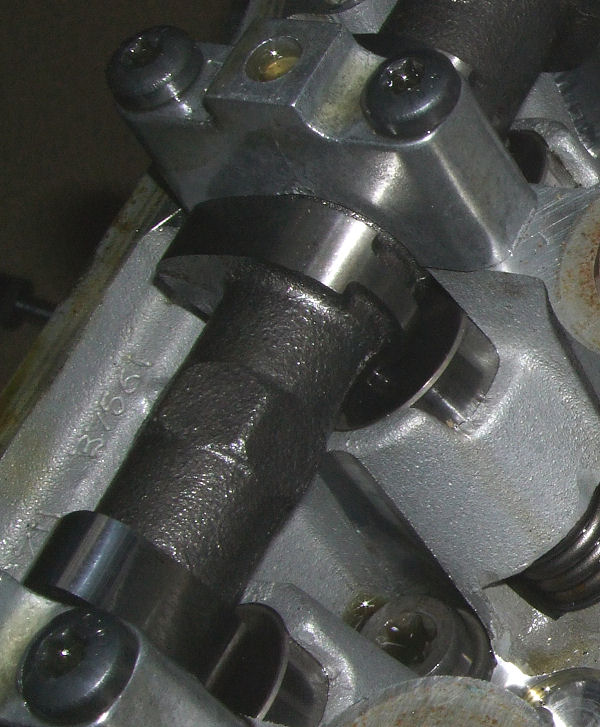
Fortunately, each cam comes with a cast-in hex nut gizmo - see the pic below - so you can make a fine
adjustment with a wrench once the caps are bolted down (and _before_ you tighten
the chain!).
With everything bolted down and aligned, it was just a matter of fitting the
chain and tensioner and the top plate and making sure the thing would turn
through a couple of rotations without anything stupid happening, like valves
bumping into pistons. A couple of rotations, back to TDC, and the marks lined
up.
Fortunately, nothing stupid happened. But when I checked the clearances again, I
found one valve way tight. That meant taking the whole mess apart and doing it
over again, which sucked. Turns out, I'd misread the shim size and used a 2.6mm
instead of 2.5, which made me feel like an idiot for not double-checking the
printed size with a micrometer and then triple checking after that. But since
I'd already done the assembly and disassembly once, I managed to get the cam
out, put in the right shim and get it all back together in about 45 minutes,
which included cigarette breaks and time allotted to kick myself for being
sloppy.
Clearances were re-measured, everything was on the loose end of spec, and the
engine spun without stupid things happening. Time for...
Then we gotta put the covers back on. The Holy Book of Triumph just says to put the gasket
on the cover, place the cover on the head with some silicone in the specified
spots, and tighten. But it ain't that simple. The gasket is a floppy one-piece
mess that includes seals for the spark plug holes in a string down the middle.
And no, you can't set it on the engine and then put the cover on, because there
is a slotted groove along the top that fits in the valve cover and it's easier
to do it this way. Trust me. I tried both.
I've worked on other bikes with separate circular gaskets for each plug, and it
was easy. This is one of those things that convinces me that engineers and
designers are people who never actually have to WORK on the things they create.
Keeping that line of plug gaskets in place while fitting the cover in the tight
space between the frame and engine was a pain innee ass.
Cover on, plugs and coils in.
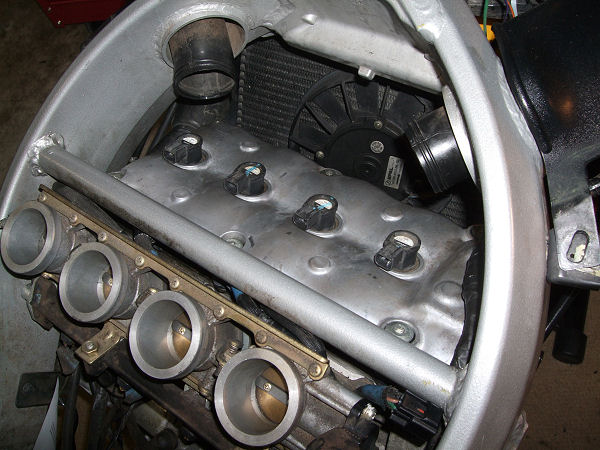
Next order of business was to fix the vacuum leaks. Every line from the stepper
motor got replaced, which delayed the whole project. The parts ended up
backordered. Could be worse. Could be an Aprilia.
After that, the airbox went back on, with a new filter.
I also put on the new tank. I used the hardware from the old tank, including the
fuel pump assembly. That was a revelation! I forgot to take a proper "before"
picture of the accumulation of crud that had built up, but here it is
mid-cleaning. Modern gas is crap.

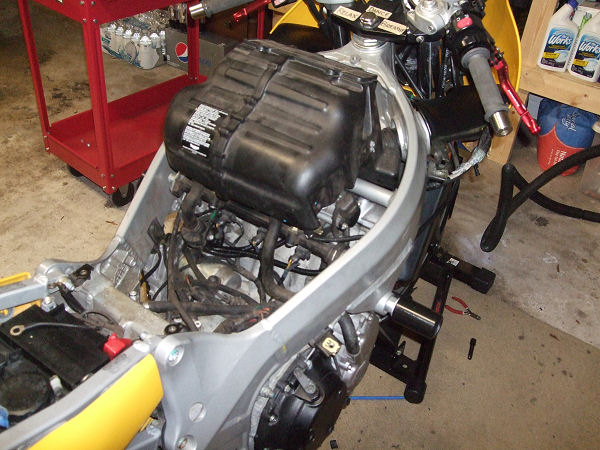
Then the tank went on.
And the rest was put back together. As sportbikes go, it's a bit roundish and
old-school, but I think it still looks sharp.

I had the time for a test ride, but opted instead to just try starting it and
running it for a few minutes. After all, I was planning to take it for a long
run the next day. It took a bit of cranking on acounta the entire fuel system
being dry, but when it fired up, it ran like the proverbial top. I let it cool
off, and on the next attempt it started like a champ.
False confidence!
I took it out the next morning and, while it ran and revved smoothly, once fully
up to temperature, it would stall if I closed the throttle completely. My
dumbass mistake. After adjusting the valves and fixing the vacuum lines, of
course the idle was likely to change.
It's always the little things.
Things I learned along the way:
- Get the manual! It will save you endless grief and guessing.
- You can do it. It just takes patience.
- Triple-check everything.
- Plug up any holes - spark plug, crank case, etc. - in case you drop
something.
- You will drop something. A magnet-on-a-stick tool is a must-have
- I take the most-used feeler gauge blades out of the tool and tie 'em on
a long loop of string. Makes them easier to access, and if you drop a blade,
you can retrieve it easily.
- Do not confuse inches and mm! My feeler gauge is in inches. Conversion
is Inch X 25.4 = mm and mm X 0.0393701 = inches. I have the formulas tacked
up on my wall.
- Use torque wrenches! I had to buy one because the torque on the cam caps
is only 10nm, which is not much, and I didn't have one that would go that
low. It's an excuse to buy a new tool.
- Recheck clearances after refitting the cams.
- Do a thorough warm-up and test ride and idle speed check!

Return home
|