|
2000 Kawasaki
ZRX1100
Part 3: Make it stop!
The ZRX was finally running and looking good, but had
developed a bad brake squeal, especially around town, during kind of
stop-and-go gentle braking you do in traffic. Reading the forum chatter, it
seems this is a pretty common complaint when the brakes aren't looked after, and these definitely
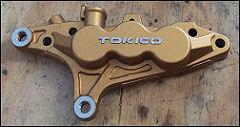
hadn't been. Except of course for the whorehouse-red paint that the previous owner
had applied to the face of the front calipers, with a brush. He even took the
time to carefully paint the brand name in white. Very posh.

Seriously? Who does this sort of thing? And why? It
took a lot of work to get that off, and the red never did completely go away.

But the squeal was a more serious problem, and it needed
new pads anyway. A good cleaning, some caliper grease (yes, there is such a
thing; no, you should not put it on the pads or disk) and they should be
alright. Or so I thought.
I took the first caliper off and removed the old pads.
Then I took a thin piece of wood and set it between the pistons, where the pads
used to be, and squeezed the pistons out just past where they had been inside
the dust seals. The wood keeps the pistons from pushing all the way out of the
bores - if that
happens, you're in trouble. With the pistons out, you can get them good and
clean with a rag or small brush and some brake cleaner, and push them back in. First piston done, I
put the new pads in, put grease on the pin that the pads slide on, and moved to the second
unit, where I
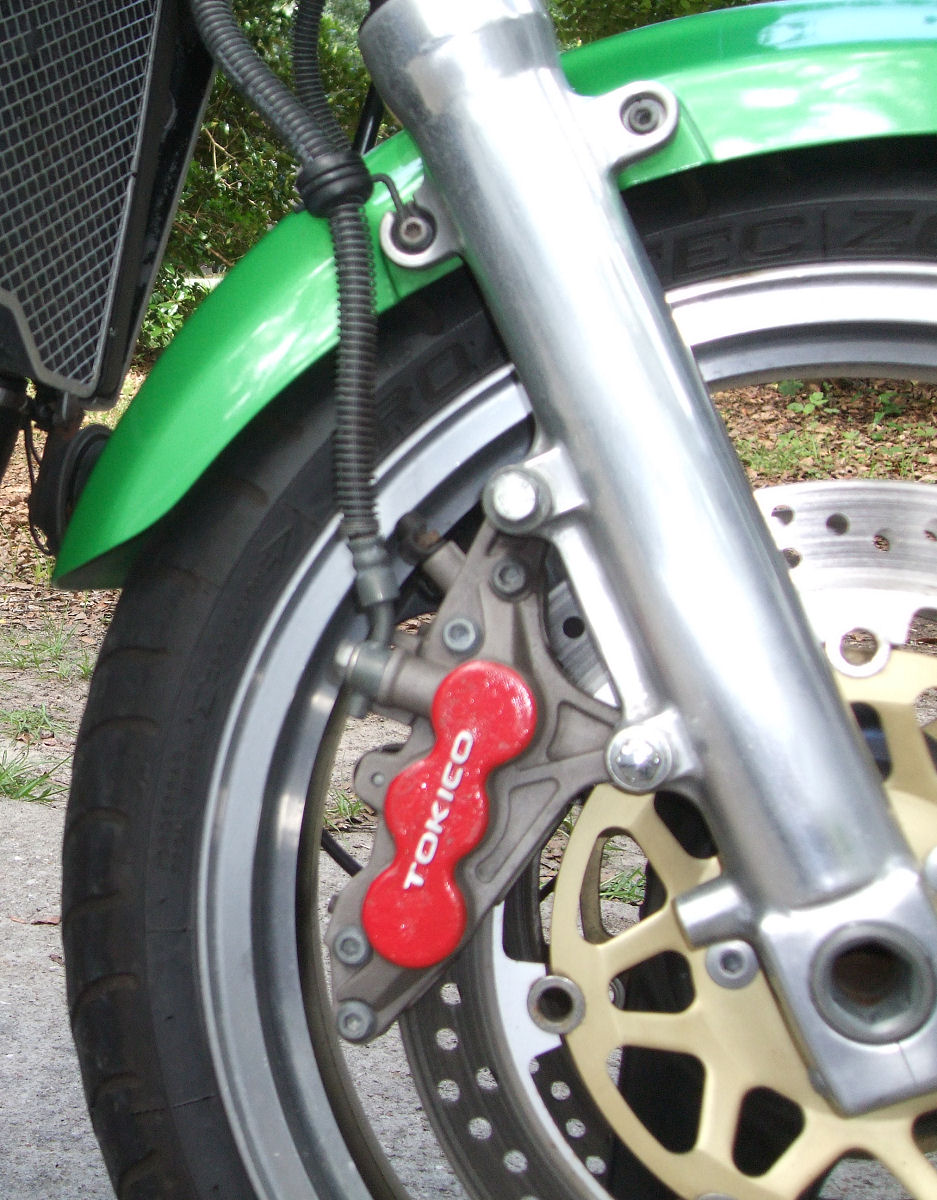
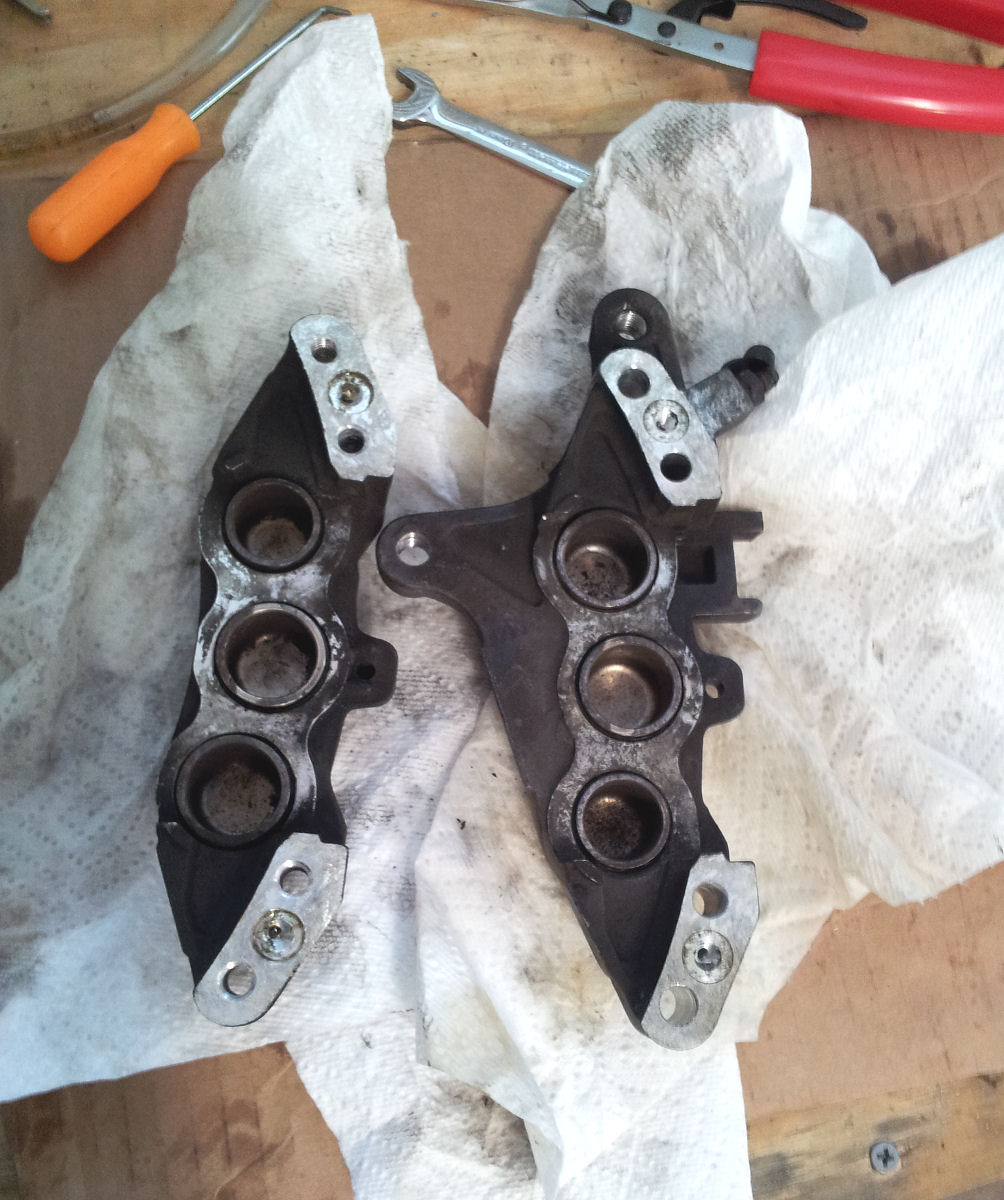
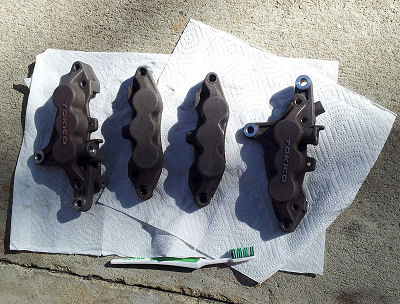
found big trouble. Check the picture I took after removing the caliper.
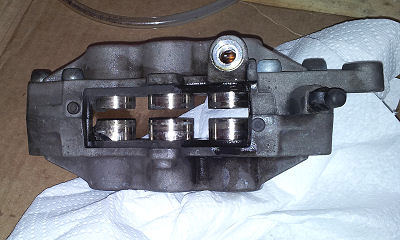
Look there on the lower left - that's one of the rubber
piston seals poking out. One bad seal probably means more waiting to go, which
means it's past time to rebuild the calipers. As long as I was going to
rebuild the calipers, I might as well replace the 14-year-old rubber brake lines
with new braided steel ones, right? And since they'll be completely apart, it
would be a good time to paint 'em, since the old colour had faded and that
stupid red will not go away.
This is an immutable truth of motorcycle maintenance: One
project invariably, inexorably leads to another.
I ordered parts and gathered "shop supplies" - you
know, those mysterious items which, much like the Pentagon's Black Budget, cost
so much but are never really explained on your invoice when you get your bike
back from the dealer.
In addition to the usual assortment of wrenches and
sockets to do the job, as well hard parts such as seals, o-rings and pistons
(if needed), you should have:
- Clear hose (for bleeding the system)
- Toxic waste container (for used brake fluid, etc.). Used
Gatorade bottles work great.
- Brake cleaner. Get several cans. you can never have
too much, and you'll use it all eventually. It's indispensable, not only for
brakes, but for
degreasing just about anything.
- Brake fluid. The ZRX and most bikes use DOT4. Again, get
several bottles just in case.
- Paper towels and rags. Lots and lots of 'em. Helpful
hint: I never throw away clothing when it is worn out. Underwear, socks with
holes, t-shirts... everything goes in
the rag box.
- Cheap clay kitty litter for cleaning up spills. I
know you're extremely careful. But
you will have spills.
- Scrap cardboard and/or newspaper to cover your work
surface, unless you really want your bench soaked with brake fluid and other nasty
crap.
- Tooth brushes, wire brushes, a wire
wheel on the bench grinder, scotchbrite pads, scouring sponge, wire wheel attachment for a Dremel
and any other cleaning/scrubbing item you think you might need.
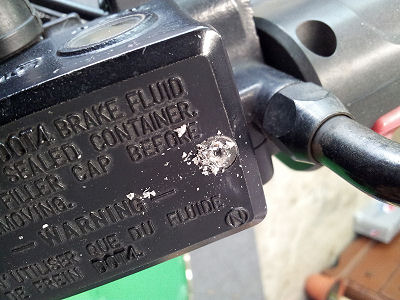
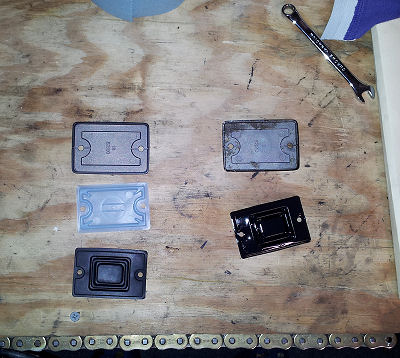
Before removing the calipers, I had a small "i" issue. The
whole system needed to be drained as much as possible to minimize the mess when
pulling things apart. That meant getting the master cylinder lid off. But one of
the phillips screws was stripped out. To remove it, I started by drilling a
small pilot hole.
Then gently tapped an EZout into the hole and carefully
turned to unscrew it.
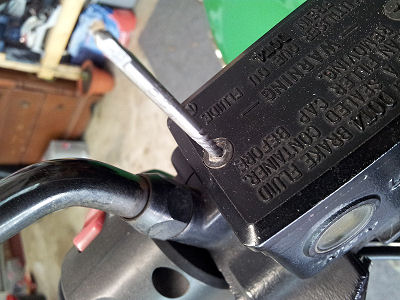
Worked great. These things really are an essential piece
of kit.
Then I stripped the second. How this
happened, I'm not quite sure, except that the screw was made of brie. Really.
Knowing the problem with the first, I was careful. But the screwdriver didn't
even try to bite - a gentle turn just rounded off
the slots.
However, feeling confident in my ability to removed
stripped screws, I decided to try the trick again, using a different type of
screw remover with narrower grooves, to see how it would do. This one "did"
like crap and broke off in the hole. And since it was made of harder metal than
the screw, I now had what is technically known as An Issue, with an upper-case
"I," since I couldn't just re-drill the hole and use the EZ-out that
worked.
No, the fix this time would be ugly and
inelegant, and involved drilling off the head of the screw, which happened to be
conveniently angled nearly like the pointy end of a drill bit, which fit into a conical
hole in the lid, so I did not actually have to destroy the part. Once the head of the
screw was turned to dust, it was a matter of
removing the lid and unscrewing the stub, which came out easily.
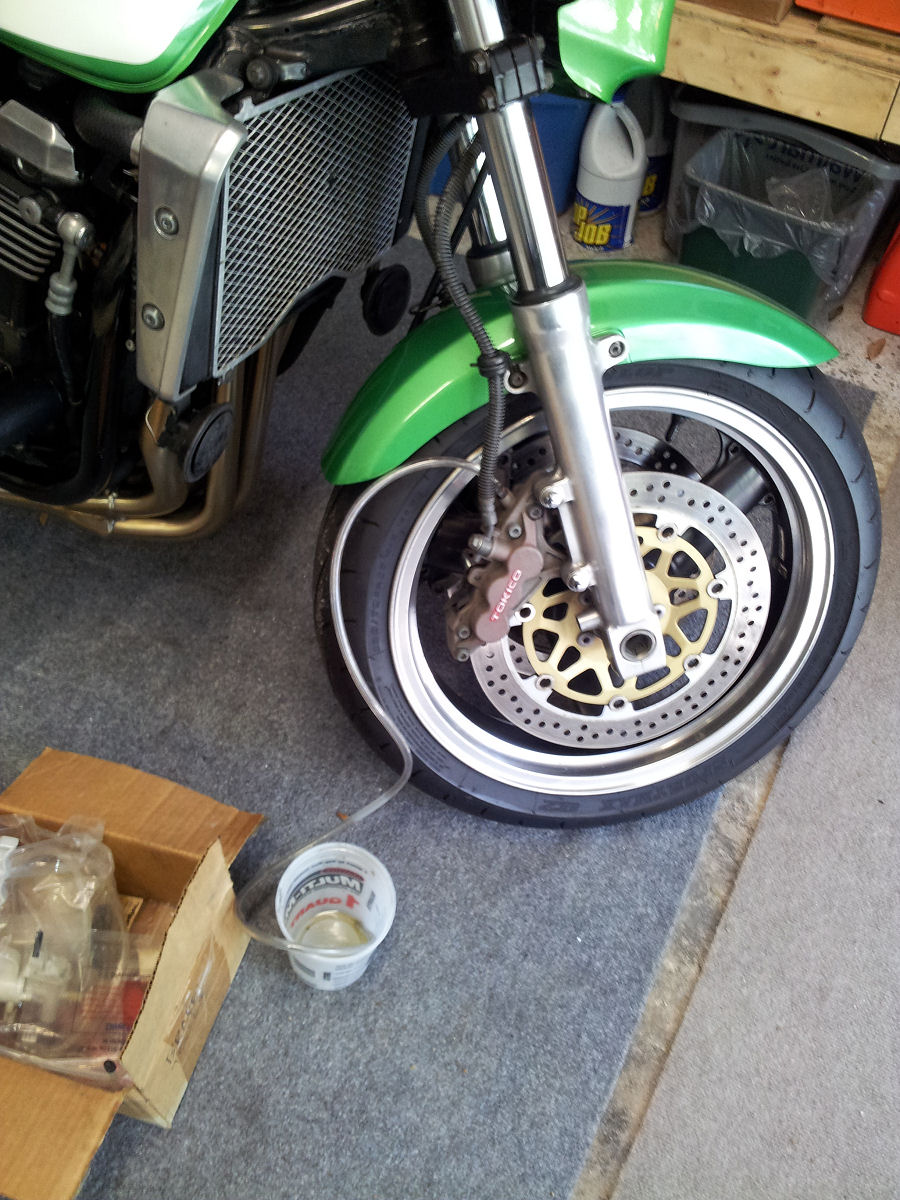
With that done, I could drain the system, which basically
meant hooking up a tube from caliper to bucket and pumping the fluid out. One
side, then the other. Everything's getting rebuilt or replaced, so no worry
about getting air in the system - it's all going to be air! Just don't drip or
spill brake fluid all over the place.

Speaking of which... remember that despite draining the system, there will be
some fluid left in the lines and caliper, and brake fluid is vile stuff. It will eat through paint and mess up wheels, tyres...
anything it gets on. Keep plenty of paper towels or rags around. In fact, before
loosening any part of the system, wrap it with a paper towel or a rag, then
remove the bolt or screw holding it in place. And if you
spill any, clean it up immediately!
Once the system is drained as much as possible, loosen the
banjo bolts holding the brake lines on. This is easier when the calipers are still
bolted to the bike. But just barely loosen them - you don't want fluid leaking out onto
the disk or anything else. Next, unbolt the calipers. Once they are clear of the disk, finish
removing the lines. Keep lots of paper towels or rags handy, as brake fluid will
dribble out out of the lines and out of the calipers. Keep the calipers upright
- they will still have quite a bit of fluid in them that will pour out of the
hole where the banjo bolt attaches. If you do spill any on your garage floor, cover it immediately with
plenty of clay kitty litter.
Grind that into the spill and sweep or shop-vac it up later.
Take the calipers to your bench, which you've already
covered with
newspaper or cardboard, and lots of paper towels. Pour as
much fluid as you can out of them into your designated toxic waste container.
Then split
them by removing the bolts holding the halves together. On the ZRX there are
four bolts. The halves should come apart fairly easily, and more brake fluid
will drip everywhere.
Here is a freshly split caliper with the pistons still in place. I don't
think these had been cleaned, ever, in the bike's lifetime. Note that the
bleeder screw is still attached. It will come out on the bench too.

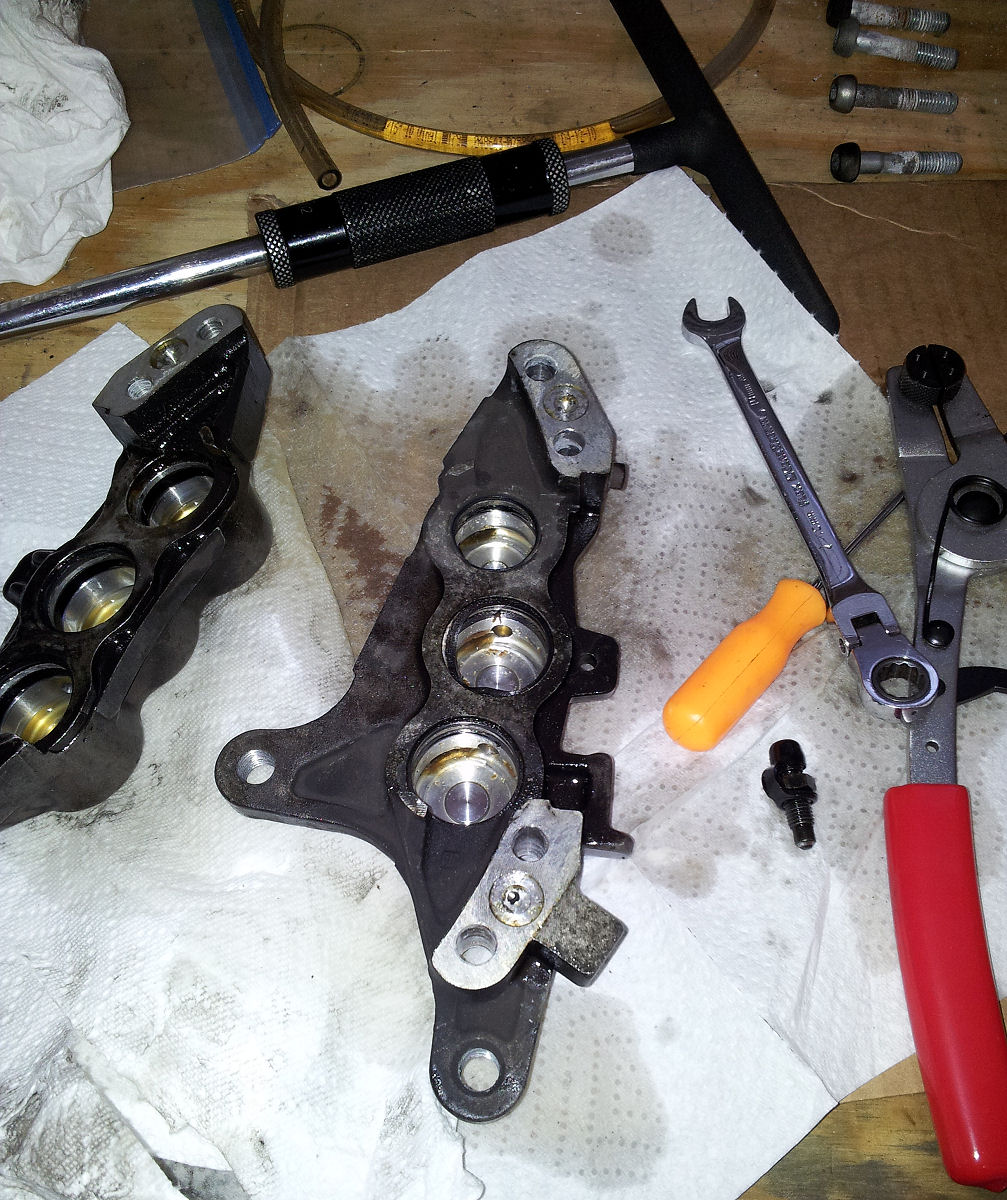
Next, remove the pistons. This can be done with compressed
air, which will shoot the pistons across the room, breaking something, or
perhaps injuring you or your pets. Lots of people do it this way. Or, you could
use caliper pliers, which grab the things from the inside. That's them on the
right in the next picture. Note the brown globs in the bores behind the pistons. They are the consistency
of snot. Did I mention that these brakes had probably never been cleaned? I
doubt they had even had a fluid flush, much
less been fully serviced. Also check out the screws at the upper right. Those held
the halves together and are heavily oxidized on accounta they are steel, while
the calipers are aluminum, and dissimilar metals don't like each other. A wire
wheel cleans 'em right up.
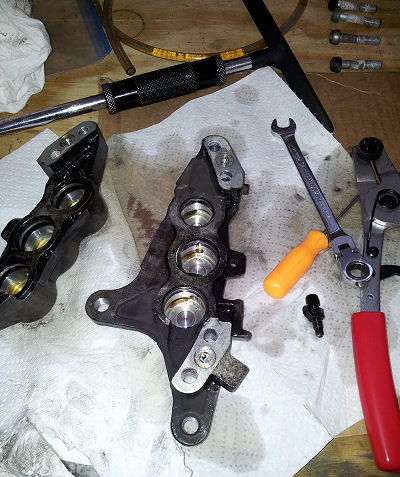
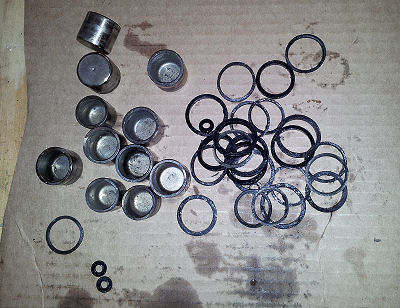
Next, remove the dust seals and fluid seals from the bores. I
use a small pick (the thing with the orange handle above) for the seals. Be very
careful! DO NOT
scratch the bores or you'll be buying new calipers. Here are all of the old
seals, o-rings and pistons. There's dirt, oxidation and all manner of crap.
This could have been avoided if the previous owner had taken better care of the
brakes and spent a little time cleaning them well, rather than painting them
red.
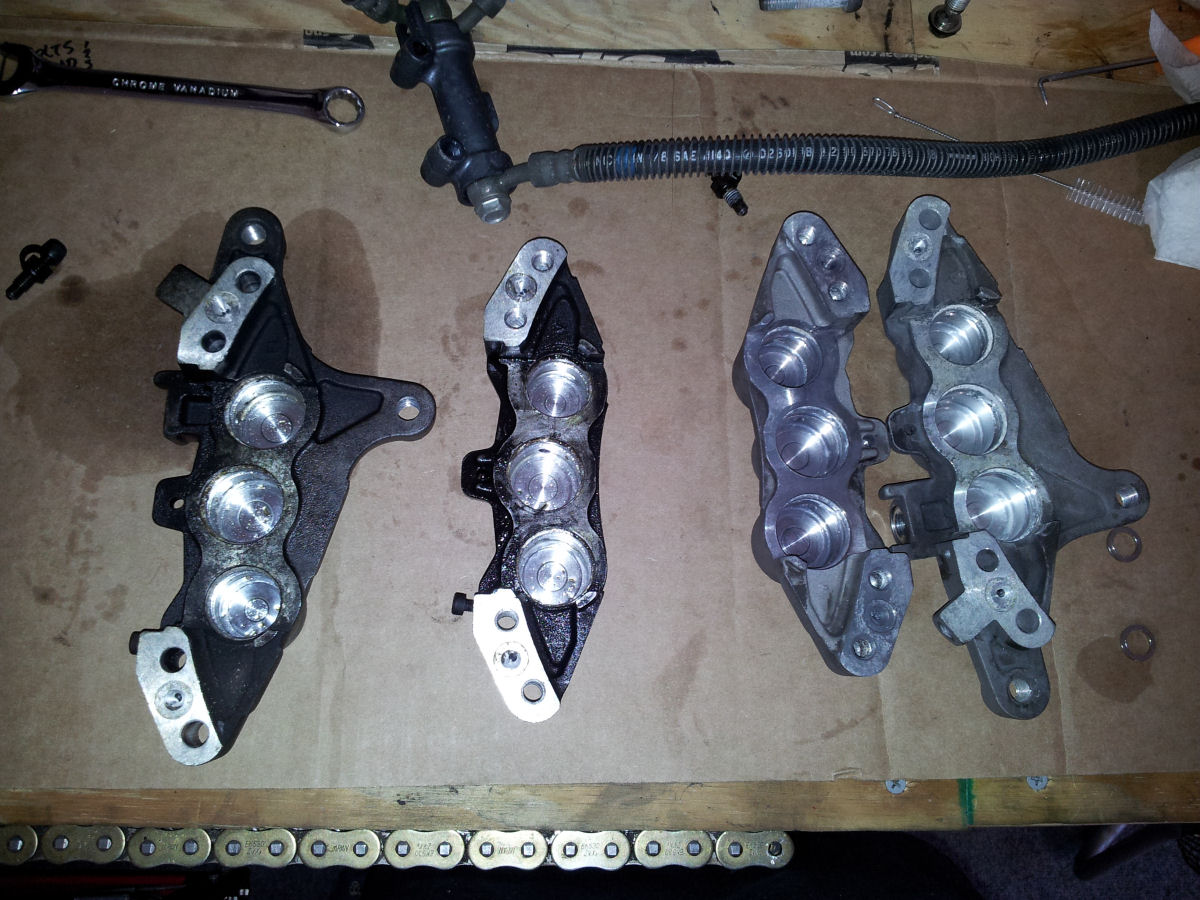
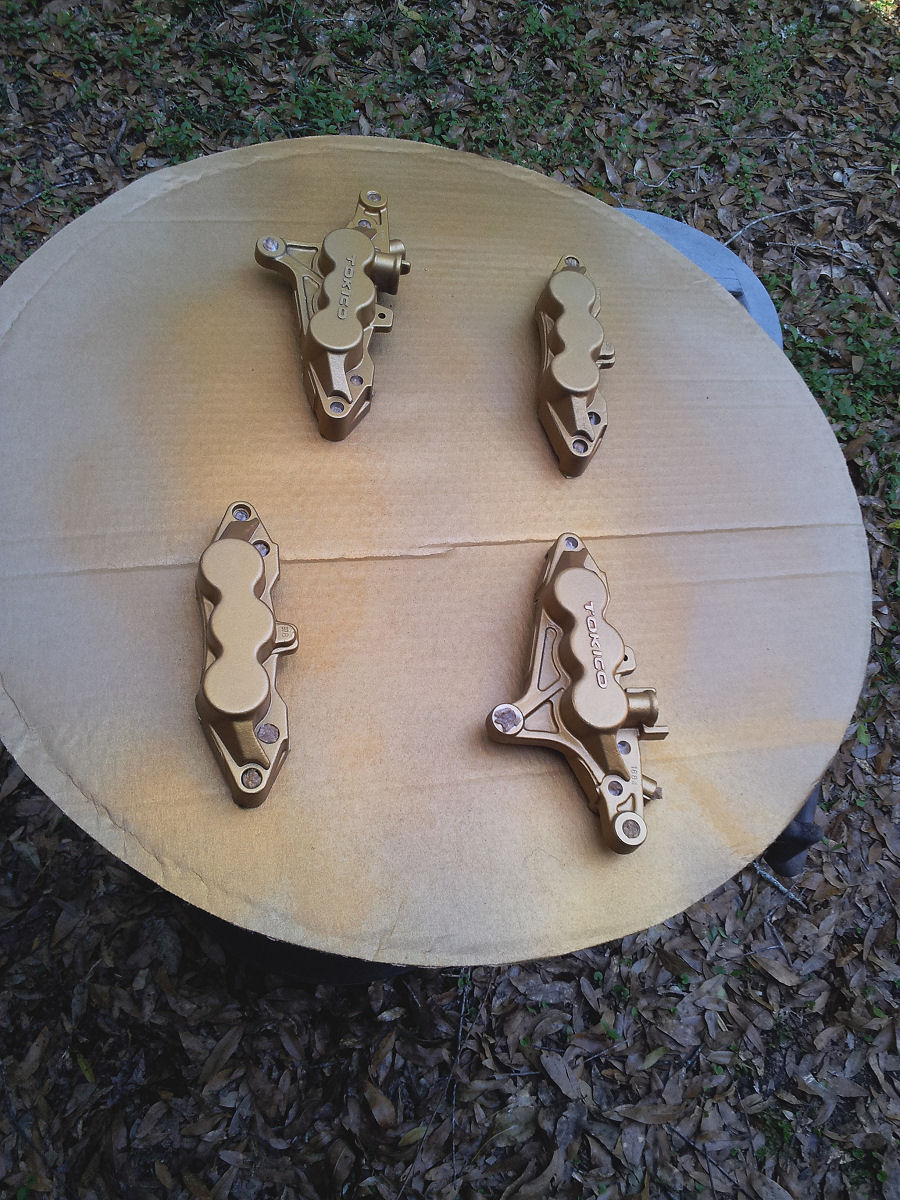
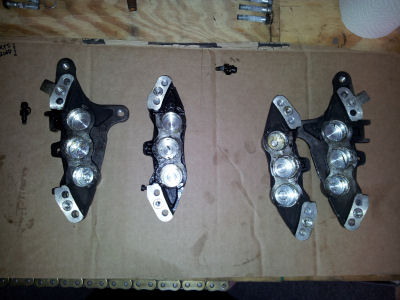
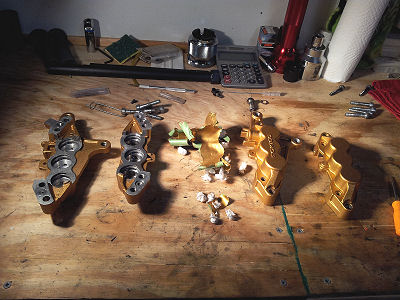
Now you're left with four chunks of aluminum to clean.
They look black, huh. When they were new, they were gold.
There are all kinds of different ways you can approach cleaning these things,
and the interwebs are full of helpful hints. In a perfect world, spraying them
down with brake cleaner and giving them a good scrub with a toothbrush would do
the trick, but brake cleaner wouldn't remove some of the built-up crap on these, not to
mention the oxidation inside the grooves where the seals go. Here's some of what
I used.
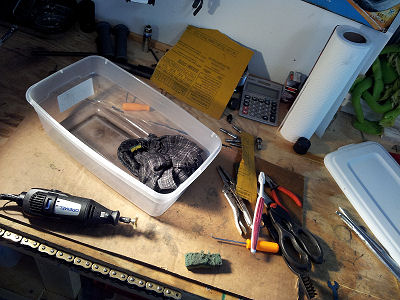
I filled the small plastic container with brake cleaner and let 'em soak. I
scrubbed 'em with a tooth brush. I cleaned 'em with a hand-held wire brush and a
Dremel-mounted wire brush. I used scotchbrite and a scouring sponge. I used
1200-grit sandpaper. Mind you, I used NONE of these things inside the bores.
Those just got repeated flushing with brake cleaner and scrubbing with a rag. DO NOT scratch the bores. The bottom line is, it takes a whole lot of
patience and scrubbing. Here we are halfway through one set.
The most vexing part to clean was the grooves for the
seals. They were heavily oxidized, coated with stuff that looked like the
calcium buildup you get around your bathroom sink. Brake cleaner wouldn't cut
it. Carb cleaner wouldn't cut it. Gasket remover wouldn't cut it (and it is
extremely nasty stuff). The only thing that worked was The Works toilet bowl
cleaner, which is a 20% solution of hydrochloric acid (that also happens to be
very good at restoring stainless steel exhaust headers). Unfortunately, that also
turned the aluminum black, so it had to be used sparingly. I got the worst of
the crud off by dipping a Q-tip into The Works and spreading it inside the
grooves, then flushing it out thoroughly with water. Even then, there was some
residue. To get the final cleaning done, I used one of these.
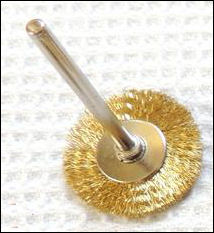
It's a small brass wire wheel for a Dremel, smaller in
diameter than the caliper bores. You can VERY CAREFULLY run it inside the
grooves to clean them out. Works great, but DO NOT let the wire wheel scratch
the bore itself. You remember playing the kid's game
Operation, where you have to remove bones and organs from the fat guy without touching the
sides of the patient? It's kinda like that.
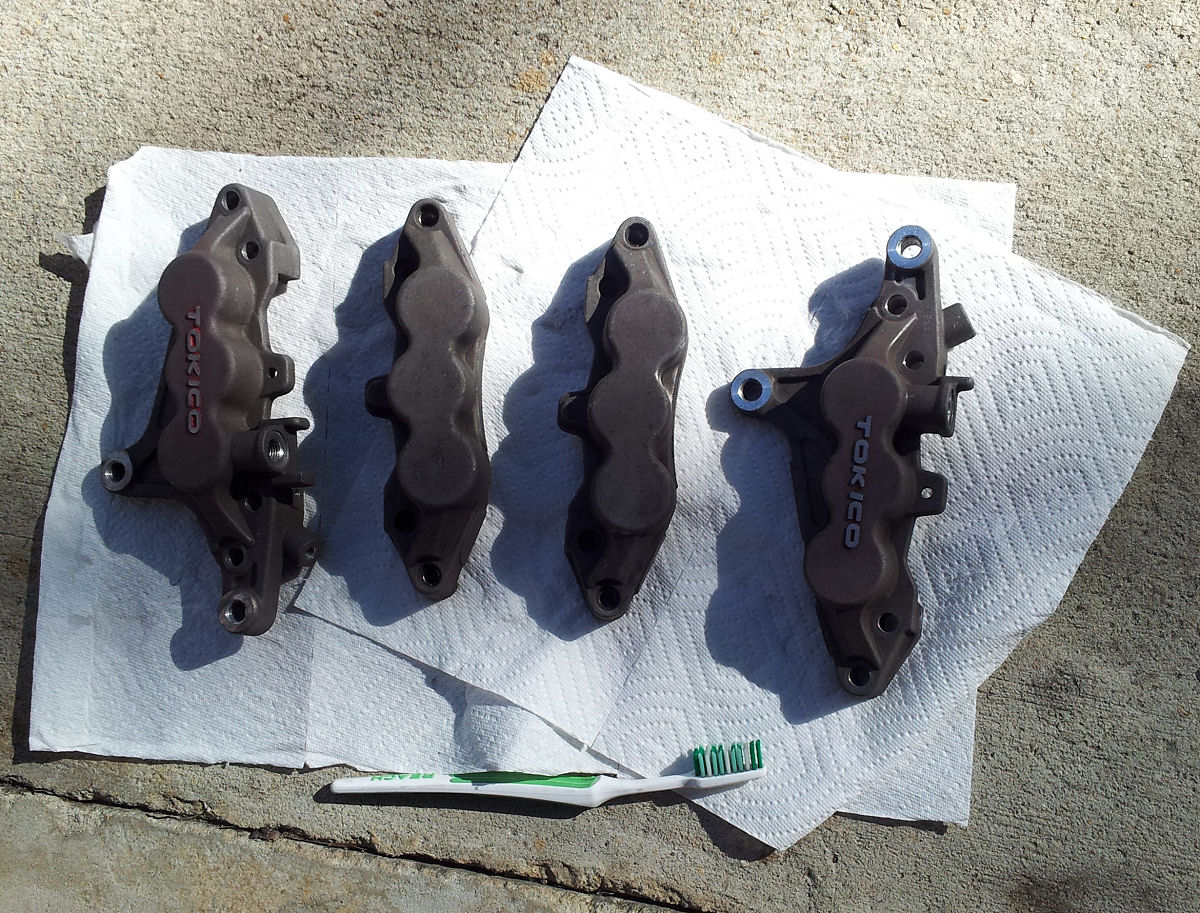
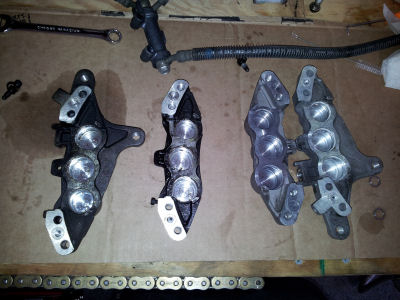
Once that was done, I flushed everything out with brake
cleaner. A lot of brake cleaner. Then water. Lots of water. Then more brake
cleaner. Then I blew them dry
with compressed air, especially the passages where the fluid flows. They
were as clean as they were gonna get. Remember, these were a muted gold/faux
magnesium colour originally.
Since they were already off and apart and looked like
crap, I decided to paint them - gold, not red. To paraphrase general Patton,
only a pimp from a cheap New Orleans whorehouse would paint his calipers red.
Unfortunately, no local parts stores had gold
caliper paint, so instead I got some VHT engine block paint. The label says it's
good for temps up to 600F, chemical resistant, and suitable for brake calipers.
Really - it says it all of that.
Turns out, the label lies. But more on that in a bit.
I used Frog Tape (wonderful stuff and yes, it really is
better than the blue tape) to mask off the piston
holes and other areas where paint should not go. I also filled all bolt holes
with paper towel bits, then painted the calipers per the instructions on the can. Two
light coats 10 minutes apart, followed by a "medium-wet" coat.

Once dry, the masking came off.
And in accordance with the instructions on the paint can,
they were "cured," baked in an oven at 200F for a little over an hour.
After that, a block of wood and some 1200-grit was used to
clean up the areas that were not masked during painting, but which needed to be
bare metal - the logo and the mounting points to the forks.

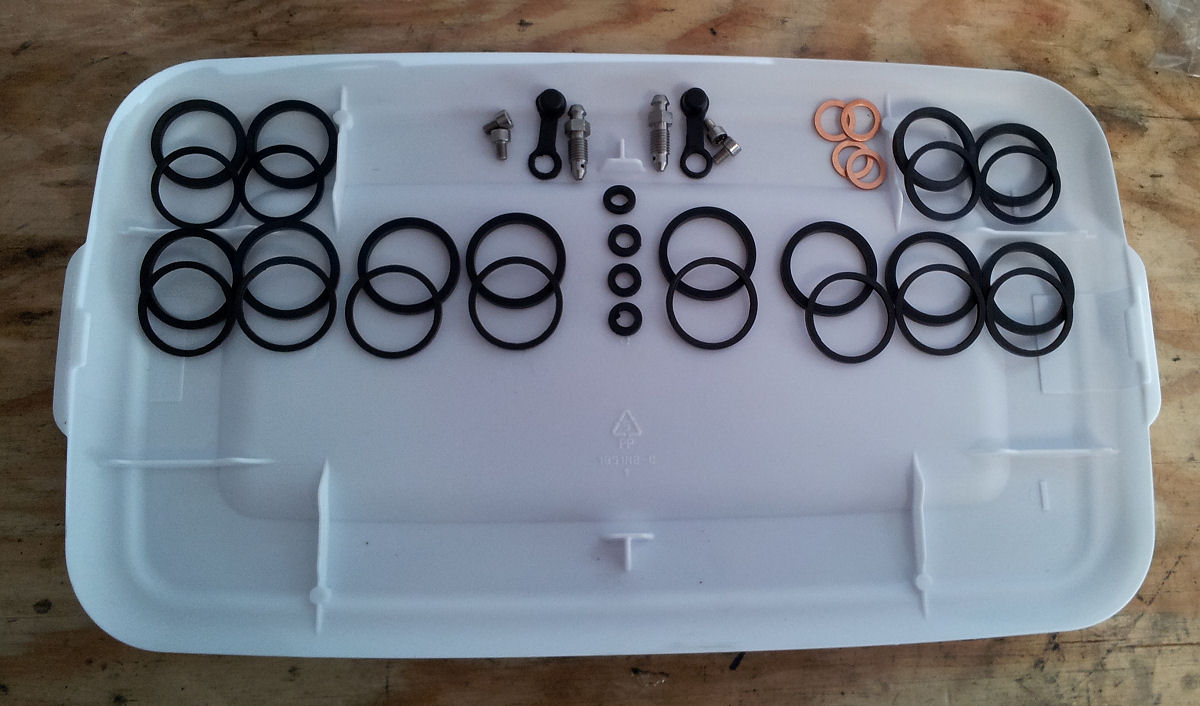
The next step was to put everything back together. A set
of stock pistons, by itself, is over $500. Seals are another $90-100. I found complete set of new pistons,
seals, o-rings, bleeder screws and copper banjo-bolt washers from
Powerhouse Automotive in the U.K. Despite the name, they deal in bike parts
and service too. The whole package was just over $300.
Here are the seals and other items.

And the pistons. There are two large ones and one small
one in each caliper half.
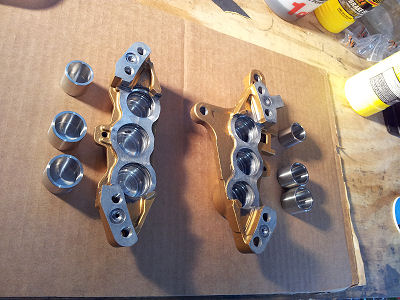
To reassemble, you basically smear brake fluid on all of
the seals and seat them in the grooves. Each caliper half has two large bores
and one small bore, and each bore has two grooves - a wide one for the fluid
seal and a narrow one near the edge for the dust seal. Once the seals are in, you smear some fluid on the
pistons and push them into the bores. Place an o-ring in the groove at either
end, and bolt the halves back together. Easy!
Except I found out rather quickly that the paint is
decidedly NOT chemical resistant. Brake fluid cut through it. So did brake
cleaner. This made inserting the seals and pistons tricky, since your hands will
get brake fluid on 'em while handling the seals and pistons, and handling the
newly painted parts messed up the new paint.
Ordinarily, you'd be able to assemble everything, wipe off the excess fluid with
brake cleaner and be a happy camper. But in this case, it would have stripped
the paint. So I had to hold the caliper with a clean hand and handle the seals
and pistons with the other hand, which isn't as easy as it sounds. Live and learn.
I managed to get everything together with minimal paint
removal and put the halves back together, tightening the bolts to spec. Then they
were mounted on the bike.
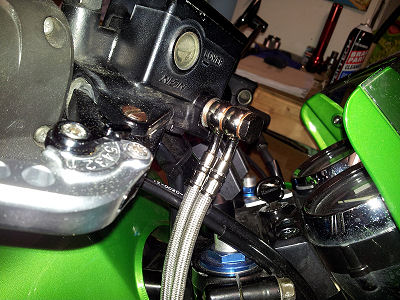
Since everything was apart anyway, I decided to add
stainless steel lines. The stock system uses rubber lines, with one line going
to a junction on the lower triple tree, then to the brakes. The lines on mine
were 14 years old and pretty tired. I got a Galfer kit
that uses a double banjo bolt at the master cylinder that feeds individual lines
to each caliper.
Now it was time to fill the system with fluid. I have done
plenty of fluid flushes, fluid changes, brake line changes and master cylinder rebuilds
requiring the system to be flushed, and never had so difficult a time as these
brakes gave me. I am not the only one. In a post on the ZRX owner's club
forum, one guy - with plenty of experience dealing with other motorcycle brakes
- finally gave up and took his bike to a shop. Others give up altogether and
pick up used four-piston calipers on eBay.
Part of the problem is that because there
are six-pistons, there are more passages and more chances for air to
get trapped. I should have read
this thread on the ZRX Owner's Association forum first. The most helpful
hint is to pre-fill the caliper with a syringe and backfilling from the bleeder
up. I also like the idea of placing
a vibrating sander on the caliper to shake the air loose from crevices. But I
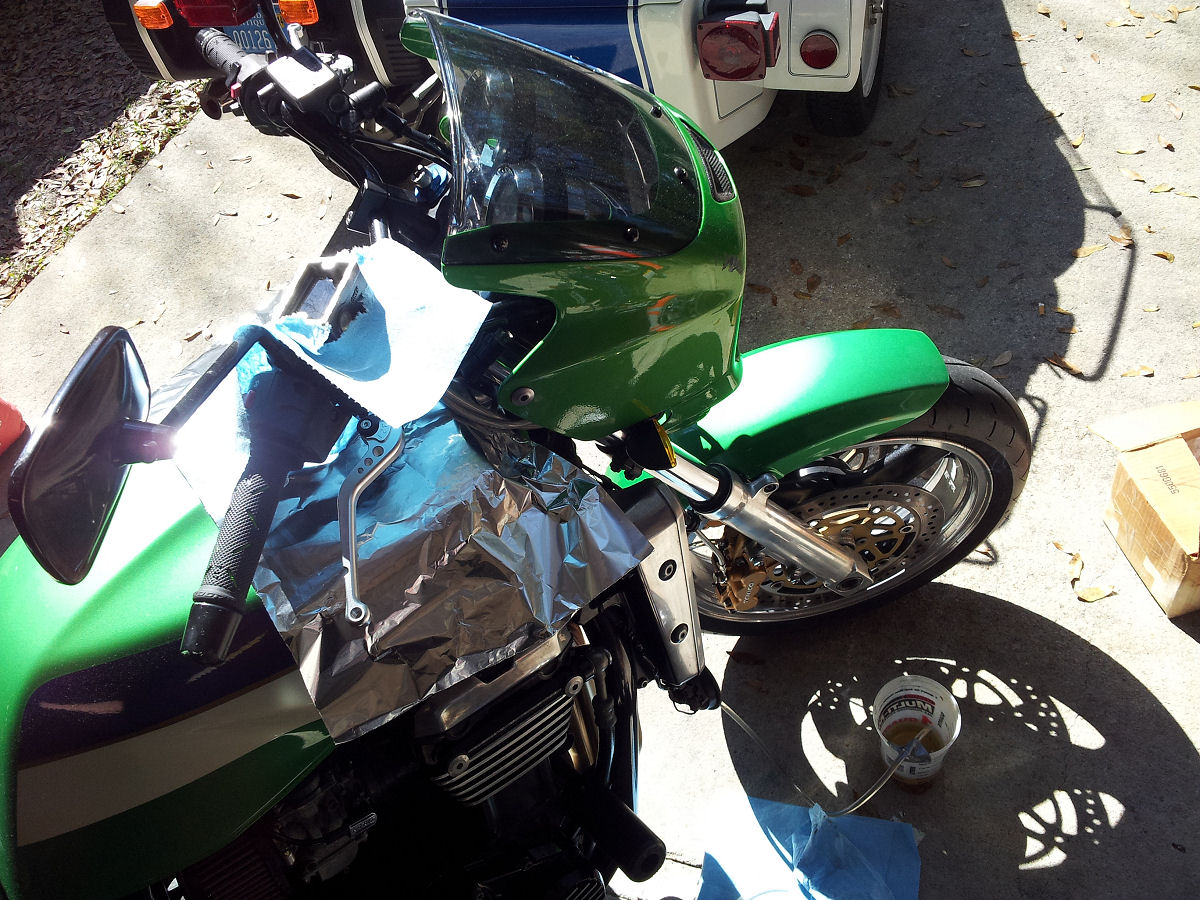
did it the old-fashioned way - from the master cylinder down, making sure to
cover the painted parts of the bike in case of spills.

In a perfect world, you'd fill the master cylinder, open one of the bleeder screws with tubing
attached and start pumping until the fluid flows. Then close the bleeder and do the other side.
Once you have fluid going through both calipers, you put the cover on the master cylinder and start the squeeze lever/open
bleeder/close bleeder/release lever routine, stopping to refill the master as
necessary so you don't suck air in at the top, until no more air bubbles come
out.
At
least that's how it's supposed to work. I got good, clear, bubble-free fluid
flowing out but the lever still went back to the bar. So there was still a lot
of air in the system that I needed to get out, ideally without starting from
scratch.
One trick that helped was
to zip-tie the lever to the bar overnight. The first night, half the fluid in
the master cylinder disappeared and the lever felt better. However, I noticed
another problem - the master cylinder cover was not keeping the fluid in, and
when the bars were turned so the master cylinder was tilted, fluid leaked out -
very slowly, but enough to cause a problem, especially since it dripped down on
to the headers and made one hell of a smokescreen when I started the bike.
I
decided to order a new rubber diaphragm (again - 14 year-old parts, probably
worn out). Looking at the parts list, I
noticed something interesting. When it was all said and done, I got the new
parts on the left. See the difference?
Yep, there's supposed to be three parts, including a "diaphragm plate," that blue thing,
which was missing from my bike. Seriously, who maintained this thing before?
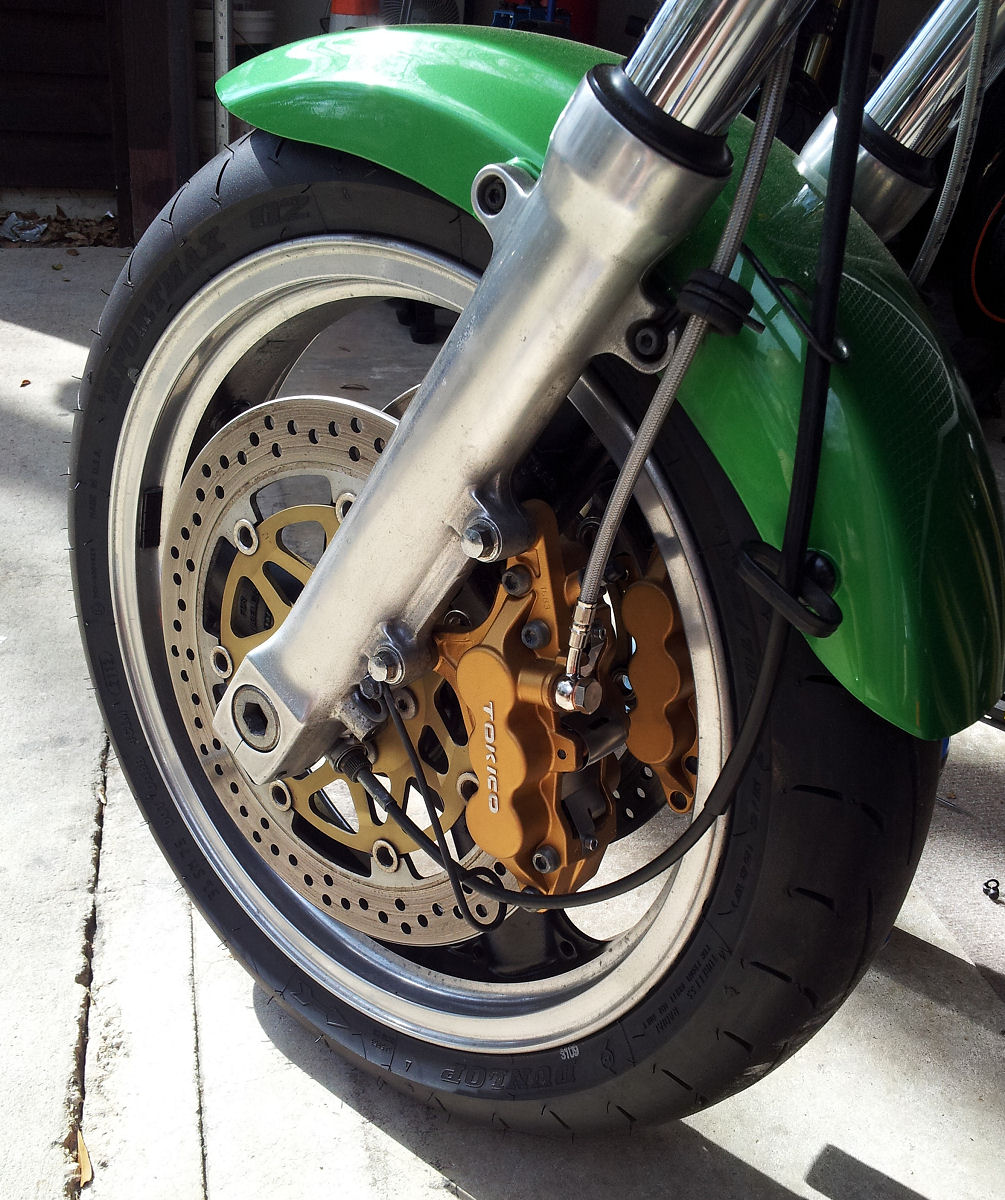
With the new parts on, the master cylinder no longer
leaked. More bleeding, more zip-tying, and I finally had decent lever feel.
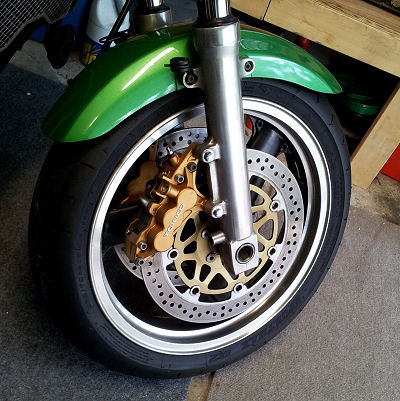
Here's the finished product. The pads still need to bed in some, but two fingers
on the lever will stop it easily, and there's no more squealing.

One of the guiding principles of the Zimmerframe Manifesto
is that anyone can learn if they're willing to screw up often enough. This
project should have been simple but it threw me a couple of curves that I'll add
to the Lessons Learned List. To wit:
- If you're gonna paint calipers, use caliper paint.
Even if the can says the paint is "suitable for brake calipers," it may not
be. Since it's my own bike, and it's not a showpiece, I let it slide with
some minimal paint damage. It still functions perfectly fine. But if I was
doing it for someone else, I would have redone the whole thing with proper
paint.
- Bleeding brakes is a pain, and bleeding six-piston
brakes is a monumental pain. Even if you've done a job before, it doesn't
hurt to do a quick search of the interwebs to see what sort of problems
people have encountered with a specific bike and how they overcame them.
- Motorcycle maintenance is like a box of chocolates.
You never know what you're gonna get until you open it up. The mysterious
missing diaphragm plate is just one example.

ZRX 1100 Part 1
ZRX 1100 Part 2
Return home
|